CONTROLS/INSTRUMENTS
2 - 22
Display of Memorized Times
Note:
Heating will turn on automatically at pre-
selected time.
Press once on
3: Heating is set for the 1
st
startup time**, indicator light
B
is on.
Press twice on
4: Heating is set for the 2
nd
startup time**, indicator light
C
is on.
Press three times on
5: Heating is set for the
3
rd
startup time**, indicator light
D
is on.
Neutral position: Press four times on
: No
display or display of time*. No preselected
startup time.
Setting of Startup Times**:
1
st
memory: Press momentarily on
B
is on.
2
nd
memory: Press momentarily on
6,
C
is on.
3
rd
memory: Press momentarily on
7,
D
is on.
Setting of time by pressing on
or on
Neutral position: Press once again on
8: No
display or display of time*, the preset times are
still in memory.
* Eventually permanent display of time with the
vehicle ignition switch on.
** Display of heating startup time turns out after
approximately 20 seconds, or time delay*.
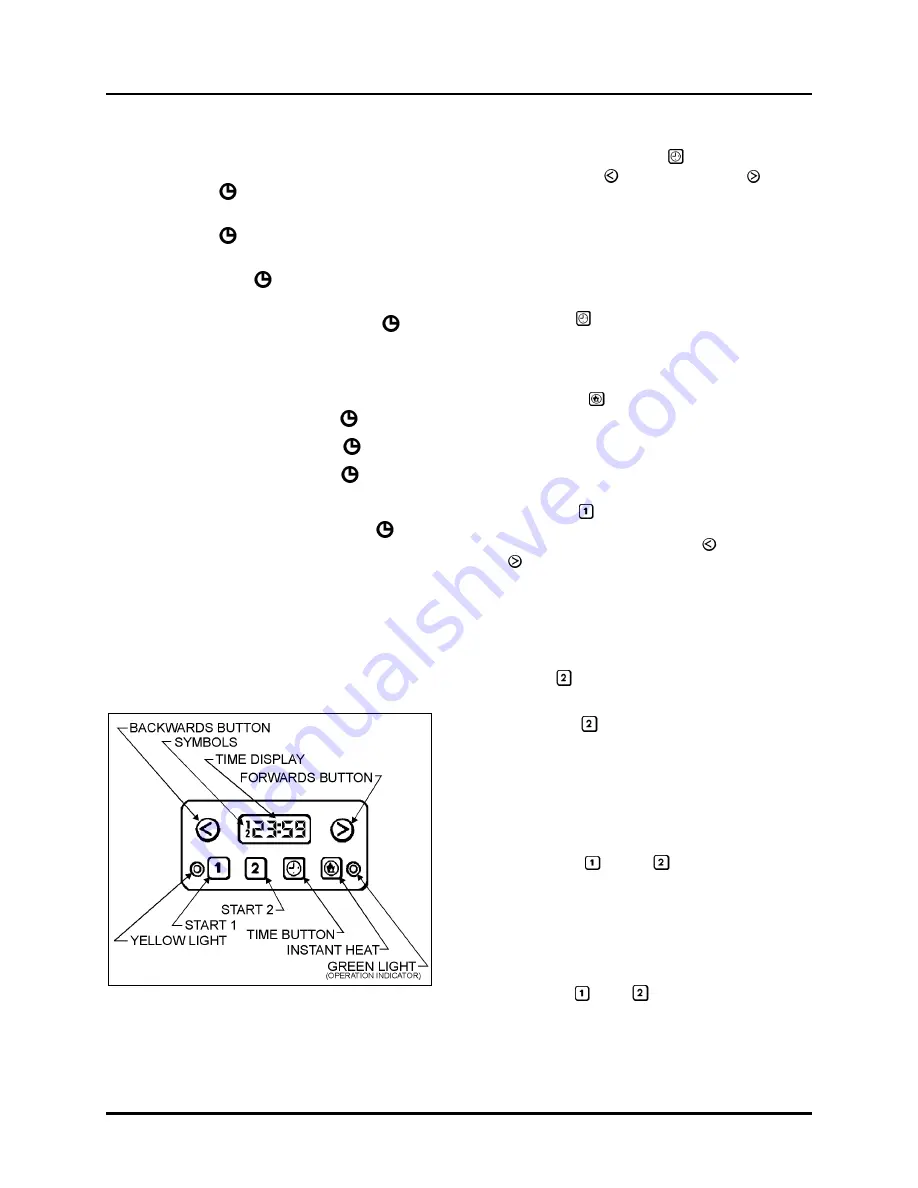
Webasto (80 000 Btu)
18046
1. To set the clock
If the time display e.g. 18:33 is wrong, or if it
flashes 8:88, press button
9 and at the same
time press either 10 (backwards) or 11 (for-
wards). The longer you hold the button down, the
quicker the display changes. The last few mi-
nutes are set accurately by quick pushes. Adjust
to get exact time, e.g. 23:59. The display fades
after 20 sec.
2. Do you want to know the time?
Just press
12 at any time. The display
appears again.
3. You can get instant heat...
with the button
13, which switches your heater
on (or off) immediately. The green light is on
while the heater is switched on.
4. ... or you can program the heater to come
on up to 24 hours ahead.
Press button
14 - and the display shows the
time at which the heater will start. You can alter
starting time by pressing button (backwards)
or
15 (forwards). The longer you press the
button, the faster the display changes. The last
few minutes are set accurately by quick pushes.
The display fades after 20 sec. The symbol 1 re-
mains in the display, and the yellow light stays
on. Your starting time is now activated.
5. Button
allows you to program a second
starting time
Press button
16, which de-activates starting
time 1. Then proceed as in (4).
The activation of the second starting time is
indicated by the symbol 2.
6. Do you want to check (or activate) your
starting time?
Press button
17 or
18 1920briefly. The
display shows, for 20 sec., the programmed
starting time. This activates the timer to start the
heater at the time shown.
7. Do you want to cancel a programmed
start?
Press button
21 or
22 23briefly. The appro-
priate number in the display goes out, together
with the yellow light.


