Controls and Instruments
77
Vehicle Clearance Information
Safe vehicle clearance height is 11’2" (3.40 m).
CAUTION
Vehicle clearance is higher when the
ventilation hatch is open, hi-buoy is selected
or if additional equipment is installed on the
roof.
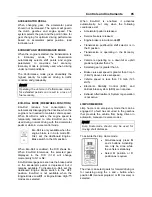
STEERING COLUMN CONTROLS
Many of the most frequently used controls are
conveniently placed on the steering column or
the steering wheel, just like a passenger car.
The multi-function lever is located on the left
side of the steering wheel while the optional
transmission retarder lever is located on the
right side of the steering wheel. Switches for the
electric horn and the air horn are located directly
on the steering wheel.
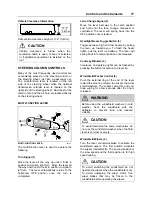
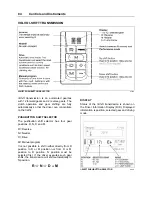
MULTI-FUNCTION LEVER
MULTI-FUNCTION LEVER
23133
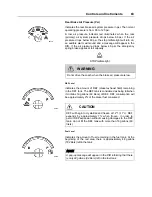
The multi-function lever is used to operate the
following:
Turn Signal (1)
Move the lever all the way up until it locks in
position to signal a right turn. Move the lever all
the way down until it locks in position to signal a
left turn. The lever automatically returns to the
horizontal OFF position once the turn is
completed.
Lane Change Signal (2)
Move the lever part way to the catch position
and hold until the lane change maneuver is
completed. The lever will spring back into the
OFF position once released.
Headlight Beam Toggle Switch (3)
Toggle between high and low beams by pulling
the lever up towards you. To flash the head-
lights, pull the lever up halfway. The lever will
spring back into normal position once released.
Courtesy Blinkers (4)
Clearance and parking lights can be flashed by
pressing the button located on the lever tip.
Windshield Washer Control (5)
Push the external ring at the end of the lever
toward the steering column to activate the wind-
shield washers. The wipers come ON and con-
tinue wiping for a few seconds after the ring is
released.
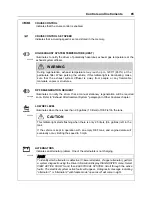
WARNING
Before using the windshield washers in cold
weather, heat the windshield with the
defroster to prevent icing and reduced
visibility.
CAUTION
To avoid damaging the pump mechanism, do
not use the windshield washer when the fluid
level is very low or empty.
Windshield Wipers (6)
Turn the lever counterclockwise to activate the
windshield wipers. The first position activates
the wipers intermittently. The second position is
the slow speed and the third position is for high
speed wiping.
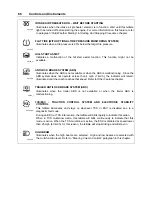
CAUTION
To avoid scratching the windshield, do not
operate the wipers when the windshield is dry.
To avoid damaging the wiper motor, free
wiper blades that may be frozen to the
windshield before operating the wipers.
Summary of Contents for X3-45 2011
Page 1: ...COACH MANUFACTURER OPERATOR S MANUAL X3 45 COACH PA1581...
Page 4: ......
Page 6: ......
Page 10: ......
Page 24: ......
Page 128: ......
Page 134: ......
Page 171: ...Technical Information 165 X3 45 OVERALL DIMENSIONS SIDE ELEVATION 18673...
Page 172: ...Technical Information 166 X3 45 OVERALL DIMENSIONS TOP FRONT AND REAR VIEWS 18674...
Page 182: ......
Page 186: ......
Page 206: ......

