OTHER FEATURES 5-37
PA1633 X3-45 Commuter Operator’s Manual
FRONT BUMPER BIKE RACK
OPERATION
NOTE
Instruction labels affixed on the bike rack take
precedence over this procedure.
The Sportworks Bike-Rack-for-Buses has been
designed to make as low an impact as possible
on transit operations. All loading and unloading
of bicycles can be done by the bicycle rider.
Sportworks suggests that loading of children's
bicycles be done by an accompanying adult, but
the rack can be easily loaded by young children.
These are the steps that should be followed
when using the rack.
LOADING BIKES
1. Prepare your bike for loading. Remove water
bottles, pumps and other loose items that could
fall off while the bus is in motion.
2. Inform the bus driver that you will be loading
your bike. You must load your bike from the curb
or in front of the bus. Do not step into oncoming
traffic to load your bike.
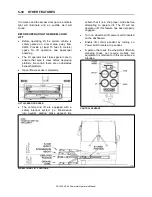
3. Squeeze handle up to release latch, then fold
down the bike rack. You only need to use one
hand to unlatch and pull the bike rack down, so
you can hold your bike with your other hand. It is
not necessary to lean your bike against the bus.
4. Lift your bike onto the bike rack, fitting wheels
into proper wheel slots. Each wheel slot is
clearly labeled for the front wheel. The purpose
of the directional placement is to make the bike
nearest the bus easier to unload.
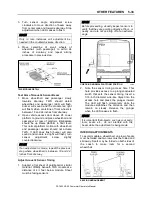
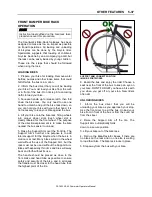
5. Raise the Support Arm over the front tire. The
Support Arm's number one purpose is to add
lateral support for the bicycle when the bus is in
motion or at rest. Many bikes will sit in the wheel
well without the use of the Support Arm, but the
rack must not be used without the Support Arm.
Bikes with especially thin rims and tires will sway
back and forth without its use.
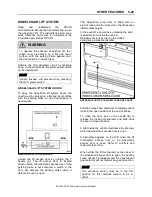
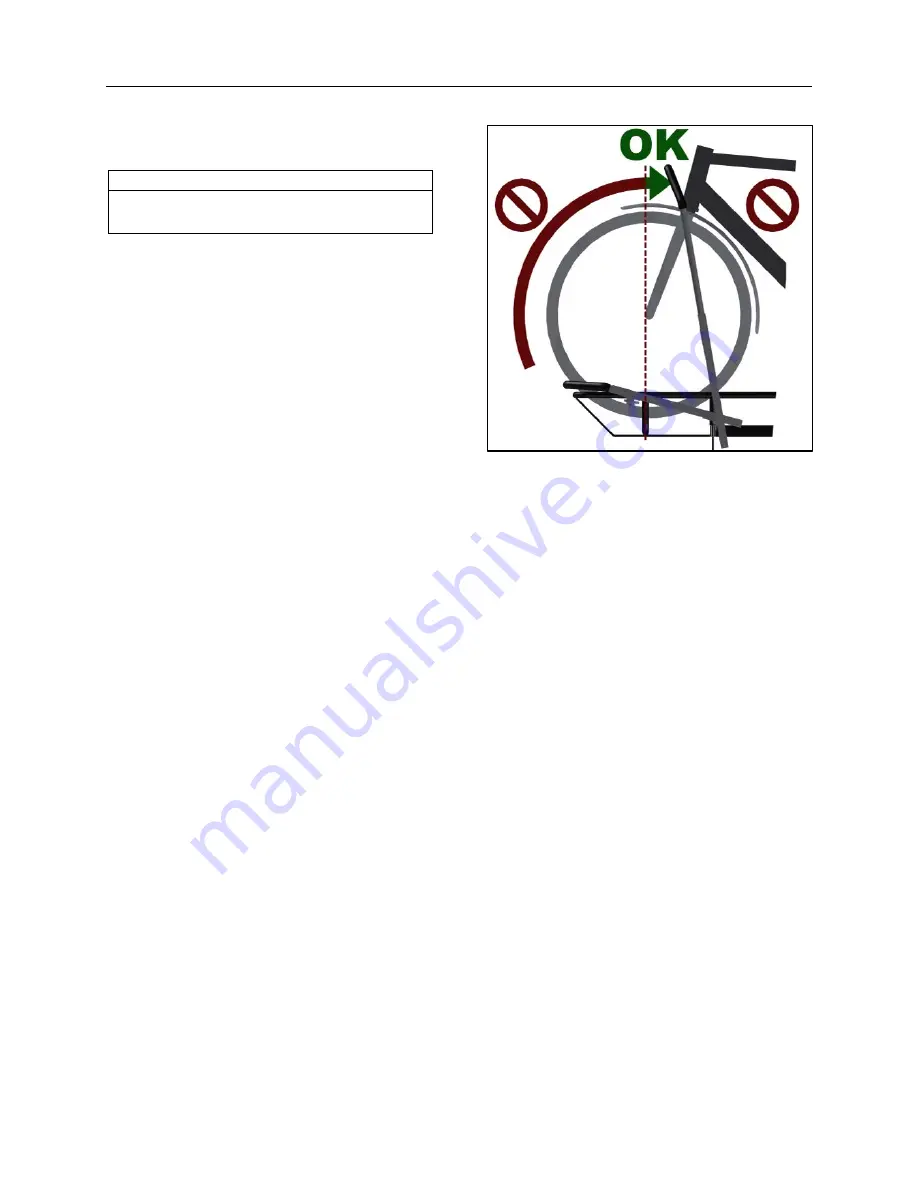
The handle should be placed as close to the
front brake and head tube as possible to ensure
safety and security of the bike, and in all cases
the handle must be closer to the head tube than
the highest point of the tire.
SUPPORT ARM CORRECT POSITION
IMAGE: SPORTWORKS
6. Board the bus and enjoy the ride! Choose a
seat near the front of the bus to keep an eye on
your bike. DON'T FORGET you have a bike with
you when you get off at your stop. New riders
often do!
UNLOADING BIKES
1. Inform the bus driver that you will be
unloading your bike as you approach your stop.
Use the front door to exit the bus. Unload your
bike from in front of the bus or from the curb, not
from the street.
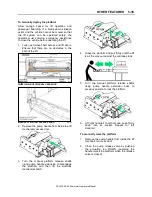
2. Raise the Support Arm off the tire. The
Support Arm automatically folds
down to a secure position.
3. Lift your bike out of the bike rack.
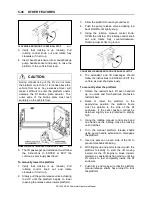
4. Fold up the Bike-Rack-for Buses if there are
no bikes on the rack and no one else is waiting
to load their bike. The bike rack locks in place.
5. Step away from the bus with your bike.
Summary of Contents for X3-45 COMMUTER 2018
Page 1: ...OPERATOR S MANUAL X3 45 COMMUTER COACH...
Page 2: ......
Page 3: ...COACH MANUFACTURER X3 45 COMMUTER OPERATING MANUAL March 2018...
Page 4: ...PA1633 MARCH 2018 Featuring REVISION DESCRIPTION DATE FIRST RELEASE 03 2018...
Page 8: ......
Page 12: ......
Page 70: ...4 36 CONTROLS AND INSTRUMENTS PA1633 X3 45 Commuter Operator s Manual...
Page 108: ...5 38 OTHER FEATURES PA1633 X3 45 Commuter Operator s Manual...
Page 116: ...6 8 STARTING AND STOPPING PROCEDURES PA1633 X3 45 Commuter Operator s Manual...
Page 120: ...7 4 SAFETY FEATURES AND EQUIPMENT PA1633 X3 45 Commuter Operator s Manual KIDDE IMAGES...
Page 128: ...7 12 SAFETY FEATURES AND EQUIPMENT PA1633 X3 45 Commuter Operator s Manual...
Page 148: ...8 20 CARE AND MAINTENANCE PA1633 X3 45 Commuter Operator s Manual...
Page 150: ...9 2 TECHNICAL INFORMATION PA1633 X3 45 Commuter Operator s Manual OVERALL DIMENSIONS...
Page 158: ...9 10 TECHNICAL INFORMATION PA1633 X3 45 Commuter Operator s Manual...
Page 160: ......
Page 164: ......

