SECTION 09: PROPELLER SHAFT
8
DOB 2490-2789 | X3-45 Commuter PA1605 Maintenance Manual (Final Version – Rev.2 April 2016)
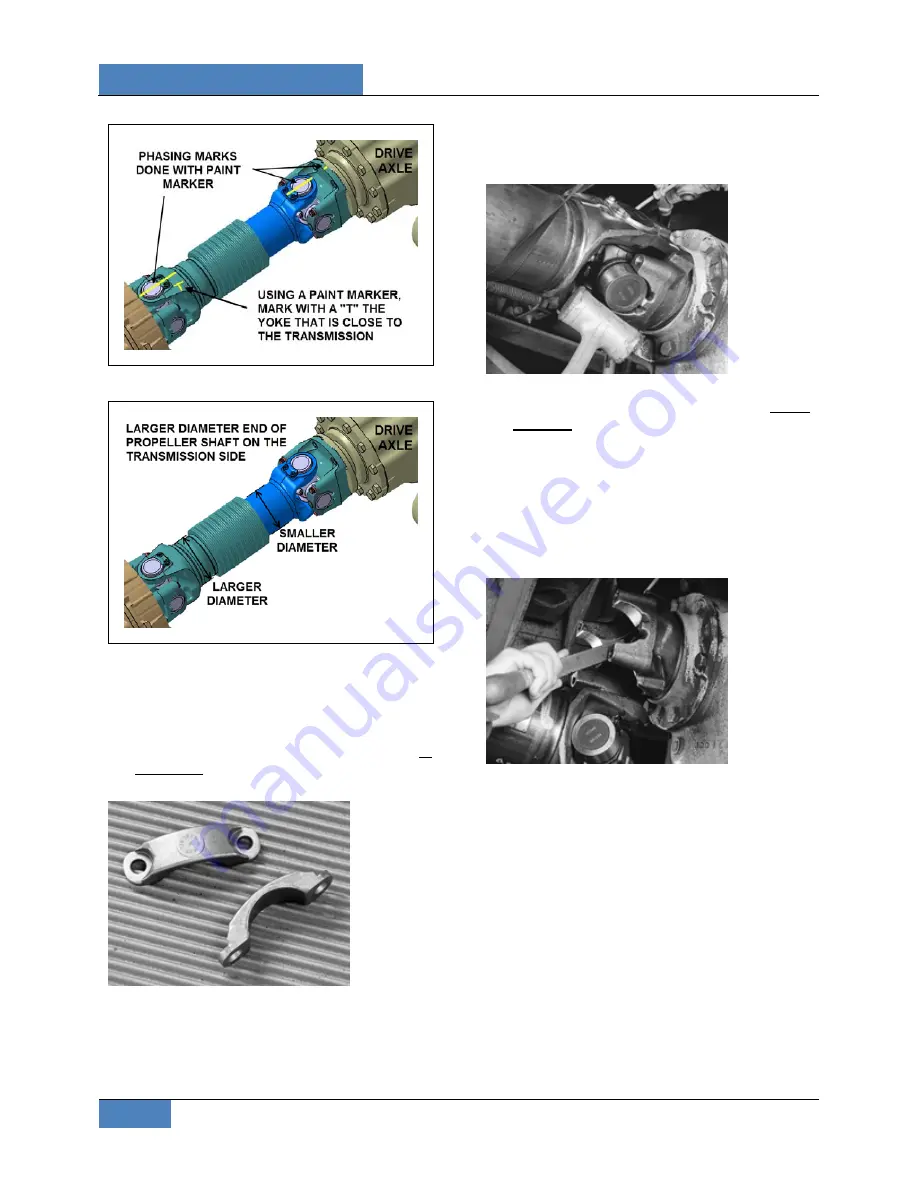
FIGURE 10: PHASING MARKS
FIGURE 11: PROPELLER SHAFT PROPER
ORIENTATION
2. Be sure to ALWAYS use support straps to
prevent the propeller shaft from falling out of
the vehicle.
3. Remove the bearing retainers and bolts at
rear end. Discard bolts, and bearing
retainers.
FIGURE 12: COLD FORMED BEARING RETAINERS
4. It may be necessary to unseat bearing cup
assemblies by tapping on yoke or bearing
cup with a soft-faced hammer. Once the
bearing cup assemblies are free, collapse
the propeller shaft until both bearing
assemblies clear the open end yoke cross
holes. Allow the propeller shaft to rest on
support strap.
FIGURE 13: UNSEATING BEARING CUP ASSEMBLIES
5. Remove bearing retainers and bolts at the
front end.
6. Inspect all end yoke cross hole surfaces and
bolt hole threads for damage. If the bolt hole
threads are damaged, the yoke must be
replaced.
7. Inspect for raised metal or fretting on open
yoke cross holes can be removed with a
fine-toothed file and/or emery cloth.
FIGURE 14: RAISED METAL OR FRETTING ON OPEN
YOKE CROSS HOLES
8. Inspect the end yoke cross holes for
distortion and damage.
4.1.1
Inspect Companion Flange/Flange
Yokes
1. Inspect all flange bolt hole threads or
through holes for damage. If the bolt hole
threads or through holes are damaged, the
flange must be replaced.
2.
Inspect all flange faces for galling or
damage. If damaged, the flange must be
replaced.


