SECTION 13: WHEELS, HUBS & TIRES
12
DOB 2490-2789 | X3-45 Commuter PA1605 Maintenance Manual (Final Version
‒
Rev.2 April 2016)
8. The difference between readings is the
amount of mounted end play in bearing unit.
9. The mounted end play figure should not
exceed:
0.050 mm (0.002”)
for a new bearing,
0.20 mm (0.008”)
for a bearing which
has been in service.
NOTE
If original bearing unit is re-fitted, and end-float
is measured at 1 mm, with hub not fully
tightened to correct torque 600±25 lbf-ft, then
the retaining clip within the unit is damaged
and a new unit must be fitted.
8.2 FRONT AXLE HUB BEARING REMOVAL
For detailed information on front axle wheel hub
bearing removal, refer to the following manual
included on your vehicle Technical Publications
CD in PDF format:
Dana Parts & Service Instructions S84U
Steer Axle HUB BEARING REWORK_ Manual
NO 1963 A+B iss A.
See OVERHAUL PROCEDURES, HUB END
DISASSEMBLY, pages No. B3, B4, B5 & B6.
8.3 FRONT AXLE HUB BEARING
INSTALLATION
You can refer to the following manual included
on your vehicle Technical Publications CD in
PDF format:
Dana Parts & Service Instructions S84U
Steer Axle HUB BEARING REWORK_ Manual
NO 1963 A+B iss A.
See OVERHAUL PROCEDURES, HUB END
REASSEMBLY, pages No. B23 up to B30.
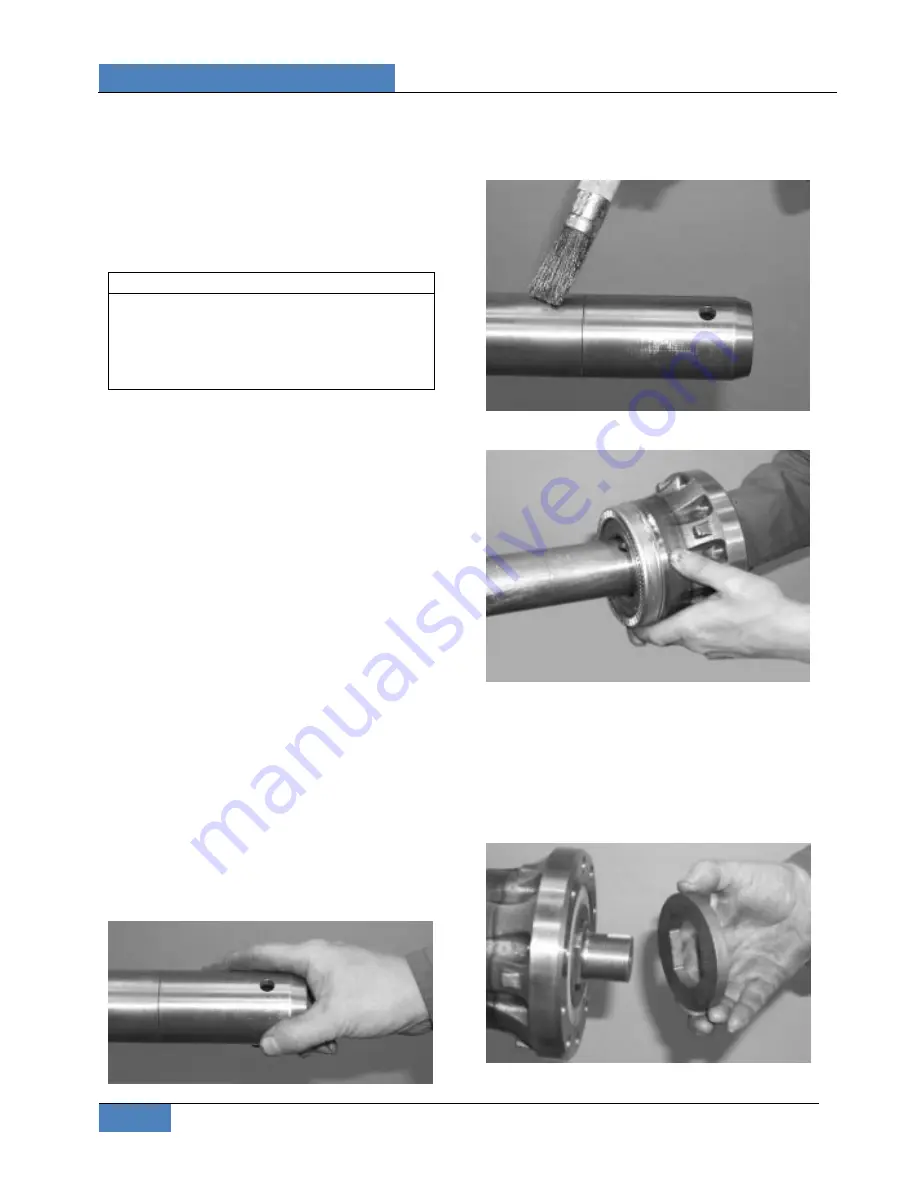
1. Clean spindle using EFX degreaser (Prevost
#685313).
2. Screw insertion tool onto spindle (FIGURE
17).
FIGURE 17: INSERTION TOOL
3. Apply a thin layer of lubricant on spindle
where bearing will be located, use Gleitmo
805 grease (Prevost #685274).
FIGURE 18: APPLY GLEITMO 805 GREASE
4.
Slide unitized hub bearing over spindle.
FIGURE 19: SLIDE UNITIZED HUB BEARING OVER
SPINDLE
5.
Clean thrust washer both sides and hub nut
using EFX degreaser.
6. Install thrust washer and hub nut then
tighten hub nut to specified torque
600±25
lbf-ft
. Rotate unitized hub bearing whilst
tightening. Do not stake hub nut at this
stage.
FIGURE 20: INSTALL THRUST WASHER


