78
MBOX EXTREME
®
MEDIA SERVER USER MANUAL
required. If you are unsure where to begin, start with the context at its default size of 50 x 50 and then experiment
once you have patched your fixtures.
If you click on the pop-up list in the fixtures area, you will find a list of stock fixture choices. The fixtures in this list are
mainly RGB LED fixtures, but there are also selections for intensity fixtures (dimmers) and moving light fixtures (both
CMY and CYM). To begin, pick one simple type of fixture from the list. To place one or more of these fixtures in the
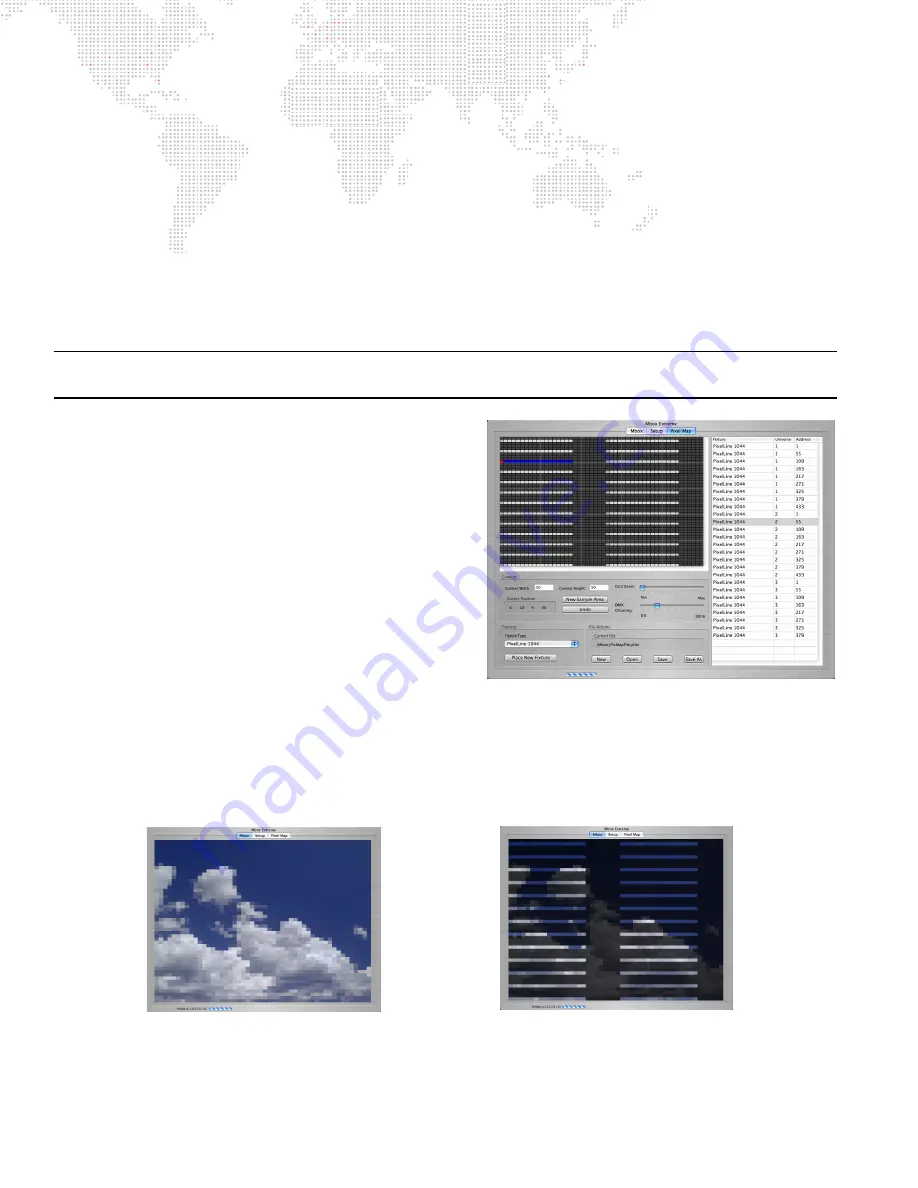
pixel-mapping context, click the "Place New Fixtures" button - it will darken to indicate that you are in fixture
placement mode - then click anywhere on the grid. This will place a fixture on the context grid.
Notice that the fixture, when highlighted, has one red pixel (the origin) and the remaining pixels are blue. Even when
not highlighted, the origin pixel will be slightly darker than the rest. When you place a fixture on the context grid, an
entry for that fixture is added to the table on the right of the grid. Mbox Extreme will automatically patch fixtures in
order (as you place them) beginning with Art-Net universe 1. Therefore you can reduce your patch time by placing
fixtures in order. However, you can modify the patch information for any fixture at any time.
Note:
If you edit your patch and allow two fixtures to share a range of DMX512 channels, the name, universe, and
address of both overlapping fixtures will turn red.
Once you have placed several fixtures on the context grid,
you are ready to see what they can do. Press [Return] or the
Place New Fixtures
button to exit fixture placement mode.
You should save your file by clicking the
Save
button at this
time. The text field above the file action buttons displays the
location of the current pixel-mapping file.
Click the Mbox tab at the top of the window to return to the
Window view and play some content. Initially, there is
nothing different, but if you press [F5] on the keyboard, your
view will change – press once to see the context view, a
second time to see the patched fixture view, a third time to
return to the normal view. Pressing [F5] affects both the
preview output and the stage outputs, so if you are using
one Mbox Extreme for both pixel-mapping and video
output, you should not leave the view set to context view or
patched fixture view when outputting video for your show. Initially, the patched fixture view may not look any different
from the context view. Both views will appear to be blocky versions of the content that you are playing.
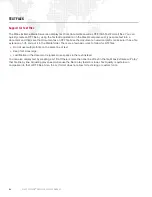
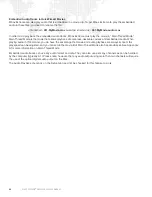
Go back to the Pixel Map tab and adjust the slider for the DMX Ghosting control. Reduce the level of this control to
about 30% and then return to the Window view. Now, the patched fixture view will display patched fixtures at full
brightness and unpatched pixels at a reduced intensity. This enables you to better visualize the result of your setup
(both context sizing and fixture placement) without needing to set up the rest of your equipment.
DMX Ghosting @ 100%
DMX Ghosting @ 30%
Summary of Contents for MBOX EXTREME
Page 1: ...SOFTWARE VERSION 3 2 WWW PRG COM MBOX EXTREME MEDIA SERVER USER MANUAL ...
Page 8: ...VI MBOX EXTREME MEDIA SERVER USER MANUAL Notes ...
Page 54: ...46 MBOX EXTREME MEDIA SERVER USER MANUAL Notes ...
Page 94: ...86 MBOX EXTREME MEDIA SERVER USER MANUAL Notes ...
Page 116: ...108 MBOX EXTREME MEDIA SERVER USER MANUAL Notes ...
Page 134: ...126 MBOX EXTREME MEDIA SERVER USER MANUAL Notes ...


