20
ES2
1
2
For easy transport of your Travel Scooter, the tiller collapses completely after the seat has been removed.
It is unnecessary to remove the shroud when transporting the Travel Scooter. Shroud removal is only
necessary when replacing the batteries. See III. “Batteries and Charging.”
WARNING! Do not lift weight beyond your physical capability. Ask for assistance when
necessary while disassembling or assembling your Travel Scooter.
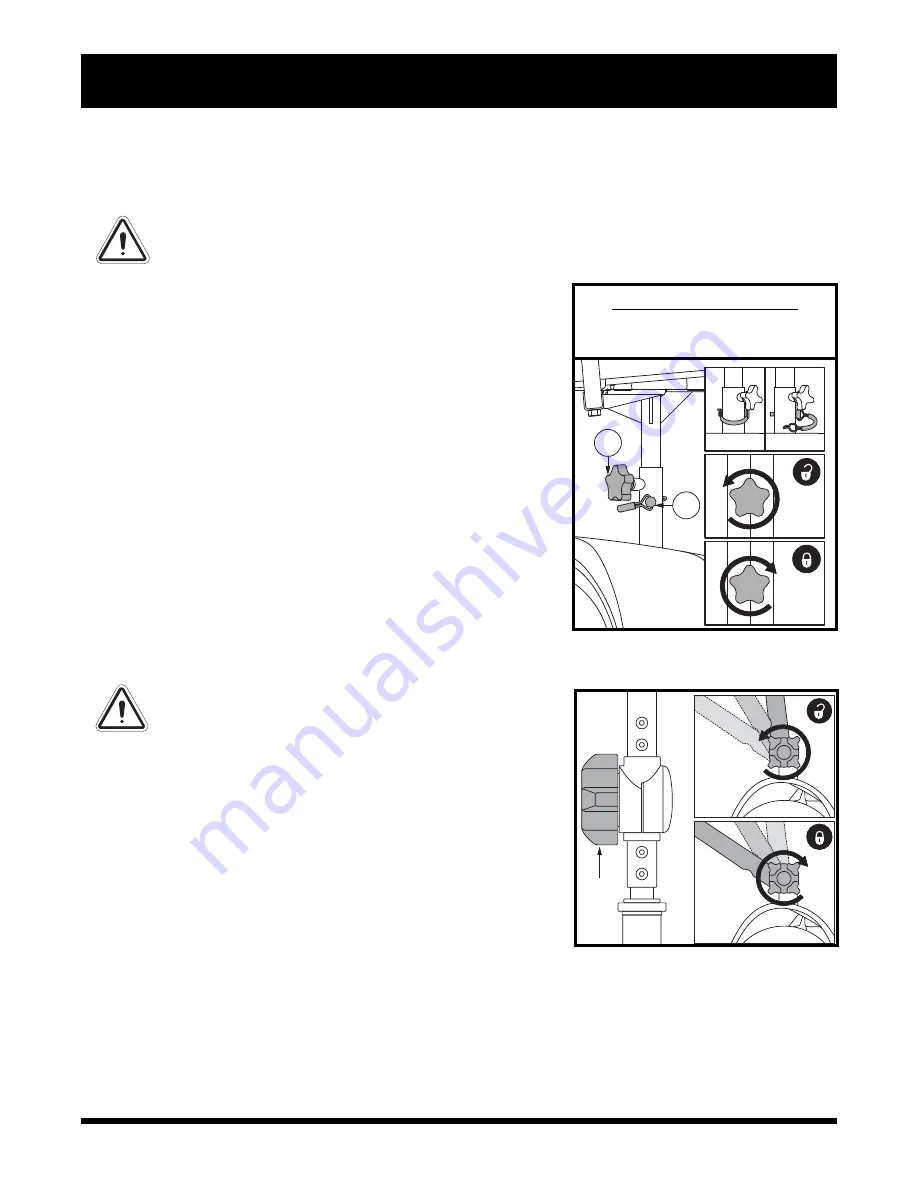
Figure 16. Tiller Release Knob
Figure 15. Seat Stabilizing Knob
V I . D I S A S S E M B L Y A N D A S S E M B L Y
IDENTIFICATION KEY
1. Se
a
t St
ab
ilizing Kno
b
2. Se
a
t Post Quick-rele
a
se Pin
Seat Removal
1. Loosen the Seat Stabilizing Knob.
See figure 15
.
2. Press the end of the seat post quick-release pin away from the
seat post to unlatch the pin. Grasp the hook and pull the pin
out of the seat post to release the seat.
3. Remove the seat by lifting it straight up and off of the Travel
Scooter.
Tiller Release
To release the tiller, loosen the Tiller Release Knob until the tiller
loosens and slowly folds down.
See figure 16
. If you encounter
resistance when folding the tiller down, firmly grasp the center of
the tiller and apply slight pressure to the tiller while pushing it
downward.
NOTE: In order to fully lower the tiller, you must first remove
the seat.
To secure the tiller in the vertical position, hold the tiller fully
upright while tightening the Tiller Release Knob.
WARNING! The tiller is not designed to be used
as a carrying handle when transporting the
Travel Scooter.
Seat Replacement
1. Insert the seat post on the seat into the lower seat post on the
base of the Travel Scooter.
2. While holding the seat, align the adjustment holes on the seat
and lower seat post.
See figure 15
.
3. Use the attached ring to push and replace the detent pin into
the lower seat post.
4. Tighten the Seat Stabilizing Knob completely.
See figure 15.
Ensure the seat is completely secure in place.


