background image

12                                                                                                                         Lift Chair Series

LIFT CHAIR PLACEMENT

Your lift chair should be placed near a standard electrical outlet on dry, level ground where there is ample
room to allow for proper operation. We recommend that you have the assistance of an attendant when
positioning the lift chair to avoid the possibility of injury when lifting.

Follow these steps to position the lift chair in a safe manner:

1. Place the back of the lift chair 30 in. (76 cm) from the nearest obstruction while the chair is in the

seated position. This measurement may vary depending on model.

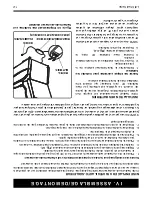
2. Adjust the leg levelers to stabilize the lift chair (

Fig. 3.1

).

3. Install the batteries into the external transformer if applicable. Refer to “Battery Installation” for more

information.

4. Position the external transformer on the floor in an open, well-ventilated area where it will not be an

obstruction or, if equipped, utilize the optional wall mount.

5. Position the low voltage connection cable where it will not be pinched between the frame and the lift

mechanism.

6. Connect the low voltage connection cable to the external transformer if it is not already connected.
7. Plug the power cord directly into the electrical outlet. 

Do not use an extension cord!

NOTE: If you discover a problem at any point during the setup and positioning of your lift chair, stop
and contact your authorized provider immediately. To avoid personal injury and/or product damage, do
not plug the unit into the electrical outlet until the problem is corrected and do not attempt to fix elec-
trical problems by yourself.

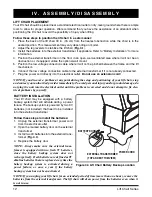
EXTERNAL TRANSFORMER 
(TOP AND BOTTOM VIEW)

BATTERY DOOR

POWER CORD

Figure 4.4 Lift Chair Battery Backup Location

BATTERY INSTALLATION

Your lift chair may be equipped with a battery
backup system that will activate during a power
failure. The backup system is powered by two 9V
batteries (not included) that need to be installed
into the external transformer.

Follow these steps to install the batteries:

1. Unplug the external transformer power cord

from the electrical outlet.

2. Open the marked battery door on the external

transformer.

3. Install two 9V batteries into the external trans-

former (

Fig. 4.4

).

4. Replace the battery door.

NOTE: Always make sure the external trans-
former is equipped with two fresh 9V batteries,
since the battery backup system does not
recharge itself. Fresh batteries are defined as 9V
alkaline batteries that are replaced every time the
battery backup system is activated during a
power failure, or once a year if the battery
backup system has not been activated.

I V .   A S S E M B L Y / D I S A S S E M B L Y

NOTE: If you unplug your lift chair for an extended period of time (more than one hour), remove the 
batteries from the external transformer. The lift chair will draw power from the batteries even when it 
is not in use.

Summary of Contents for LIFT CHAIR Series

Page 1: ...LIFT CHAIR...

Page 2: ...ngle with a black border MANDATORY These actions should be performed as specified Failure to perform mandatory actions can cause personal injury and or equipment damage On the product this icon is rep...

Page 3: ...Lift Chair Series 3 I INTRODUCTION 4 II SAFETY 5 III YOUR LIFT CHAIR 8 IV ASSEMBLY DISASSEMBLY 10 V OPERATION 13 VI BASIC TROUBLESHOOTING 15 VII CARE AND MAINTENANCE 17 C O N T E N T S...

Page 4: ...AGREEMENT By accepting delivery of this product you promise that you will not change alter or modify this product or remove or render inoperable or unsafe any guards shields or other safety features...

Page 5: ...proved 3 pronged adapter to an electrical outlet having 2 pronged plug access Do not connect the heat and massage hand control directly to the motor Connect the hand control directly to the junction b...

Page 6: ...t time There are certain situations including some medical conditions where you will need to practice operating the lift chair in the presence of a trained attendant A trained attendant can be defined...

Page 7: ...by maintaining a minimum distance between portable and mobile RF com munications equipment It is recommended that at least 9 feet 3 meters of distance be maintained between the lift chair and any hand...

Page 8: ...r needed to return the lift chair to an upright or semi upright position in the event of a power failure Must be installed in the external transformer if equipped with battery backup EXTERNAL TRANSFOR...

Page 9: ...e battery and achieve the most amount of lift Keep in mind that the amount of life the batteries will be able to provide is affected by user weight and battery condition WARNING Pinch Crush Points Haz...

Page 10: ...ssembly instructions provided with the chair For the 2 position model the KD sleeves are located on the inside as shown in figure 4 1 I V A S S E M B L Y D I S A S S E M B L Y BARIATRIC MODEL WALL HUG...

Page 11: ...he lift chair and heat massage harnesses if equipped to the lift chair Fig 4 3 WARNING Do not connect the push button or heat massage hand control directly to the motor Connect the hand control direct...

Page 12: ...lift chair stop and contact your authorized provider immediately To avoid personal injury and or product damage do not plug the unit into the electrical outlet until the problem is corrected and do no...

Page 13: ...in an upright and closed position when not in use Do not sit or stand on the footrest Do not drop into the lift chair when sitting if it is in a partially raised position PROHIBITED Do not place objec...

Page 14: ...air reaches a comfortable seated position Follow these steps to properly stand up from your lift chair 1 Activate and hold the UP button switch to raise your lift chair 2 Release the button switch whe...

Page 15: ...re is no movement in either direction check if the motors are out of sync and that the pressure sensitive safety switch has been activated Out of sync motors will show one motor extended farther than...

Page 16: ...ed to the electrical outlet to ensure the outlet is receiving power What if the heat and massage options on my lift chair do not function Ensure the junction box is connected properly to the external...

Page 17: ...eep ashtrays a safe distance from the lift chair Always make sure cigarettes are completely extinguished before disposal NOTE Do not use solvent type cleaners to spot clean Do not saturate the fabric...

Page 18: ...18 Lift Chair Series This page intentionally left blank Cette page a t laiss e vierge intentionnellement...

Page 19: ...Lift Chair Series 19 This page intentionally left blank Cette page a t laiss e vierge intentionnellement Lift Chair Serie 18...

Page 20: ...cigarette allum e sans surveillance Gardez les cendriers distance du fauteuil auto souleveur Assurez vous de bien teindre les cigarettes avant d en disposer NOTE N utilisez pas de nettoyeur base de s...

Page 21: ...faire si les fonctions Chaleur et Massage de mon fauteuil ne fonctionnent pas V rifez le branchement de la bo te de jonction avec le transformateur externe et l alimentation du transformateur Un voya...

Page 22: ...a manette dans un sens ou dans l autre Si le fauteuil refuse de fonctionner v rifiez l tat du commutateur de s curit pression pour voir si il a t activ Un moteur d r gl montrera un extension plus long...

Page 23: ...euil auto souleveur 1 Activez et maintenir le bouton BAS commutateur jusqu ce qu il soit confortablement inclin 2 Activez et maintenir le bouton HAUT commutateur pour revenir une position verticale as...

Page 24: ...manette du fauteuil lorsque vous voulez pr venir l utilisation non autoris du fauteuil vitez les endroits o vous pouvez vous pincer craser les doigts dans les ciseaux du m canisme Gardez vos mains et...

Page 25: ...rique NOTE Si vous percevez un probl me quelconque lors de la pr paration ou de la mise en place de votre fauteuil auto souleveur arr tez et contactez votre d taillant autoris imm diatement Afin de pr...

Page 26: ...avant de l enfoncer pour le bloquer en position 3 Pesez fermement sur le dessus du dossier pour le bloquer en position Vous devez entendre le clic provenant de chaque cot pour bien le bloquer en plac...

Page 27: ...tage fournies avec le fauteuil Pour le mod le 2 position les manches KD sont situ es l int rieur comme le montre la figure 4 1 Figure 4 1 Assemblage du fauteuil auto souleveur 1 D ballez le dossier po...

Page 28: ...et d obtenir une pouss e maximale Garder en m moire que la capacit des batteries fournir une pouss e est affect e par le poids de l utilisateur et de leurs tat MISE EN GARDE Danger Prenez garde de vou...

Page 29: ...la manette de commande pour plus d informations sur les options de manette de commande CONNECTIONS RAPIDE Permet l utilisateur de d tacher la manette de commande du fauteuil auto souleveur EXTENSION...

Page 30: ...f rences lectromagn tiques en conservant une distance minimale de 3 m tres 9 pieds entre le fauteuil et les appareils portable et les quipements de communication de type RF Il est recommand de mainten...

Page 31: ...s qui exigent une certaine habilet pour l utilisation vous aurez besoin de la pr sence d une personne aidante qualifi e afin de vous pratiquer Une personne qualifi e peut tre un membre de votre famill...

Page 32: ...deux fentes Ne branchez pas la manette de commande massage chaleur directement au moteur Branchez la manette de commande dans la bo te de jonction afin de pr venir les dommages l quipement Ce produit...

Page 33: ...TE A L ACHAT En acceptant ce produit vous vous engagez ne pas modifier alt rer enlever ou rendre inutilisables les protecteurs et ou gardes de s curit dispositifs de s curit Vous vous engagez ne pas r...

Page 34: ...I INTRODUCTION 4 II SECURITE 5 III VOTRE FAUTEUIL AUTO SOULEVEUR 8 IV ASSEMBLAGE DEMONTAGE 10 V FONCTIONNEMENT 13 VI PROBLEMES ET SOLUTIONS 15 VII SOINS ET ENTRETIEN 17 T A B L E D E S M A T I E R E...

Page 35: ...votre produit Sur le produit le symbole est un triangle jaune avec une bordure noire OBLIGATOIRE Ces actions doivent tre ex cut es comme indiqu sous peine de vous blesser ou d endommager votre produit...

Page 36: ......

Reviews: