background image

Quantum 610 Series                                            www.pridemobility.com                                                                   37

FRONT RIM  
HALF

WHEEL 
HUB

V I I .   C A R E   A N D   M A I N T E N A N C E

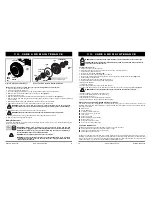
Figure 27. Quantum 610 Drive Wheel Disassembled

WASHERS

TIRE

REAR RIM HALF

NUTS

Figure 26. Quantum 610 Drive Wheel

TUBE

DRIVE WHEEL 
WASHER

DRIVE 
WHEEL 
NUT

AXLE 
SLOT

AXLE KEY

Follow these easy steps for a quick and safe repair for both pneumatic and solid tires:

1. Turn off the power to the controller.
2. Set the power chair up on blocks.
3. If you are changing a pneumatic tire, completely deflate it before removing the wheel. 
4. Remove the drive wheel nut and washer from the axle. 

See figure 26.

5. Pull the wheel off the axle.
6. Remove the nuts and washers from the wheel hub and separate the rim halves. 

See figure 27.

7. Remove the old tube from the pneumatic tire and replace it with a new tube or replace the entire assembly if

it is a solid tire.

8. Reassemble the rim halves and reinstall the nuts and washers to the wheel hub.
9. Slide the wheel back onto the axle. Make sure that the key is in the axle slot.

WARNING! Failure to ensure that the axle key is properly installed into the axle slot when

mounting the wheel can result in electronic brake failure, personal injury, and/or product damage.

10. Reinstall the drive wheel nut and washer to the axle and tighten. 

WARNING! Make sure both the nut and washer are reinstalled and secured properly.

11. Inflate pneumatic tires to the psi/bar/kPa air pressure rating indicated on each tire.
12. Remove the power chair from the blocks.

Battery Replacement

A battery wiring diagram is printed on a decal located on the front battery tray. See VI. “Batteries and Charging”
for correct battery specifications.

MANDATORY! Battery posts, terminals, and related accessories contain lead and lead

compounds. Wear goggles and gloves when handling batteries and wash hands after handling.

WARNING! The batteries in your power chair should only be serviced or replaced by a

Quantum Rehab Provider or a qualified technician.

WARNING! Do not replace batteries when seat is occupied.

WARNING! Power chair batteries are heavy. See specifications table. If you are unable

to lift that much weight, be sure to get help. Use proper lifting techniques and avoid

lifting beyond your capacity. 

38                                                                  www.pridemobility.com                                     Quantum 610 Series

V I I .   C A R E   A N D   M A I N T E N A N C E

WARNING! Do not mix old and new batteries. Always replace both batteries at the same time.

PROHIBITED! Keep tools and other metal objects away from the battery terminals. Contact with

tools can cause electrical shock.

To replace the batteries:

1. Turn off the power to the controller.
2. Make sure that the power chair is in drive mode. See III. “Your Power Chair.”
3. Loosen the rear shroud fasteners. 
4. Remove the rear shroud. 

See figure 28.

5. Disconnect the battery harness from the rear battery.
6. Remove the retaining pin and lift off the front cover using the foot platform bracket. 

See figure 20.

7. Slide the battery tray forward.
8. Disconnect the battery harness from the front battery.
9. Unfasten the hook and loop straps from both batteries.
10. Remove the batteries.
11. Install new batteries.
12. Fasten the hook and loop straps around both batteries.
13. Connect the battery harness to the front battery according to the battery wiring diagram. 

See figure 28.

WARNING! Make sure you tighten the fasteners so that the connections are secure.

14. Slide the battery tray back into the power base.
15. Connect the battery harness to the rear battery.
16. Reinstall the front cover.
17. Reinstall the rear shroud and tighten the fasteners.
18. Charge the batteries. See VI. “Batteries and Charging.”

When to See Your Quantum Rehab Provider for Service

The following symptoms could indicate a serious problem with your power chair. If necessary, contact your
Quantum Rehab Provider. When calling, have the model number, serial number, nature of the problem, and the
error code if available.

Motor noise
Frayed harnesses 
Cracked or broken connectors
Uneven wear on any of the tires
Jerky motion
Pulling to one side
Bent or broken wheel assemblies
Does not power up
Powers up, but does not move
Loose seat or seating components

Corrective Maintenance

If the battery condition meter does not light up when you turn on the power:

Check the harness connections. Make sure they are tight.
Check the circuit breaker. Reset it if necessary.
Check the battery connections.

If the above conditions prove normal, you can load test the batteries with a battery load tester. These testers are
available at automotive parts stores. Disconnect both batteries before load testing and follow the directions that
come with the load tester. If either one of the batteries fails the load test, replace both of them. If your power chair
still does not power up, contact your authorized Quantum Rehab Provider.

Summary of Contents for Quantum 610

Page 1: ...1 800 800 8586 US 1 888 570 1113 Canada QUANTUM 610 ...

Page 2: ...product this icon is represented as a white symbol on a blue dot with a white border PROHIBITED These actions are prohibited These actions should not be performed at any time or in any circumstances Performing a prohibited action can cause personal injury and or equipment damage On the product this icon is represented as a black symbol with a red circle and red slash Quick Reference Information Co...

Page 3: ...e to the power chair including voiding the warranty PURCHASER S AGREEMENT By accepting delivery of this product you promise that you will not change alter or modify this product or remove or render inoperable or unsafe any guards shields or other safety features of this product fail refuse or neglect to install any retrofit kits from time to time provided by Pride to enhance or preserve the safe u...

Page 4: ... Avoid exposure to rain snow ice salt or standing water whenever possible Maintain and store in a clean and dry condition Do not connect an extension cord to the AC DC converter or the battery charger 6 www pridemobility com Quantum 610 Series I I S A F E T Y Removal of grounding prong can create electrical hazard If necessary properly install an approved 3 pronged adapter to an electrical outlet ...

Page 5: ...and its packaging Locked and in drive mode Place unit on level ground and stand to one side when changing from drive mode to freewheel mode or freewheel mode to drive mode Unlocked and in freewheel mode Indicates flammable material Do not expose to heat sources such as open flame or sparks Do not transport batteries with flammable or combustible items Contains Lead 8 www pridemobility com Quantum ...

Page 6: ...mit Keep in mind that the maximum weight capacity includes the combined weight of the user and any accessories mounted to the power chair MANDATORY Stay within the specified weight capacity of your power chair Exceeding the weight capacity voids your warranty Pride will not be held responsible for injuries and or property damage resulting from failure to observe weight limitations WARNING Do not c...

Page 7: ...d Roadways WARNING You should not operate your power chair on public streets and roadways Be aware that it may be difficult for traffic to see you when you are seated on your power chair Obey all local pedestrian traffic rules Wait until your path is clear of traffic and then proceed with extreme caution Outdoor Driving Surfaces Your power chair is designed to provide optimum stability under norma...

Page 8: ... combustible items Positioning Belts Your Quantum Rehab Provider therapist s and other healthcare professionals are responsible for determining your requirement for a positioning belt in order to operate your power chair safely WARNING If you require a positioning belt to safely operate your power chair make sure it is fastened securely in order to reduce the possibility of a fall from the power c...

Page 9: ...ined attendant perform the fol lowing tasks before attempting a transfer Turn off the power to the controller Ensure your power chair is not in freewheel mode See III Your Power Chair Turn the caster wheels toward the transfer destination to improve power chair stability during transfer Make sure both armrests are flipped up or removed from your power chair Flip up the foot platform or move the le...

Page 10: ... www pridemobility com Quantum 610 Series I I I Y O U R P O W E R C H A I R Electrical Components The electrical components are located inside the power base The main circuit breaker is located on the front of the battery tray The controller connector s are located inside the power base See figure 7 Motor Connectors This is where the controller connects to the motors Battery Connector This is wher...

Page 11: ...t disengage the drive motors when the power chair is on an incline as the unit could roll on its own Only engage the freewheel mode when on a level surface WARNING It is important to remember that when your power chair is in freewheel mode the braking system is disengaged To engage or disengage the drive motors 1 Locate the lever on top of each motor 2 Push the two levers inward to engage the driv...

Page 12: ...ese extrusions attach to a pair of trapeze bars that are mounted to the power base See figure 11 NOTE If your power chair is equipped with a Spe cialty Seat Synergy Seat or a TRU Balance Power Positioning System refer to the information provided in separate manuals WARNING Do not pick up the seat frame by the armrests They are free to pivot and you may lose control of the seat if they do so To ins...

Page 13: ...ts Do not change your seating configuration without first contacting Pride Mobility Products or your Quantum Rehab Provider WARNING Some power chair components are heavy You may need assistance to lift or carry them Please refer to Appendix I Specifications for specific component weights before you disassemble the power chair WARNING Remove the occupant from the power chair before making any adjus...

Page 14: ...Figure 19 Underside of Armrest SETSCREW V C O M F O R T A D J U S T M E N T S To change the armrest width 1 Locate the two armrest knobs on each side of the armrest receiver bracket See figure 18 2 Loosen the knobs 3 Slide the armrests in or out to the desired width 4 Tighten the knobs Armrest Angle Adjustment To change the armrest angle 1 Lift the armrest straight up so that it is perpendicular t...

Page 15: ...RM RETAINING PIN QUICK RELEASE FASTENERS Figure 21 Quick Release Fastener Operation SCREW SECUREMENT NUT 28 www pridemobility com Quantum 610 Series V C O M F O R T A D J U S T M E N T S Positioning Belt Your power chair may be equipped with a positioning belt that can be adjusted for operator comfort See figure 23 The positioning belt is designed to support the operator so that he she does not sl...

Page 16: ...ir Charging the Batteries The battery charger is essential in providing long life for your power chair batteries It is designed to optimize your power chair s performance by charging the batteries safely quickly and easily PROHIBITED Removal of grounding prong can create electrical hazard If necessary properly install an approved 3 pronged adapter to an electrical outlet having 2 pronged plug acce...

Page 17: ... daily basis or you may not use it for weeks at a time Daily Use If you use your power chair on a daily basis charge the batteries as soon as you are finished using your power chair Your power chair will be ready each morning to give you a full day s service It is recommended that you charge the batteries 8 to 14 hours after daily use Infrequent Use If you use your power chair infrequently once a ...

Page 18: ...usceptible to damage from the elements Avoid damp areas of any kind WARNING Direct or prolonged exposure to water or dampness could cause the power chair to malfunction electronically and mechanically Water can cause electrical components to corrode and the chair s frame to rust Power chairs should be examined periodically for signs of corrosion caused by water exposure bodily fluids exposure or i...

Page 19: ...r power chair clean and free of foreign material such as mud dirt hair food drink etc Yearly Checks Take your power chair to your Quantum Rehab Provider for yearly maintenance especially if you use your power chair on a daily basis This helps ensure that your power chair is functioning properly and helps prevent future complications 36 www pridemobility com Quantum 610 Series V I I C A R E A N D M...

Page 20: ... A N D M A I N T E N A N C E WARNING Do not mix old and new batteries Always replace both batteries at the same time PROHIBITED Keep tools and other metal objects away from the battery terminals Contact with tools can cause electrical shock To replace the batteries 1 Turn off the power to the controller 2 Make sure that the power chair is in drive mode See III Your Power Chair 3 Loosen the rear sh...

Page 21: ...demobility com 39 Figure 28 Battery Installation REAR SHROUD FASTENERS REAR SHROUD FRONT BATTERY REAR BATTERY BATTERY WIRING DIAGRAM V I I C A R E A N D M A I N T E N A N C E 40 www pridemobility com Quantum 610 Series N O T E S ...

Page 22: ...Quantum 610 Series www pridemobility com 41 N O T E S 42 www pridemobility com Quantum 610 Series N O T E S ...

Page 23: ......
Page 24: ... at the factory Date Inspected Inspector Quality Control Quantum 610 Inclusion of all Parts Joystick Serial Number Controller Serial Number Left Motor Serial Number Right Motor Serial Number Fit and Finish Performance INFMANU2924 Serial Number ...

Reviews: