background image


3


1.2.6 DO NOT clean with any chemical detergent. Clean only with a dry cloth.   
1.2.7 DO NOT block any ventilation openings. Install in accordance with the 
manufacturer’s instructions. 
1.2.8 DO NOT install near any heat sources such as radiators, heat registers, stoves, 
or other apparatus that produce heat. 
1.2.9 Protect the power cord from being walked on or pinched particularly at plugs, 
convenience receptacles, and the point where it exits the apparatus.   
1.2.10 Only use attachments/accessories specified by the manufacturer. 
1.2.11 Use only with the cart, stand, tripod, bracket, or table specified by the 
manufacturer, or sold with the apparatus. When a cart is used , use caution when 
moving the cart/apparatus combination to avoid injury from tip-over. 
1.2.12 Unplug this apparatus during lightning storms or when unused for long 
period of time. 
1.2.13 Refer all servicing to qualified service personnel. Servicing is required when 
the apparatus has been damaged in any way, such as when the power-supply cord or 
plug is damaged, liquid has been spilled or objects have fallen into the apparatus, 
the apparatus has been exposed to rain or moisture, does not operate normally, or 
has been dropped. 
 

1.3 Handling Cautions 

1.3.1  DO  NOT  expose  this  apparatus  to  dripping  or  splashing.  Do  not  put  objects 
filled with liquids, such as vases on the apparatus. 
1.3.2 To turn this apparatus off completely, you must pull the power plug out of the 
wall socket. Consequently, the power plug must be easily and readily accessible at 
all times. 
1.3.3  DO  NOT  plug  multiple  electric  devices  into  the  same  wall  socket. 
Overloading a socket can cause it to overheat, resulting in a fire. 
1.3.4 Before connecting other components to this player, be sure to turn them off. 
1.3.5 If the product makes an abnormal noise or produces a burning smell or smoke, 
turn off the power switch immediately and disconnect the power plug from the wall 
outlet. Then, contact the nearest customer service center for technical assistance. Do 
not use the product. Using the product as it is may cause a fire or an electric shock. 
 

Summary of Contents for PR-N101+

Page 1: ...1 Prijector PR N101 User s Guide...

Page 2: ...ich the receiver is connected Consult the dealer or an experienced radio TV technician for help This equipment complies with FCC radiation exposure limits set forth for an uncontrolled environment Thi...

Page 3: ...ratus has been damaged in any way such as when the power supply cord or plug is damaged liquid has been spilled or objects have fallen into the apparatus the apparatus has been exposed to rain or mois...

Page 4: ...2 USB interface support mobile HDD wired wireless mouse and keyboard operation RJ45 10 100M Ethernet interface Support 1080P video playback HDMI video output connect to HDTV for HD video playback Supp...

Page 5: ...n robot during loading When loading is finished it will go to Home screen 2 6 2 Home Screen display 3 Settings Using Navigation 4 directions OK EXIT and Menu keys of Remote Controller to select the op...

Page 6: ...nnect a secured WiFi network corresponding password will be input firstly Or fail to connect and need reset password 3 1 3 Once build up the connection with a certain WiFi network successfully PR N101...

Page 7: ...7 3 2 Ethernet Connect Box and Router by RJ45 network cable Press ON in Ethernet setting it will connect to network automatically 3 3 Date usage Show data usage information...

Page 8: ...and set VPN 3 5 2 Portable hotspot 3 5 2 1 Enable Portable hotspot 3 5 2 2 Set up WiFi hotspot Note WiFi and hotspot connection can not be applied at same time Disconnect WiFi and connect Ethernet wh...

Page 9: ...ase or decrease sound volumes 3 5 2 Touch Sounds If enable Touch sound sound will be heard while move remote controller 3 6 Display 3 6 1 Auto Brightness Auto set brightness to save power 3 6 2 Font s...

Page 10: ...ge Shows the storage used of the OS and SD card 3 8 Apps List all apps installed You can choose an application and force to shut down the app uninstall the app clear user data move to SD card and clea...

Page 11: ...11 3 9 Permissions 3 10Location...

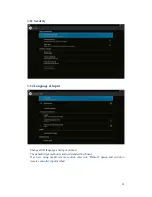
Page 12: ...12 Language input Change OSD language and input method The default input method is android standard keyboard If you are using our IR remote control enter into Default option and switch to remote contr...

Page 13: ...WiFi password and other settings Factory data rest You can reset all the settings and apps to factory default Note You might want to backup important data before resetting the box Once you choose to...

Page 14: ...14 3 15 Accessibility 3 16 Developer options...

Page 15: ...15 3 17 About device...

Page 16: ...ket over the Internet or other sources such as other online sources the internal storage and the USB storage device and SD card that you have mounted onto PR N101 You also can manage apps on PR N101 a...

Page 17: ...is not supported The supported memory size is 32G maximum Make sure that this player supports these files 6 3 Remote Controller cannot respond quickly to the pressing of keys Make sure that batteries...

Page 18: ...Video Output HDMI CVBS Audio Output HDMI IR receiver LAN RJ45 10 100M Ethernet interface WiFi IEEE 802 1 b g n 2 4G Audio Decoder Low power MediaCPU with DSP audio processing Supports MP3 AAC WMA RM F...

Page 19: ...19 Storage System Built in 4K bits One Time Programming ROM for key storage Size 100 X 100 X 15mm Net Weight 160g...

Page 20: ...red trademarks of HDMI Licensing LLC in United States and other countries 10 FCC Radiation Exposure Statement The antennas used for this transmitter must be installed to provide a separation distance...

Reviews: