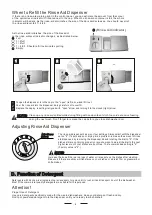

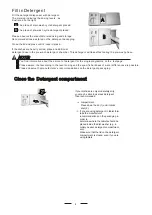

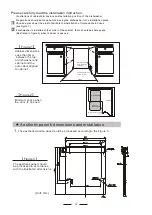
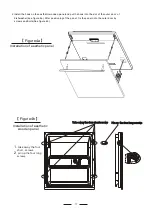


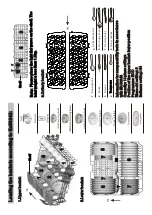
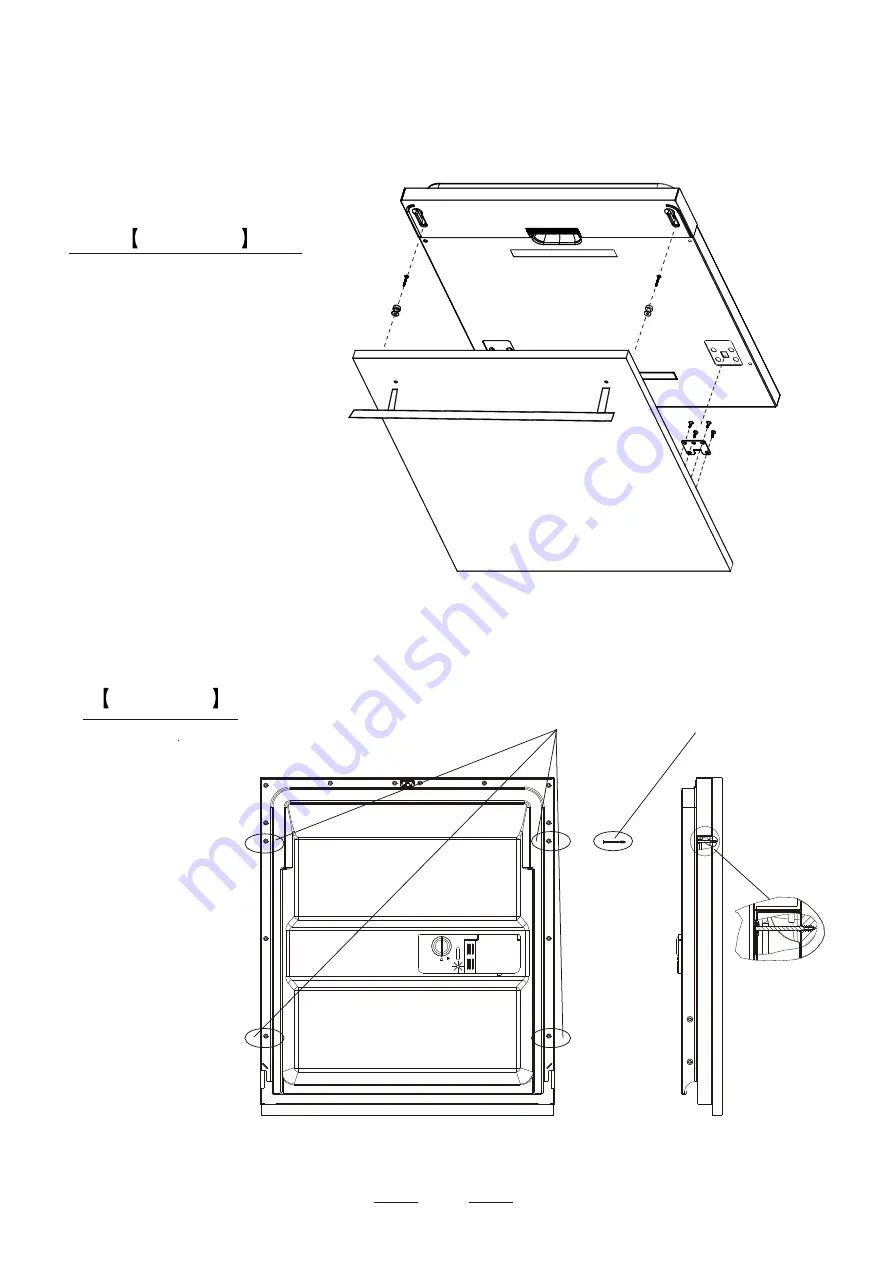
Installation of aesthetic panel
Figure4a
2 Install the hook on the aesthetic wooden panel and put the hook into the slot of the outer door of
dishwasher(see figure 4a). After positioning of the panel , fix the panel onto the outer door by
screws and bolts(See figure 4b) .
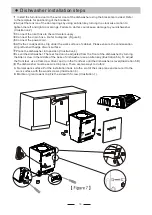
Installation of aesthetic
wooden panel
Figure4b
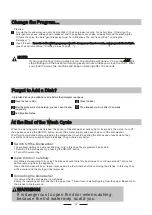
1
. take away the four
short screws
2
. pin up the four long
screws
Take away the four short screws
Take away the four short screws
Pin up the four long screws
Pin up the four long screws
17


