


Summary of Contents for PRAE0030
Page 1: ...Cod 0103082466 Extractors PRAE0030 ...
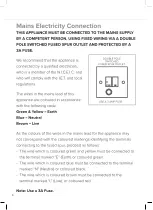
Page 5: ...Power Key ...
Page 10: ...10 ...
Page 13: ...13 ...
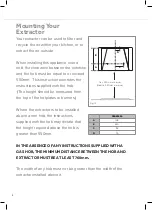
Page 17: ...12 ...
The Prima PRAE0030 user manual is your comprehensive guide for the installation, use, and maintenance of this exceptional product. Available as a free download on our website, this manual provides detailed instructions and valuable insights to ensure proper usage and maximum performance of the Prima PRAE0030.
Page 1: ...Cod 0103082466 Extractors PRAE0030 ...
Page 5: ...Power Key ...
Page 10: ...10 ...
Page 13: ...13 ...
Page 17: ...12 ...


