background image

P r i m a L u c e L a b   S p A

A R C O   u s e r   m a n u a l

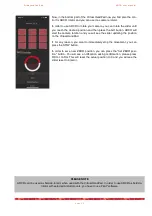
Now, in the bottom part of the Virtual HandPad now you find also the con-
trol for ARCO rotator and you can use it as camera rotator.

In order to use ARCO to rotate your camera, you can rotate the slider until 
you  reach  the  desired  position  and  then  press  the  GO  button. ARCO  will 
start the camera rotation and you will see the slider updating the position 
on the Virtual HandPad.

If,  for  any  reason,  you  want  to  immediately  stop  the  movement,  you  can 
press the STOP button.

In order to set a new ZERO position, you can press the “Set ZERO posi-
tion”  button.  You  will  see  a  notification  asking  confirmation,  please  press 
OK to confirm. This will reset the actual position to 0 and you will see the 
slider reset to 0 (zero).

p a g e   2 2

PLEASE NOTE

ARCO can’t be used as field de-rotator when used with the Virtual HandPad. In order to use ARCO as field de-

rotator with selected Alt-Azi mounts, you have to use PLAY software.

Summary of Contents for ARCO 2

Page 1: ...atters relating to the use service and warranty please refer to the addresses given in the relevant documents PrimaLuceLab SpA Vi a R o v e r e d o 2 0 B 3 3 1 7 0 P o r d e n o n e w w w p r i m a l...

Page 2: ...3 Installing ARCO on ESATTO focusers 4 Installing ARCO on focusers with SESTO SENSO 2 focusing motor 6 Use ARCO as camera rotator with EQ mounts and PLAY 8 Use ARCO as fi eld de rotator rotator with A...

Page 3: ...cation Package contents ARCO camera rotator and fi eld de rotator 2mm Allen key Rotator port cable 130mm long Rotator port cable 700mm long ARCO quick start guide p a g e 2 Serial number Rotator port...

Page 4: ...veloped to be used with SESTO SENSO 2 focusing motor or ESATTO focuser 2 SESTO SENSO 2 or ESATTO have to use at least the 3 0 fi rmware previous fi rmware releases don t support ARCO rotator Please us...

Page 5: ...l back the same you can connect to the ESATTO draw tube Now you can connect the cable from the ARCO port of the ESATTO to the port below the ARCO body Take great care when connecting the cable to the...

Page 6: ...port of the ARCO rotator the arrow position on the cable s connector has to correspond to the white point ATTENTION On the ARCO port of the ESATTO the arrow position on the cable s connector has to b...

Page 7: ...ocuser this will vary based on your focuser speci fi cations Now you can connect the cable from the ARCO port of the SESTO SENSO 2 to the port below the ARCO body Take great care when connecting the c...

Page 8: ...CO port of the SESTO SENSO2 the arrow position on the cable s con nector has to be set towards the ARCO label NOTE Before moving to the next step please check that che cable is long enough to let ARCO...

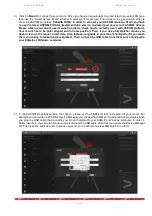
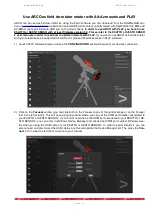
Page 9: ...Y software and you will see the CONFIGURATOR section where set your devices connection 2 Click on the Focuser section you can click both on the Focuser shape of the central image or on the Focuser tex...

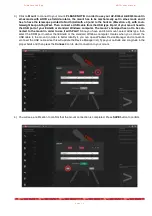
Page 10: ...Then if you use a SkyWatcher mount you have to turn on the mount insert date time latitude longitude in your mount handpad until you reach the menu asking to make the star alignment Then connect the U...

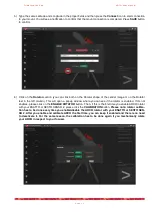
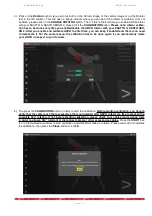
Page 11: ...a popup window where you can see if the rotator is enabled If it s not enables please click on the ENABLE ROTATOR button Then if this is the fi rst time you enable ARCO rotator with your ESATTO or SE...

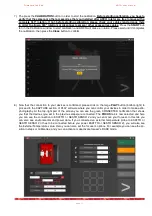
Page 12: ...ed please click on the large PLAY button bottom right to proceed to the CAPTURE section of PLAY software where you can control your devices in order to make astro photography At the top right part of...

Page 13: ...int the mount to the desi red object STOP button to stop the mount movement ENTER COORD button to manually type coordinates of the desired object You can also manually move the mount by using the NSEW...

Page 14: ...pported Alt Azi mount please follow these steps in PLAY software 1 Launch PLAY software and you will see the CONFIGURATOR section where set your devices connection 2 Click on the Focuser section you c...

Page 15: ...ows computer The mount s handpad has not to be con nected to the mount in order to use it with PLAY Since you have an Alt Azi mount select AltAz type then select the COM port number that EAGLE or the...

Page 16: ...CO the fi rst time you can keep it enabled and there is no need to deactivate it For the same reason the calibration has to be done again if you mechanically rotate your ARCO in respect to your focuse...

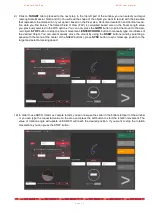
Page 17: ...o be connected before you power ESATTO or SESTO SENSO 2 you will also see the External Temperature value Here you can also set the focuser s options For example you can see the po sition in steps or m...

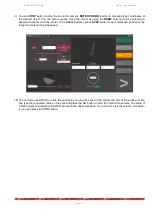
Page 18: ...NSEW buttons press SYNC button to sync telescope position to the target and select a tracking speed 10 You can also use ARCO to rotate the camera by moving the slider in the bottom left part of the w...

Page 19: ...physical of your device in sert primalucelab as the default password or the password you chose if you modi fi ed the default password and then press the Login button The next time you want to access...

Page 20: ...ma L uceLab SpA ARCO user manual To create a link directly to your device desktop simply press the share button and then Add to Home You can personalize the name Press Add button to con fi rm p a g e...

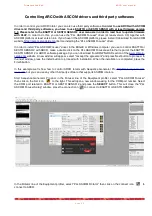
Page 21: ...an EAGLE or to a Windows computer Press the menu button on the top left part of the Virtual HandPad to reveal the left menu Press the ARCO enable option the slider will turn ON and if you previously d...

Page 22: ...NTION when you use ARCO please take care of the cables and check that in any rotation position of the ARCO cables won t pull too much If they pull too much they may break or they may damage your devic...

Page 23: ...ng the position on the Virtual HandPad If for any reason you want to immediately stop the movement you can press the STOP button In order to set a new ZERO position you can press the Set ZERO posi tio...

Page 24: ...that is part of the ESATTO SESTO SENSO 2 or ARCO software package 3 you can download from DOWNLOAD section of the www primalu celab com website A new window will appear select I accept the agreement...

Page 25: ...o rotate the camera to and press the Set button In order to come back to the 0 position press the Zero button If you want to manually sync a rotator position to a precise angle you can press the Manua...

Page 26: ...turn it to the reseller upon the purchase of a new type of equivalent equipment one by one Properly differentiated collection for the subsequent start of dismantled equipment for recycling treatment a...

Page 27: ...4 THE GUARANTEE DOES NOT APPLY IN THE FOLLOWING CASES Repair by anyone not authorized by PrimaLuceLab Invasive interventions or tampering with internal and or external parts Missing of the invoice or...

Reviews: