background image

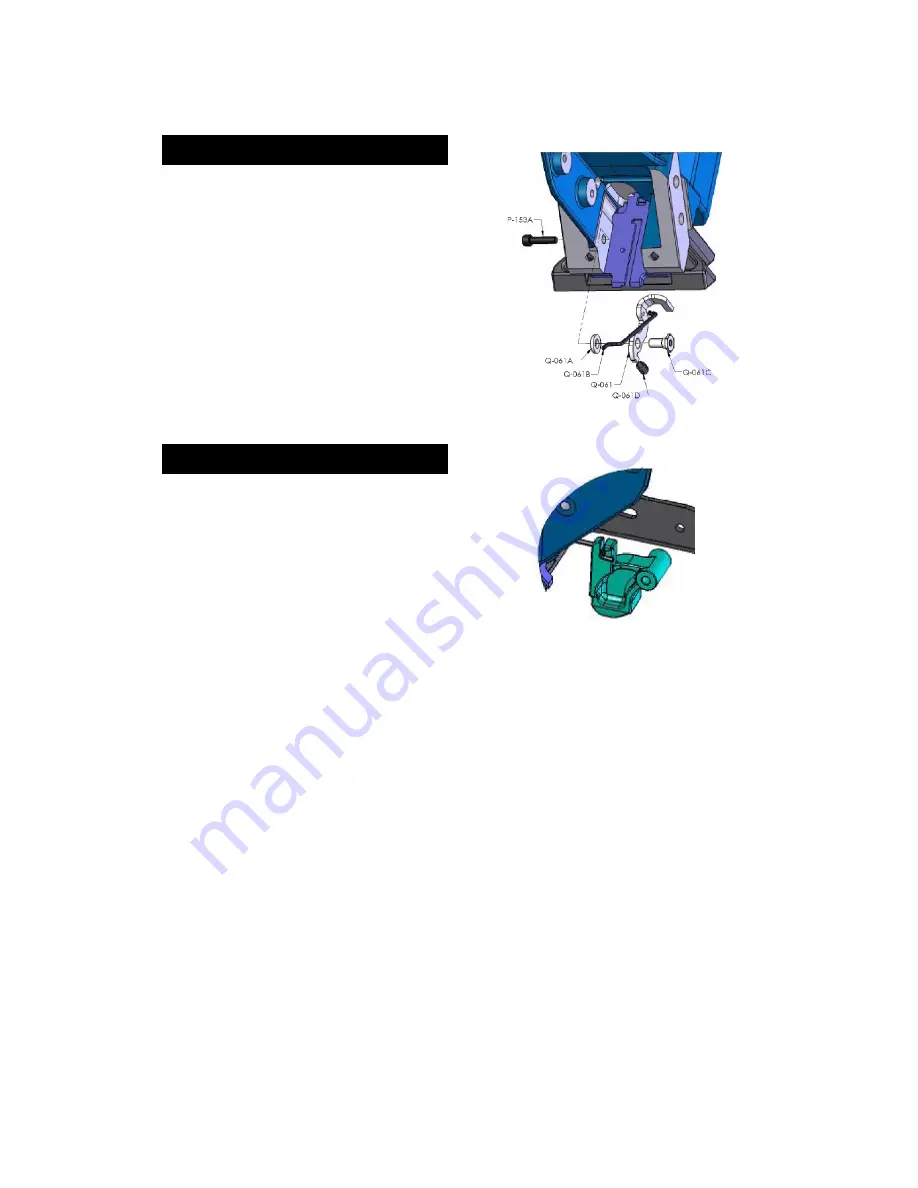
INSTALLING THE SAFETY

You shouldn't need to remove the safety stop mechanism
unless  the element Q-061 do not swivel or has a broken
tip.

• Assemble together parts Q-061, Q-061A , Q-061C and

Q-061D.

• Insert the short end of Q-061B as shown.
• Put two drops of adhesive sealant onto the thread area

of  Q-061C,  near  its  cylindrical  end.  Make  sure  no
sealant is retained on the end or exterior wall.

• Insert  the  assembly  into  the  hole  in  the  tool  body  as

shown.

• Tight together with screw P-153A, holding Q-061C.

INSTALLING THE BASE ASSEMBLY

The plastic base can be installed or removed without the
need of a tool.

• First,  insert  connecting  stem  Q-061B  to  the  safety

contact Q-062.

• Lift the safety contact and fully slide-in the plastic base

Q-033 onto the brackets Q-035A & B.

• The safety contact should simply drop into place. Insert

the locking rod Q-062A until it snaps. It should engage
the safety contact.

Summary of Contents for Q550A

Page 1: ...hit the head cap of the actuator if the plastic base is not sitting perfectly on the working surface Never leave the tool laying down on its side while the air supply hose is connected the tool shoul...

Page 2: ...e adjustment procedure proceed with the installation of few boards Carefully check for the proper positioning of the fastener onto the board Check again after few more rows to insure that all parts ar...

Page 3: ...te at 70 F 21 C Higher air pressure will increase the consumption of compressed air This tool is designed to be operated with a compressed air pressure of 80 to 100 psi 5 5 7 0 bar Air pressure of 80...

Page 4: ...e if necessary When ordering parts be sure to specify the right part number as well as the tool serial number After any maintenance to the tool REMOVE ALL Fasteners before connecting air and actuate t...

Page 5: ...valve on the cylinder is properly installed 4 Insert the piston assembly about 1 into the bottom end of the cylinder 5 Push the bumper into the bottom end of the cylinder 6 With the head lock loosened...

Page 6: ...nt is retained on the end or exterior wall Insert the assembly into the hole in the tool body as shown Tight together with screw P 153A holding Q 061C INSTALLING THE BASE ASSEMBLY The plastic base can...

Page 7: ...apply to all parts except those subjected to normal wear SEVEN YEAR EXTENDED LIMITED WARRANTY covers tool casing WARRANTY STATEMENT Primatech s sole liability hereunder will be to replace any part or...

Reviews: