background image

 [ 11 ]  Fatal Vision

®

 Roadster Assembly Instructions and Maintenance Guide  |  © Innocorp, ltd. www.fatalvision.com

FATAL VISION

®

  ROADSTER STEP BY STEP ASSEMBLY INSTRUCTIONS [ SINGLE SEATER ]

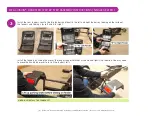
Place the spoiler on the frame, and replace the Philips head screw through the hole at the bottom of the spoiler into 
the metal tab on the kart. 

Do not tighten all the way yet.

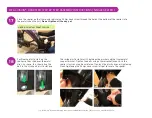
Position the plastic slots on the 
spoiler, so they slide over the metal 
clips. As shown, this should trap the 
bolt in the ‘U-shaped’ plastic slot gap. 

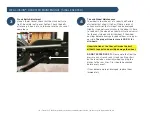
The inside plastic slot must fit between the washer and the frame metal 
support bracket. Tighten the bolts using a 13mm socket/wrench, so the 
spoiler stays securely. Be careful not to crack the plastic by over-tightening. 
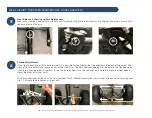
Finish tightening the Philips head screw in front to secure the spoiler.

17

18

  VIDEO  9:34 INSTALL FRONT SPOILER

Summary of Contents for FATAL VISION ROADSTER

Page 1: ...BY SINGLE SEATER Step By Step Assembly Instructions and Maintenance Guide...

Page 2: ...e Innocorp ltd www fatalvision com FATAL VISION ROADSTER STEP BY STEP ASSEMBLY INSTRUCTIONS SINGLE SEATER Scan QR code below or visit https vimeo com 709244660 to review the assembly guide video TO RE...

Page 3: ...he package Unpack the hardware set located inside the plastic steering wheel bag 1 2 A 1 front assembly B 1 drive wheel C 1 seat D 1 front spoiler E 1 hardware bag J 1 fender set F 1 rear assembly G 3...

Page 4: ...nstall the rear fenders Locate the two fenders and identify the left and right fenders by looking on the inside of the fenders and finding L for left and R for right Install the fenders by sliding the...

Page 5: ...wheel over the square on the drive axle until the inside of the wheel makes contact with the stop washer A rubber mallet may be used Reinstall the bolt and washer and tighten using a 17 mm socket Atta...

Page 6: ...at frame into the slot on the back of the plastic seat and line up the hole on the seat frame with the hole on the seat Insert the seat bolt D in hardware through the plastic seat then attach the wash...

Page 7: ...the front axles 17mm socket 1 bolt from the end of the steering shaft 13mm wrench 1 screw from the front of the spoiler mount bracket Philips screwdriver and 1 bolt from the steering wheel mounting p...

Page 8: ...Slide the front assembly into the tube of the rear assembly Use a 17mm socket or wrench to replace the 2 bolts washers by the chain drive on the rear assembly to attach the steering column brace Do no...

Page 9: ...ONS SINGLE SEATER Install the end connection bolt and washer onto the end of the steering rod and tighten using a 13mm socket Install the frame connection bolt washers and nut assembly B in hardware T...

Page 10: ...BY STEP ASSEMBLY INSTRUCTIONS SINGLE SEATER Attach both front wheels and tighten using a 17mm socket The air intake valve stems should face inward while attaching the wheels Place the spoiler mounting...

Page 11: ...kart Do not tighten all the way yet Position the plastic slots on the spoiler so they slide over the metal clips As shown this should trap the bolt in the U shaped plastic slot gap The inside plastic...

Page 12: ...BY STEP ASSEMBLY INSTRUCTIONS SINGLE SEATER Slide the steering wheel over the triangular plate and reattach the bolt and washer using the 13mm socket wrench Gently tap on the steering wheel cap E in...

Page 13: ...NS SINGLE SEATER Remove the seat from the kart and prepare to install the rear bumper frame Remove the existing hardware using a 13mm socket wrench and an Allen hex wrench Slide the rear bumper frame...

Page 14: ...on Roadster Assembly Instructions and Maintenance Guide Innocorp ltd www fatalvision com FATAL VISION ROADSTER STEP BY STEP ASSEMBLY INSTRUCTIONS SINGLE SEATER Replace the seat and the Roadster is rea...

Page 15: ...erformed on your pedal kart to keep it in safe and good working order The items listed here are some common components that will need periodic adjustment or replacement This maintenance guide is not m...

Page 16: ...hain loosen bolt B and nut C To tighten the chain turn nut D clockwise to tighten the chain Turn counter clockwise to loosen After the proper chain tension is set re tighten B and C parts for your mod...

Page 17: ...metal rim that will dent and be damaged slightly If you notice any cracks in the edge it s time to replace it The wheels on Pedal Karts are universal for the coast wheels and drive wheel If the wheel...

Page 18: ...ont wheels are hit hard during impact it is possible for the front end of the pedal kart to go out of alignment The signs of this are excessive or uneven wear on the front tires To adjust the front wh...

Page 19: ...the paint coating becomes damaged exposing the bare steel touch up the area with any type of close match spray paint to keep the frame from rusting Coaster Brake Transmission Maintenance The mounting...

Page 20: ...MAINTENANCE SINGLE SEATER CHAIN DRIVE TROUBLESHOOTING Scan QR code below or visit https vimeo com 709636047 to review the chain drive troubleshooting video REPLACING THE TIRE INNER TUBE Scan QR code...

Reviews: