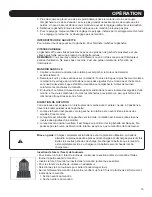
background image

7

OPERATION

More torque will set a screw deeper into material, less torque will prevent it 


e

lt

ti

A

. .

s

e

n

o

 l

l

a

m

s


n

a

h

e

v

ir

d


o

e

u

q

r

o

e

r

o

m


e

ri

u

q

e

s

w

e

r

c

s

 r

e

g

r

a

L

 .

g

n

i

p

p

ir

t

s

trial and error will show you which is the optimum setting for the situation.

Release the trigger when the clicking sound indicates the chuck will not turn 

further.

For drilling, always use the drill setting, indicated by the pictogram of a drill bit. 

At this setting, the drive does not disengage from the chuck.

SWITCH TRIGGER

To turn the tool ON, depress the switch trigger. To turn it OFF, release the 

switch trigger.

VARIABLE  SPEED

The switch trigger delivers higher speed with increased trigger pressure and 

lower speed with decreased trigger pressure.

NOTE:

 You might hear a whistling or ringing noise from the switch during use.  

Do not be concerned, this is a normal part of the switch function.

3.

4.

5.

 Turning the endmost knurled ring, the 

 clockwise by hand while with the other 

KEYLESS CHUCK

Center the rotation direction knob to prevent the motor accidentally starting.

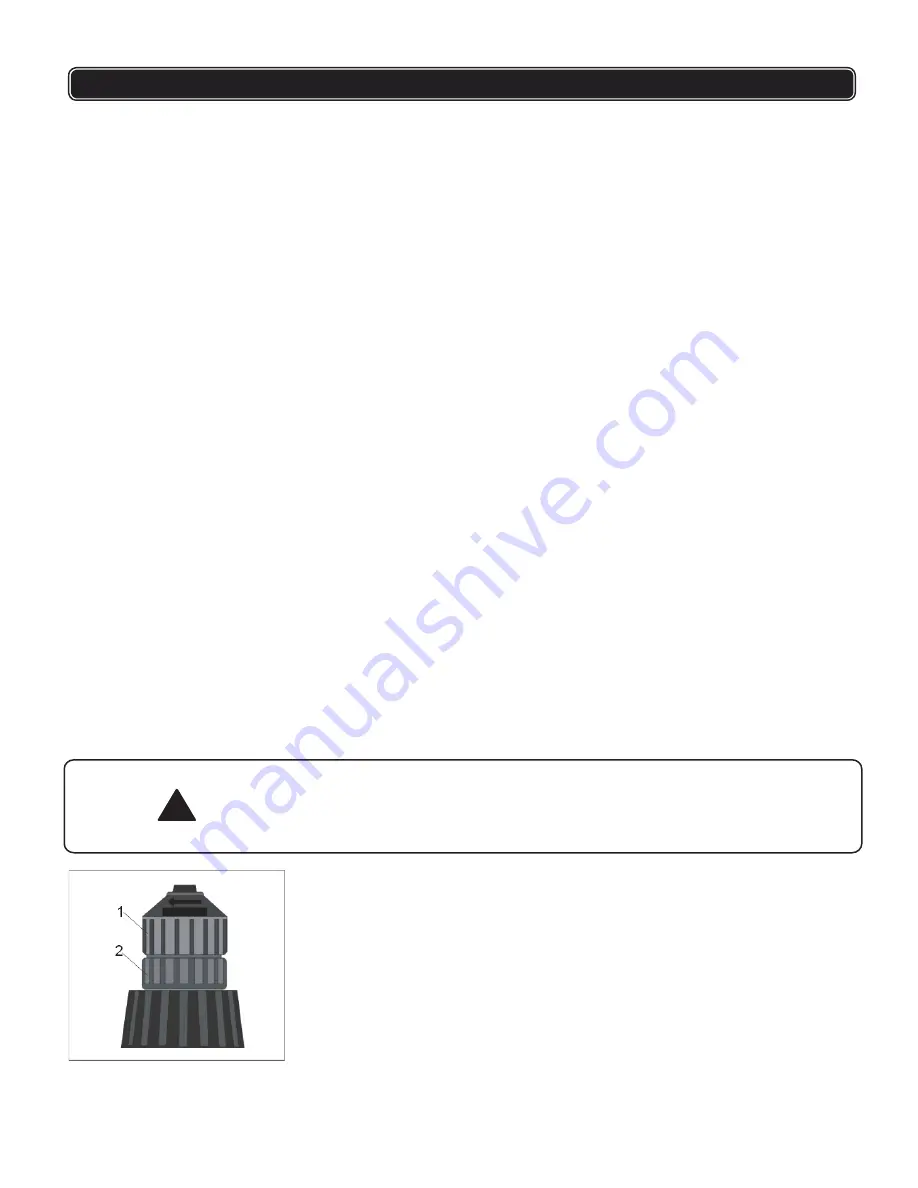
Note there are two rings on the chuck.

chuck tightening ring of the chuck

hand, holding the second chuck stop ring to prevent the motor turning;  

this closes the jaws of the chuck.  

Turning that same chuck tightening ring counter-clockwise opens the jaws.

Open the jaws to insert a bit and then close the jaws so they clamp the bit 

tightl

ROTATION DIRECTION

Your drill is equipped with a 3-position forward/reverse/neutral-lock switch 

through the housing above the trigger.

1. When knob is pushed toward the left, rotation is forward (clockwise).

2. When pushed in from the left to the right side, rotation is reversed

(counter-clockwise).

3. When in center position, it is locked in neutral and the trigger is blocked. Do

not push the rotation direction knob until the chuck stops turning.

y.

1.

2.

3.

!

Caution:

Fully charge battery before first use. The battery will reach full capacity

after being charged and discharged several times. 

Avoid short periods of charging. Only charge battery pack when fully 

empty.

Charger and battery pack will be warm when charging.

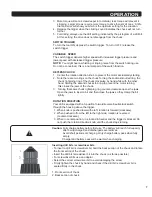
Inserting drill bits / screwdriver bits

To insert a drill bit / screwdriver bit, hold the back section of the chuck and rotate

the front section of the chuck

Insert the drill bit / screwdriver bit into the chuck ( as far as possible )

For screwdriver bits use an adaptor

Select the correct screwdriver bit to avoid damaging the screw

Firmly tighten the chuck by hand and check if the drill bit / screwdriver bit is

seated firmly in the chuck

1. Front section of chuck

2. Back section of chuck

Summary of Contents for CAB-CT317

Page 1: ...N MAX CORDLESS DRILL PROJECT KIT SAVE THIS MANUAL You will need this manual for safety instructions operating procedures and warranty Put it and the original sales receipt in a safe dry place for future reference Operator s Manual T O O L S ...

Page 2: ...used properly dust collection can reduce situations related to dust and debris hazards Do not run the cordless drill while carrying it at your side A spinning socket or bit could become entangled with clothing and injury may result Disconnect the plug or remove the battery from tool and place the switch in the locked or OFF position before making any assembly adjustments changing accessories perfo...

Page 3: ...ed with 2 wire or 3 wire extension cords Only round jacketed U L Underwriters Laboratories listed extension cords should be used If you are going to use an extension cord outside make sure the cord is manufactured for outdoor use NOTE Most cords used for outdoor use can also be used indoors The letters W or WA on the cord jacket mean the cord is suitable for outdoor use 4 An extension cord must be...

Page 4: ...t and will prevent serious damage to the battery Never over discharge a battery by using the tool even after tool performance has decreased When tool performance begins to diminish stop the tool and recharge the battery for optimal performance Allow the tool to cool down after use avoid placing the charger and tool in a warm environment The charger and battery may become warm to touch while chargi...

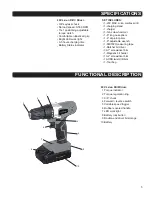
Page 5: ...8 keyless chuck No load speed 0 550 RPM 15 1 positioning adjustable torque clutch Comfortable rubberized grip Bright LED work light 3 5 hours charging time SET INCLUDES 1 20V MAX Li ion cordless drill 1 charging stand 1 charger 1 12oz claw hammer 1 6 long nose pliers 1 6 slip joint pliers 1 8 adjustable wrench 1 5M 16Ft measuring tape 1 Ratchet bit driver 39 1 screwdriver bits 1 Magnetic bit holde...

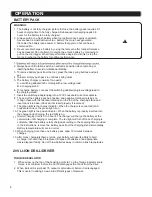
Page 6: ...nsert simply push pack in until lock spring clicks The battery charger consists of two parts A a switching adapter 120 volt plug with a low voltage lead B a charging stand To recharge battery connnect the switching adapter plug low voltage lead to the charging stand 1 2 3 4 The green light is the charge indicator When the charger is connected toAC household current the green light is on The green ...

Page 7: ...o prevent the motor turning this closes the jaws of the chuck Turning that same chuck tightening ring counter clockwise opens the jaws Open the jaws to insert a bit and then close the jaws so they clamp the bit tightl ROTATION DIRECTION Your drill is equipped with a 3 position forward reverse neutral lock switch through the housing above the trigger 1 When knob is pushed toward the left rotation i...

Page 8: ...ck jaws as widely as possible so you can get at the chuck retaining screw Unscrew the chuck retaining screw with a Philips screwdriver Note that this is a left hand threaded screw and you remove it by turning it clockwise Clamp the shorter arm of a large Allen wrench in the chuck aligning it with about 3 8 10 mm above that surface Or press the drill body on the working table and place the chuck ov...

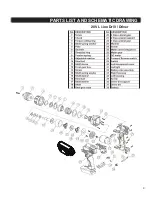
Page 9: ...9 PARTS LIST AND SCHEMATIC DRAWING 20V Li ion Drill Driver ...

Page 10: ...0V LI ION MAX CONSERVEZ CE MANUEL Vous aurez besoin de ce manuel pour les instructions de sécurité les procédures d utilisation et la garantie Placez le et le reçu de vente original dans un endroit sec et sûr pour référence future Manuel de l Opérateur T O O L S ...

Page 11: ...en mouvement de cette machine gardez vos vêtements gants cheveux ou bijoux à l écart de toute machinerie en mouvement 7 Assurez vous de connecter et d utiliser correctement l appareil qui extrait et recueille la poussière Lorsqu elle est utilisée correctement la collecte de la poussière peut réduire les situations liées aux risques de poussière et de débris 8 Ne faites pas fonctionner la perceuse ...

Page 12: ...térieur REMARQUE La plupart des cordons utilisés pour une utilisation en extérieur peuvent également être utilisés à l intérieur Les lettres W ou WA sur la veste de cordon signifient que le cordon est adapté pour une utilisation en extérieur 4 Une rallonge doit avoir le calibre approprié diamètre de fil AWG ou Calibre de Fil Américaine pour être utilisée en toute sécurité éviter les pertes de puis...

Page 13: ... Les outils corrects feront le travail mieux et plus sûr au taux pour lequel il est conçu 3 N utilisez pas d outils si l interrupteur ne l allume pas ou l éteint Tout outil qui ne peut pas être contrôlé par l interrupteur est dangereux et doit être réparé 4 Débranchez la fiche de la source d alimentation avant d effectuer des réglages de changer d accessoire ou de ranger l outil De telles mesures ...

Page 14: ...ur 1 Arrache clou 12oz 1 Pince à nez long 6 1 Pince multiprise6 1 Clef à molette 8 1 Ruban à mesurer 5M 16Ft 1 Pilote de bit à cliquet 39 1 Forets de tournevis 1 Porte forets magnétique 10 2 Forets de tournevis 10 HSS Forets hélicoïdaux 1 Sac d outils Perceuse Li ion 20V 1 Indicateur de couple 2 Bague de régulation de couple 3 Mandrin 3 8 4 Interrupteur avant arrière 5 Gâchette de vitesse variable...

Page 15: ...n branchez le câble basse tension au support de charge 7 Insérez l adaptateur la fiche de commutation dans une prise de courant domestique de 120 V 8 L extrémité de la batterie a des marques terminales positives et négatives Alignez les avec les marques identiques sur le dessus du support de charge et insérez le pack dans la base Le pack ne sera pas inséré correctement s il est inversé 9 Le voyant...

Page 16: ...errage du mandrin dans le sens inverse des aiguilles d une montre et ouvre les mâchoires Ouvrez les mâchoires pour insérer un peu puis fermez les mâchoires afin qu elles serrent le foret DIRECTION DE ROTATION Votre perceuse est équipée d un interrupteur de marche avant arrière neutre à 3 positions à travers le boîtier au dessus de la gâchette 1 Lorsque le bouton est poussé vers la gauche la rotati...

Page 17: ...s court d une grande clé Allen dans le mandrin en l alignant avec la mâchoire afin qu ils puissent saisir trois de ses six côtés 8 Placez la perceuse sur une surface plane et soutenez le mandrin avec un morceau de bois d environ 10 mm 3 8 au dessus de cette surface Ou appuyez sur le corps de perçage sur la table de travail et placez le mandrin sur le bord de la table Faites attention avec votre ma...

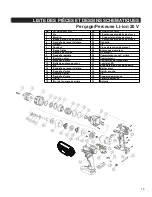
Page 18: ... de jonction de moteur 7 Bague filetée 26 Engrenage de moteur 8 Ressort de torsion 27 DC moteur 9 Rondelle réglable 28 Commutateur avant arrière 10 Boulet en acier 29 Commutateur 11 Manchon d arbre 30 Couvercle Led transparent 12 Boîte de engrenage avant 31 Lumière LED 13 Vis 32 Ensemble de pinces de batterie 14 Rondelle de ressort d arbre 33 Boîtier droit 15 Rondelle d arbre 34 Boîtier gauche 16 ...

Reviews: