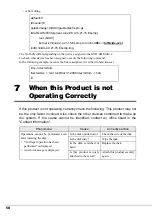
44
7
Attach the covers to the server.
3.4
How to Install the CD-ROM drive to a Server
to which a thick type CD-ROM drive has
been installed
1
Connect the provided conversion DC cable to the connector of this
product.
2
Remove the covers from the server.
Refer to "Installing Options" in the "User's Guide" in the PRIMERGY Document & Tool CD
provided with the server.
3
Remove the thick type CD-ROM drive from the server.
Disconnect the interface cables and the power cables connected to the thick type CD-ROM
drive. Pull the CD-ROM with the installation rail outwards while pulling the rails attached to
the left and right and remove it.
4
Remove the rails from the thick type CD-ROM drive and attach it to
this product.
There are two types of installation rails, an installation rail that can be secured using 4
screws and an installation rail that can be secured by inserting tabs in the screw holes. When
securing this product using screws, use the provided screws for installing a 5 inch bay.
5
Install this product in the server.
Push this product into the bay that used to contain the thick type CD-ROM until a click is
heard.
Connect the interface cables and power cables removed in Step 3.
Connect the power cable to the conversion DC cable.
6
Attach the covers to the server.
Connect the conversion DC cable
Summary of Contents for PG-DVA102D
Page 2: ...2 PRIMERGY DVD RAM DVD RAM PRIMERGY CD 2006 5...
Page 3: ...3 J CD DVD CD DVD setup exe OS Windows...
Page 5: ...5 J...
Page 6: ...6 1 1 DHHS 21 CFR Subchapter J 1 IEC 60825 1 CENELEC EN 60825 1 JIS JISC6802 3A 3B 1 3A 3B...
Page 12: ...12 DVD RAM Ctrl Alt Delete DVD RAM DVD RAM CD ROM CD ROM DVD DVD 1 14mm 1 5mm DVD 4 4 2 LED...
Page 14: ...14 2 LED LED 4 P 18 LED Ready LED...
Page 17: ...3 17 J 6 2 7 3 4 CD ROM 1 DC 2 CD 3 CD ROM CD ROM 4 CD ROM 5 M3 4 5 CD ROM 3 DC 6 DC...
Page 18: ...18 4 4 1 1...
Page 19: ...4 19 J 2 3 4...
Page 20: ...20 4 2 4 1 P 18 1 2 CD DVD...
Page 54: ...54...
Page 56: ......

