background image

8

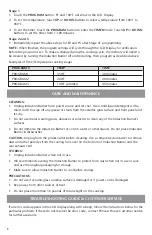
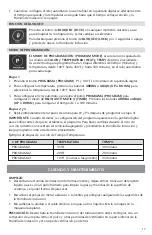
Stage 1

1.  Touch the 

PROGRAM

 button. P1 and 100°F will show in the LCD Display.

2.  To set the temperature, touch 

UP

 or 

DOWN

 buttons to select a temperature from 100°F to 

450°F.

3.  To set the timer, touch the 

PROGRAM

 button to enter the 

TIMER

 mode. Touch 

UP

 or 

DOWN 

buttons to set the timer from 1-180 minutes.

Stage 2 and 3

•  Immediately repeat the above steps for P2 and P3 after Stage #1 programming.

NOTE:

 When finished, the program settings will cycle through the LCD Display for verification 

before the program is set. To make a change during the cooking cycle, the memory will need to 
be cleared by turning the Induction Burner off and restarting, then program as described above.
Examples of Time/Temperature cooking stages

PROGRAM # 

TEMP 

TIME

PROGRAM 1 

350°F 

30 minutes

PROGRAM 2 

200°F 

20 minutes

PROGRAM 3 

100°F (simmer) 

45 minutes

CARE AND MAINTENANCE

CLEANING:

•  Unplug Induction Burner from power source and let cool. Use a mild liquid detergent with a 

moist cloth to wipe off any grease or stains from the ceramic glass surface and front panel and 
let dry.

•  Do not use metal scouring pads, abrasives or solvents to clean any of the Induction Burner’s 

surfaces.

•  Do not immerse the Induction Burner or cord in water or other liquids. Do not place Induction 

Burner in dishwasher.

CAUTION:

 Unplug from the power outlet before cleaning. Use a compressed air duster to remove 

dust and other particles from the cooling fan cover on the bottom of Induction Burner and the 
rear exhaust vent.

STORING:

•  Unplug Induction Burner when not in use.
•  We recommend covering the Induction Burner to protect from dust when not in use or save 

and use the original packaging for storage.

•  Make sure to allow Induction Burner to cool before storing.

PRECAUTIONS:

•  Do not use if ceramic glass cooktop surface is damaged or if power cord is damaged.
•  Keep away from other sources of heat.
•  Do not place more than 50 pounds of total weight on the cooktop.

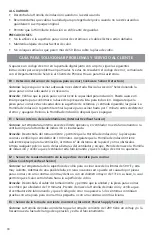
TROUBLESHOOTING GUIDE & CUSTOMER SERVICE

If an error code appears in the LCD display along with a beep, follow the instructions below for the 
particular problem. If these do not resolve the error code, contact Princess House Customer Service 
for further assistance.

Summary of Contents for Precision 1800 Plus

Page 1: ...INSTRUCTION MANUAL MY PRINCESS HOUSE CONSULTANT PHONE NUMBER C5091 1 17 Princess House Induction Burner...

Page 2: ...efficient than electric and gas cooktops This exclusive Induction Burner is ideal for everyday use and with its 1800 watts of power and larger cooking surface it will give you a full cooking experienc...

Page 3: ...eat unopened cans of food The cans could explode Do not use in or around flammable or explosive environments Administer close supervision when operating around children Electric shock hazard Never att...

Page 4: ...rect the interference by one or more of the following measures Reorient or relocate the receiving antenna Increase the separation between the equipment and receiver Connect to an outlet on a circuit d...

Page 5: ...on Burner is initially powered on GENERAL INFORMATION 1 Your Precision 1800 Plus Induction Burner offers 3 cooking operations Heat Mode Temp Mode and Program Mode It also includes a 180 minute TIMER a...

Page 6: ...s It offers quick heating when more accurate temperature control is not a requirement If temperature control is required use the TEMP MODE Touch the ON OFF POWER button to turn on the Induction Burner...

Page 7: ...350 F 400 F Medium High Boil Fry Sear 425 F 450 F High Boil Fry Sear 180 MINUTE AUTOMATIC TIMER The TIMER can be set from 1 180 minutes when using either Heat or Temp Mode The timer is adjustable in 1...

Page 8: ...stains from the ceramic glass surface and front panel and let dry Do not use metal scouring pads abrasives or solvents to clean any of the Induction Burner s surfaces Do not immerse the Induction Burn...

Page 9: ...nduction Burner back on and verify the cooling fan is operating and the error code is removed E2 Glass Cooktop Overheat Sensor Symptom Glass cooktop surface temperature exceeds its operation limit of...

Page 10: ...ER EXPIRATION OF THE EXPRESS ONE YEAR WARRANTY This warranty gives you specific legal rights which may vary from state to state Some of the provisions set forth above may not be applicable to you HALF...

Page 11: ...nte el calor a la pieza Si la Hornilla de inducci n se prende no se calentar hasta que la olla entre en contacto con la superficie Es m s fresca r pida segura y consume menos energ a que las superfici...

Page 12: ...as o con piezas para cocinar calientes sobre la misma No coloques objetos de metal sobre la superficie para cocinar s lo art culos para cocinar de metal No coloques la Hornilla de inducci n sobre ning...

Page 13: ...es puede causar interferencia perjudicial a las radiocomunicaciones Si esta unidad causa interferencia perjudicial a la recepci n de radio o televisi n la cual puede determinarse cuando la unidad se p...

Page 14: ...adecuada de 120V 15A y verifica que la luz roja del INDICADOR DE PODER POWER INDICATOR est iluminada por encima del bot n de prendido y apagado ON OFF 3 Aseg rate que la pieza para cocinar adecuada es...

Page 15: ...vicio al Cliente al 508 823 6800 MODOS DE OPERACIONES Y CONTROLES MODO DE OPERACI N DE CALOR 10 funciones ajustables de vatios potencias Usa el MODO DE CALOR HEAT MODE el cual es la funci n predetermi...

Page 16: ...deseada entre 100 F y 450 F presionando los botones de ARRIBA o ABAJO UP o DOWN En cualquier momento durante su uso presiona el bot n de HERVIR COCINAR A FUEGO LENTO BOIL SIMMER para cambiar la funci...

Page 17: ...UP o DOWN para configurar el tiempo de 1 a 180 minutos Etapas 2 y 3 Repite inmediatamente los pasos de arriba para P2 y P3 despu s de programar la etapa 1 IMPORTANTE Cuando termines la configuraci n d...

Page 18: ...ento Internal Overheat Sensor S ntoma La temperatura interna excede el l mite operativo el ventilador no est funcionando o la ventilaci n para la Hornilla de inducci n es inadecuada Remedio Desenchufa...

Page 19: ...TA O USO DEL PRODUCTO ESTAS RENUNCIAS DE RESPONSABILIDADES CONTINUAR N DESPU S DE LA EXPIRACI N DE LA GARANT A EXPL CITA Esta garant a le otorga derechos legales espec ficos que pueden variar de un es...

Page 20: ...princesshouse com 2017 Princess House Inc C5091 1 17 M A I N O F F I C E 470 Myles Standish Blvd Taunton MA USA 02780 e mail custsvc princesshouse com...

Reviews: