17
Bluetooth Wireless Data Communication
The standard Mt3B printer has the Bluetooth module factory installed option.
It requires a host, which also has hardware compatible with the Bluetooth
wireless communication standard. It also supports both Serial RS232 and IrDA
compatible infrared communication interfaces, with the appropriate DIP switch
settings.
The Bluetooth data link functions the same as IrDA with the important
exception that no effort is required to physically align the host and printer in
any particular fashion. If your printer is configured to use Bluetooth (see
“Configuration and Data Connectivity”), simply send the job from the host and
tear off the output – no other action is required.
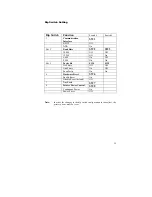
Bluetooth RF communication occurs at 19.2Kb/sec and odd parity which
requires dip switch #3 to be set to the ON position for 19.2Kb/sec and dip
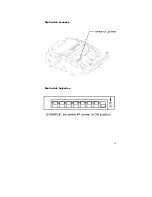
switch #4 set to the ON position for odd parity. To gain access to the dip
switch, open the paper door and remove the paper roll. The dip switch is
located at the middle of the paper roll slot. Refer to the pg. 14 for the proper
location of the referenced dip switch settings.
Dip switch #3 – ON
Dip switch #4 – ON
The Mt3B printer has been electronically modified to help extend the life of the
internal battery cartridge due to the current demands of Bluetooth RF
communication. The printer modification is such that the printer can be set to
operate in either the MANUAL POWER OFF or CONTINUOUS ON mode of
operation.
MANUAL POWER OFF mode:
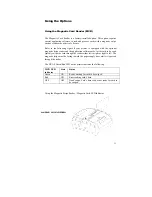
When demonstrating RF wireless communication, turn the printer on by
pressing the ON switch located on the left side of the printer. The printer will
remain active waiting for the wireless print command. Pressing the ON switch
again will turn the printer OFF. For each wireless demonstration, again turn
the printer on by pressing the ON switch. Operation in this fashion will greatly
extend the life of the battery cartridge.
Dip switch #3 – ON
Dip switch #4 – ON
EXTENDED CONTINUOUS ON mode;
If it were desired to leave the printer on for extended operation, it would be
necessary to switch dip switch #8 to the ON position. Be aware that operating
with dip switch #8 in this ON position means that the printer is always on
placing the highest current demand from the battery resulting in reduced battery
charge lift. To offset this situation, it is recommended to use the adapter to


