7
2.2.4
Serial Interface (RS-232C) as option
2.2.5
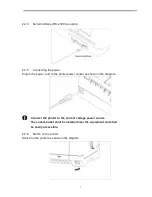
Connecting the power
Plug in the power cord to the printer power socket as shown in the diagram.
Connect the printer to the correct voltage power source.
The socket-outlet shall be installed near the equipment and shall
be easily accessible.
2.2.6
Switch on the printer
Switch on the printer as shown in the diagram.
Summary of Contents for PrintMaster 700 Series
Page 1: ...PrintMaster 700 Series Printer...
Page 2: ......
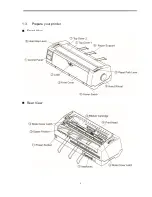
Page 11: ...2 1 3 Prepare your printer n Front View n Rear View...
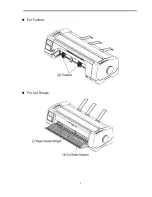
Page 12: ...3 n For Fanfold n For Cut Sheets...
Page 23: ...14 3 2 2 2 Rear tractors for fanfold...
Page 24: ...15 3 2 2 3 Top pull tractors for fanfold For the steps and please refer to the 2 3...
Page 27: ...18 This page left intentionally blank...
Page 28: ...19 This page left intentionally blank...
Page 29: ...20 This page left intentionally blank...
Page 30: ...21 This page left intentionally blank...
Page 31: ...22 This page left intentionally blank...
Page 36: ...27 This page left intentionally blank...
Page 37: ...28 This page left intentionally blank...
Page 40: ...31 Menu Printout...
Page 85: ...76 7 Addendum 7 1 Character Set standard character set 1 standard character set 2...
Page 86: ...77 IBM character set 1 IBM character set 2...
Page 87: ...78 OCR A character set 1 OCR A character set 2...
Page 88: ...79 OCR B character set 1 OCR B character set 2...
Page 119: ...110 9 2 Non Scalable Fonts Code Pages and National Character Sets...
Page 120: ...111...


