PrintMaster 860 Series Quick Setup Instructions
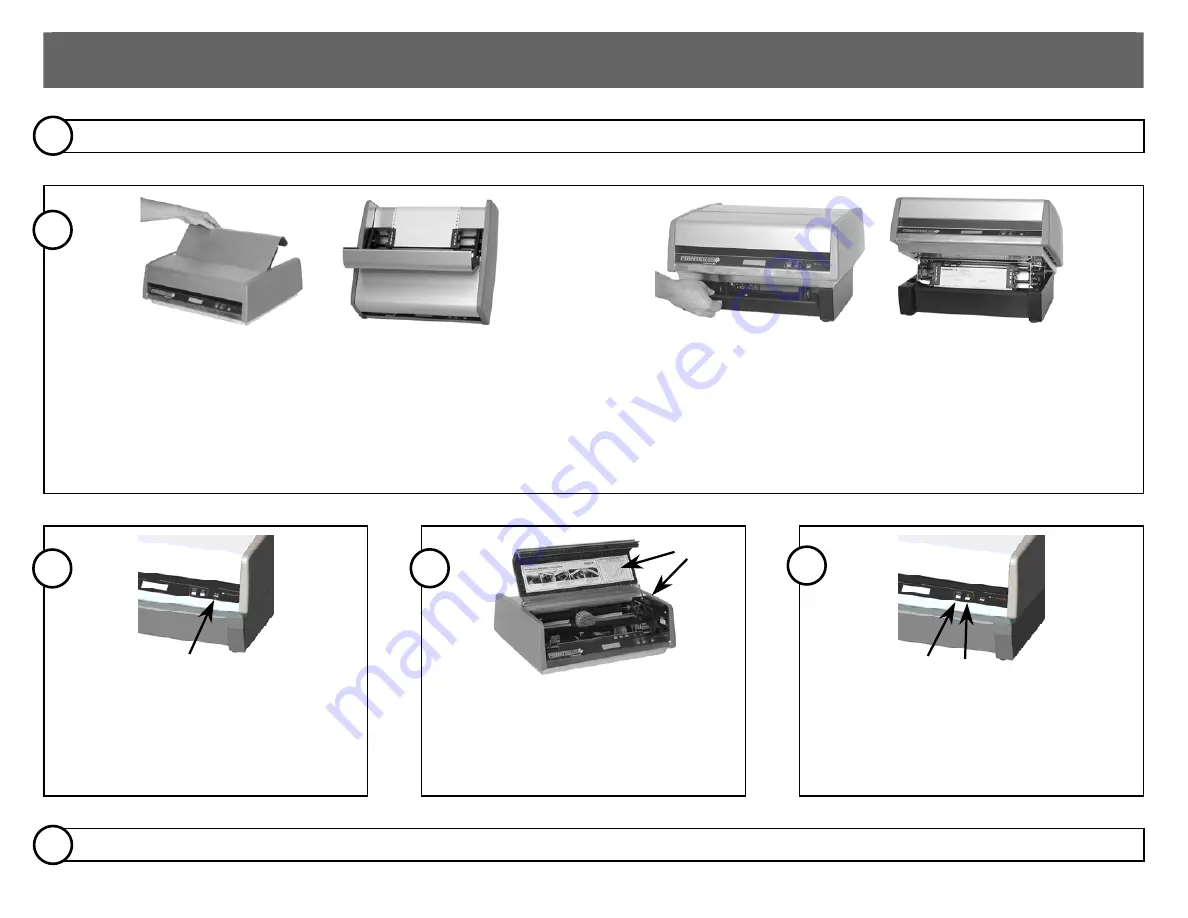
Unpack the Printer:
Remove all packing materials, and place on table or print stand. ––
Connect
the power and host interface cables.
1
Load Paper
– To access the rear
ed tractors, lift the lid on
ack
e
paper fe
the b
of the printer. If the tractors are nost set to the proper wideth for the form you
are loading, locate the reen lever on the side of the right-hand tractor and
move it toward the front of the printer to allow the tractor to slide left or right.
Note that the left-hand tractor position is not adustable. Open the doors on th
top of the tractors and place the holes in the edges of the form, face down,
over the pins in the tractor. Make sure the top edge of the form will not extend
beyond the tractor doors and close the doors. Slide the right-hand tractor so
that the form is taut between the tractors and lock the tractor in place by
moving the green lever down.
If your printer is a PrintMaster 862, open the access door for the lower tractors. Load
a form in the bottom tractors with the front of the form facing you by using the same
procedure used for loading the rear tractors. Make sure that top edge of the form
does not extend above the top of the tractors.
2
Turn the Printer On
– Press the
Online/Power button to turn the
printer on.
Install the Ribbon
– Follow the
side
instructions on the ribbon lid and the
of the printer to load the ribbon cartridge.
CAUTION: DO NOT TIGHTEN RIBBON!
The printer will do this automatically when
the ribbon lid is closed.
Select the Form
you wi
sh to print on
using the UNLOAD/CHANGE button, and
then press the LOAD button to load the
form into position for printing.
3
4
5
Review the configuration settings
described on the next page. When complete, press the “Online” button to allow the printer to receive data and begin printing.
ber 6818 Rev. A
6
Part Num


