72
Chapter
3
Setting SLPA Configuration Parameters
•
Press the + key to move right or the – key to move left.
NOTE: In menus with numeric ranges of more than 50 numbers, hold down
the + or – key for more than 2 seconds to move through the range in
increments of 5. To move in increments of 1 again, release your hold
on the + or – key.
Selecting A Menu Option
To select an option, you need to press the
↵
key. By default, however, the
↵
key is “locked” when the SLPA is turned on to prevent accidental changes
to the configuration menu. If you press the
↵
key when the key is locked, the
message “ENTER SWITCH LOCKED” displays on the LCD for one second
and the value will not be selected.
To unlock the
↵
key, press the
↓
and
↵
keys at the same time. This toggles
the ENTER/LOCK function.
•
If this function is performed while the
↵
key is locked, the message
“ENTER SWITCH UNLOCKED” displays for one second, and the
↵
key
will be unlocked.
•
If this function is performed while the
↵
key is unlocked, the message
“ENTER SWITCH LOCKED” displays for one second, and the
↵
key will
be locked.
When you press the
↵
key (with the
↵
key unlocked), you select the value or
option that displays. An asterisk displays after the value you selected, and the
configuration is changed immediately.
IMPORTANT
This change takes effect for all subsequent data and operations for the
SLPA as soon as the
↵
key is pressed and the asterisk (*) is displayed.
The configuration change(s) stay in effect only while the SLPA is
powered on. When the power is turned off, all current configurations will
be lost unless changes made to it are saved via the CONFIG. CONTROL
menu.
To save configuration information permanently or to select it as the power-up
default, see “Saving A Configuration” on page 73.
Changing SLPA Settings
You can change (or “configure”) SLPA settings, such as print speed or
emulations, through the control panel as follows:
1.
Press the Menu key until the following message displays:
2.
Press the
↓
key to cycle through these options:
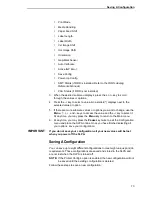
•
Print Intensity
•
Print Speed
MENU MODE
QUICK SETUP
Summary of Contents for LPA8000
Page 2: ......
Page 14: ...14 Table of Contents...
Page 70: ...70 Chapter 2 Printing And Applying Labels...
Page 244: ...244 Chapter 6 Troubleshooting Other Symptoms...
Page 252: ...252 Appendix A Communications Interface...
Page 274: ...274 Appendix C Loading Flash Memory...
Page 288: ...288...
Page 289: ......
Page 290: ...250117 001B 250117 001...


