APPENDIX D
79
Appendix D – Envelope Printing Attachment
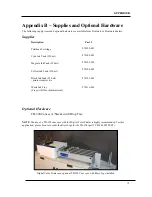
This optional attachment (42-110-52) is used primarily when printing envelopes, but it can also be useful
when feeding other media types. The attachment flattens the envelope, to help reduce contact between the
media and the printhead; thereby reducing the chance for scuff marks and smudging.
NOTE
:
For your convenience; new printers are shipped with this device already installed.
Installation Instructions:
1.
Open the Top Cover.
Press the Printhead Latch Release Button
(or click “Printhead Release” from the User
Interface screen in the Toolbox). The Printer
will do a partial deprime (pumps some ink
back into the Tanks) and then it will release
the Printhead Latch.
Wait for the Printhead Latch to open. DO
NOT FORCE THE LATCH OPEN.
DAMAGE WILL RESULT.
2.
Make sure the Printhead Latch is fully
opened to retract the ink couplings. Tilt the
Printhead Cartridge back toward the ink
couplings and lift it up slightly.
This will keep the printing surface out of the
way during device installation.
3.
Open the Clamshell (top section of Print
Engine).
4.
[A]
Slide the Envelope Printing Attachment
up behind the metal support; as shown.
[B]
Push the Attachment to the right, to lock
the Attachment in place.
[C]
While the Clamshell is still open, snap
the Printhead Cartridge back into place.
NOTE: Make sure the Attachment is aligned
with the Printhead Cartridge as shown.
5.
Reinstall the printhead. Refer to the section
titled “
Installing the Printhead Cartridge
”
(Operators Guide).
6.
Run “Printhead Cartridge Conditioning
Routines” and test for proper operation.
Removal:
1.
Follow steps 1 – 3, as outlined above.
2.
Remove the Envelope Printing Attachment
by reversion the procedure described in step
4 above.
3.
Follow steps 5 & 6, as outlined above.
Summary of Contents for iJet Press
Page 1: ...Digital Color Printer OPERATOR S GUIDE ...
Page 6: ......


