background image


2.


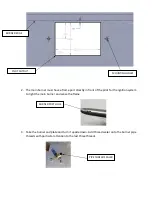
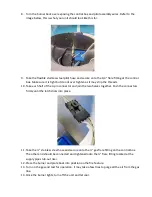
The main burner must have a flame port directly in front of the pilot for the ignition system 
to light the main burner and sense the flame. 


3.


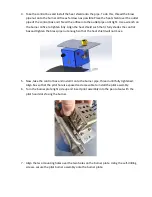
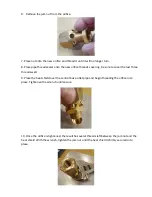
Take the burner and plate and turn it upside down. Add thread sealer onto the burner pipe 
threads with particular attention to the last three threads.   


   BURNER EDGE 

   PILOT CUTOUT 
HOLE 

   MOUNTING HOLES 

BURNER PORT HOLE 

PIPE THREAD SEALER 

Summary of Contents for Hardscapes Moderno 5

Page 1: ...INSTALLATION OPERATION MAINTENANCE MANUAL For model PH Ignite 12VAC Auto Burner Ignition System...

Page 2: ...CTION 2 General Description 2 1 System Overview 2 2 Product Dimensions 2 3 Gas Electric Requirements 2 4 Product Contents Section 3 Installation Details 3 1 Preparation Installation 3 2 Gas Orifice Se...

Page 3: ...state or local requirement exists the installer or maintainer must be a qualified professional with sufficient experience in installation and maintenance of gas appliances Prior to installation read...

Page 4: ...hot surfaces or open flames Do not ignite fire feature when media rocks glass is wet Doing so may cause media to crack and burst It is important to inspect your fire feature before every use Make sure...

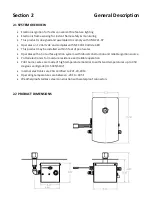
Page 5: ...installed within 5 feet of pool water Operates with a hot surface ignition system with robust construction and reliable ignition source Potted electronics for moisture resistance and reliable operatio...

Page 6: ...supplier to verify gas flows and pressures available at the location of your installation In many cases utility companies will install larger meters at no charge to accommodate larger flows WARNING TH...

Page 7: ...tall the 1 2 flare to NPT fitting into the reducer fitting pipe You may place a manual shut off valve between the elbow and the reducer for future maintenance Test gas piping for leaks Note The gas an...

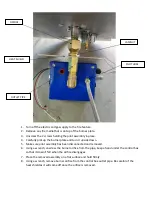
Page 8: ...oid gas leaks If this fitting is not tightened correctly it will leak and potentially ignite and can damage the control system 3 Connect the 12 VAC wires from the control box to the electrical wires c...

Page 9: ...on system to light the main burner and sense the flame 3 Take the burner and plate and turn it upside down Add thread sealer onto the burner pipe threads with particular attention to the last three th...

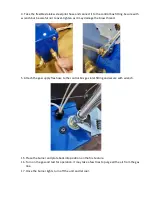
Page 10: ...hades the control box and tighten the brass pipe nut enough so that the heat shield will not move 5 Now take the control box and install it onto the burner pipe thread until fully tightened Align box...

Page 11: ...f the 4 pin connector and join the two halves together Push the connectors firmly until the latch clicks into place 11 Take the stainless steel hose and secure onto the gas flare fitting on the contro...

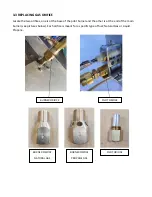
Page 12: ...se of the pilot burner and the other is at the end of the main burner see pictures below Each orifice is meant for a specific type of fuel Natural Gas or Liquid Propane BURNER ORIFICE PILOT ORIFICE BU...

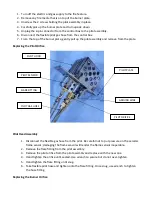
Page 13: ...ce Pilot Head Assembly 1 Disconnect the flexible gas hose from the pilot Be careful not to put pressure on the ceramic flame sensor damaging the flame sensor will render the flame sensor inoperable 2...

Page 14: ...ot assembly has been disconnected and removed 6 Using a wrench unscrew the burner orifice from the pipe keep a hand under the control box so that it doesn t fall when the orifice disengages 7 Place th...

Page 15: ...g be sure to cover the last three threads well 9 Place the heat shield over the control box outlet pipe and begin threading the orifice into place Tighten with a wrench until secure 10 Once the orific...

Page 16: ...Place pipe thread sealer onto the burner pipe 13 Place the control box outlet onto the burner pipe and turn clockwise until tight 14 Align the control box to where the pilot hole is accessible PILOT H...

Page 17: ...de of the pilot hood is facing the burner 2 Align the pilot plate mounting holes and secure the two mounting screws through the pilot plate to the burner plate 3 Turn the burner plate upside down Take...

Page 18: ...y damage the brass thread 5 Attach the gas supply flex hose to the control box gas inlet fitting and secure with wrench 15 Place the burner and plate back into position on the fire feature 16 Turn on...

Page 19: ...lot burner will then ignite and stay lit for 6 to 8 seconds until the main burner produces flames Once the burner is lit the ignitor will turn off and the flame sensor will keep the flames going Note...

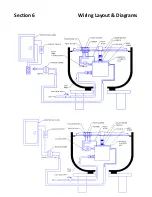
Page 20: ...Section 6 Wiring Layout Diagrams...

Page 21: ...ed of replacement f Igniter turns red but does not ignite the pilot burner the orifice may be plugged and needs cleaning or replacement 2 Pilot flame ignites but main burner does not a Control box wil...

Page 22: ...or any defects resulting from misuse user error installation error abuse repair or alteration The use of wood or fuels other than those specified for use with this unit by Prism Hardscapes will void w...

Page 23: ......
Reviews: