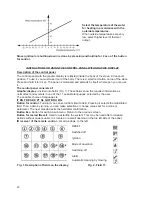
Select the temperature of the water
for heating in accordance with the
outside temperatures.
When outside temperatures are very
low, select higher level of thermal
output.
Stove ignition /or shutting-down / is done by pressing and holding for 2 sec. of the button
for control.
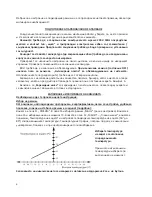
INSTRUCTION FOR USING THE CONTROL PANEL WITH GRAPHIC DISPLAY
Description of the control panel.
The control panel with the graphic display is retracted inside the body of the stove, in transport
position. To use it, you must take it out of the body. There is a small red button on top of the stove.
Press and hold it for 3 sec. The panel is motorised and extends by itself, whereupon you can use
it.
The control panel consists of:
Graphic display -
divided into fields (Fig. 1). These fields show the required information as
normal text and symbols in one of the 11 possible languages, selected by the user.
The possible choice of languages is:
IT EN FR ES DE PT NL GR TR RU BG
Button for control.
Turning it you can scroll from field to field. Pressing it selects the highlighted
field. Then, again by turning, you can make selection or change values set for a mode or
parameter. The next pressing exits the field after confirmation.
Button Esc.
Button for exiting a sub-menu. Return to the previous screen.
Button for restart (Reset).
Used for restarting the system. This may be need after prolonged
periods without power supply. It is located in a small opening on the top left side of the panel.
IR receiver of the remote control
– small windows, to the left.
RESET
Switched off
Ignition
Mode of operation
Switching-off
Alarm
Automatic cleaning by blowing
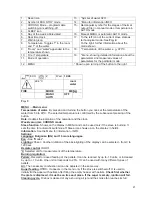
Fig. 1. Description of fields on the display.
Fig. 2. Field 17.
20
Summary of Contents for PLW 13G
Page 1: ...p 2L9 2 9 2ELLET S618 9 6 WAT 4 EA6 0 4 2 9 2 9...
Page 4: ...2 5W 48W 6mm 30mm 1...
Page 5: ...3 IR 12 15...
Page 7: ...5 2 bar 0 2 MPa ZhE K hW...
Page 8: ...6 230V 50Hz OFF 6 11 16 15 12 50 80 2...
Page 11: ...9 h h rpm lpm 1 s 5 1 5 15 17 PL 15 5 40 6 6...
Page 12: ...10 7 A01 A02 A03 A04 t A05 06 07 A08 A09 A10 A11...
Page 13: ...11 A18 5 95 17 1 2 2 IR...
Page 14: ...12 PLW 13 PLW 27...
Page 16: ...14 E E E...
Page 32: ...PRITY PLW 13G PLW 27 Year of manufacture Serial number QS passed Stamp 352 8 7 02...

