background image

Operation

Page EN-24

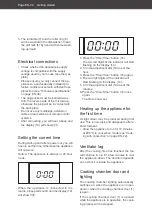
Pressing the button

Display – indicator

1x

150

2x

160

3x

170

4x

180

5x

190

6x

200

7x

210

8x

220

9x

230

10x

240

Defrosting

The appliance has 2 defrost programmes:


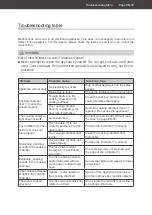
d-1

: Defrosting by weight


d-2

: Defrosting by time

Within this programme, you can freely select 

your desired defrosting time.

Defrosting by weight

1. Press the “Defrost by weight/time” but-

ton (12).

The indicator 

d-1

 and the indicators   

and   will appear on the display (14).

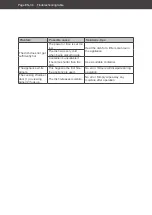
2. Turn the adjustment dial (19) until the 

display (14) shows the weight of the food 

that you want to defrost.

You can defrost food up to a weight of 

2,000 g.

3. Press the “Start/+30sec./Confirm” but-

ton (18).

Defrosting starts. The required defrosting 

time is counted down in the display (14). 

The indicators   and   flash.

Once the defrosting time has elapsed, 

5 signal tones will sound.

The defrosting time will vary depending 

on the weight you wish to defrost. For 

100 g, the defrosting time will take ap-

prox. 3 minutes and 40 seconds; for 2,000 g, 

41 minutes 40 seconds.

Defrosting by time

1. Press the “Defrost by weight/time” but-

ton (12) twice.

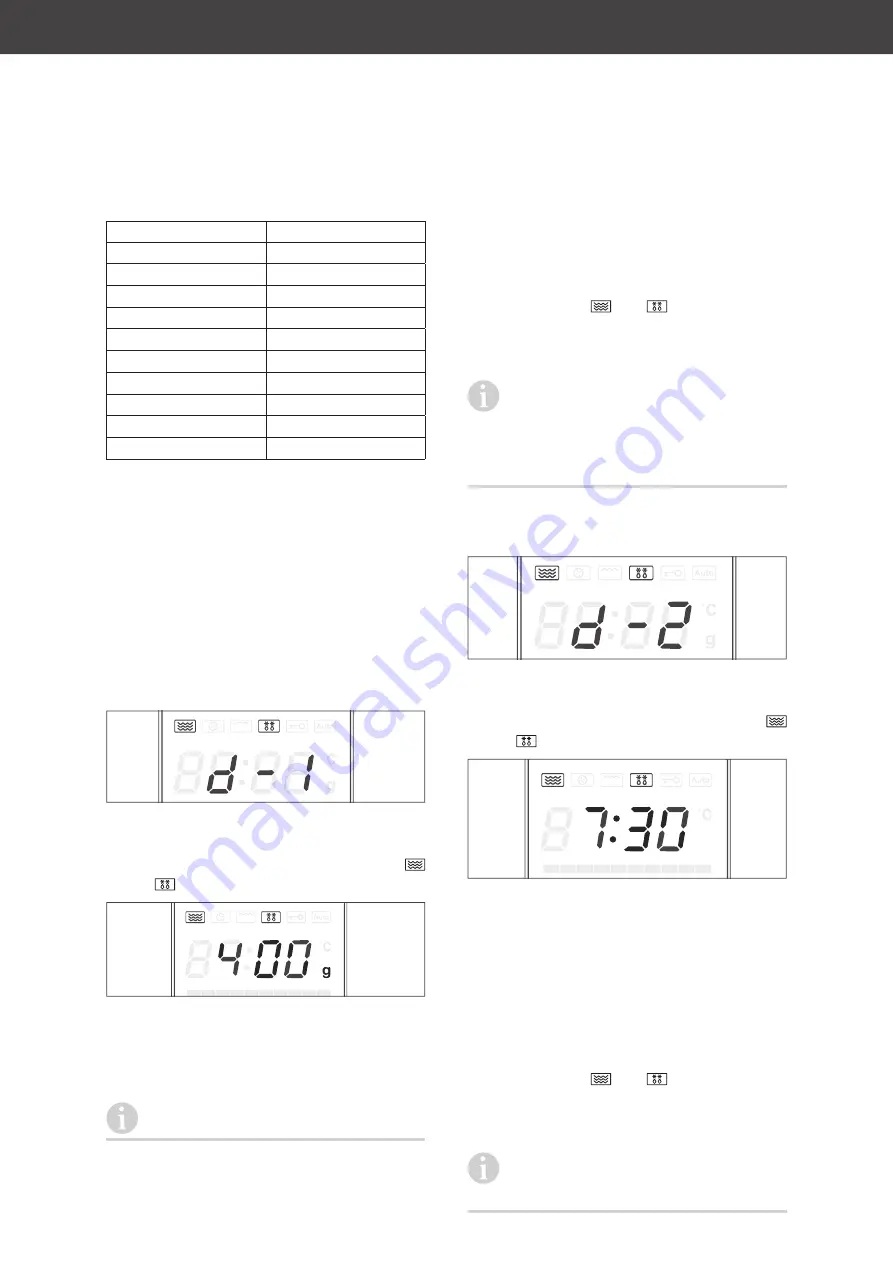
The indicator 

d-2

 and the indicators   

and   will appear on the display (14).

2. Turn the adjustment dial (19) until the dis-

play (14) shows the required defrost time.

The defrosting time must be a minimum of 

5 seconds and can be a maximum of 95:00 

minutes.

3. Press the “Start/+30sec./Confirm” but-

ton (18).

Defrosting starts. The required defrosting 

time is counted down in the display (14). 

The indicators   and   flash.

Once the defrosting time has elapsed, 

5 signal tones will sound.

You can extend the defrosting time as 

described in section “Extending the 

cooking time” on page EN-20.

Summary of Contents for 285902

Page 1: ...Anleitung Version 92446 DE 20220706 Bestell Nr 285902 Nachdruck auch auszugs weise nicht gestattet Z e i twahl Gewicht A u t o M e n Gewicht Zeit Auftauen Hei luft Grill Kombi Mikrowelle Start 30Sek...

Page 2: ...30 Inbetriebnahme DE 31 Der richtige Aufstellort DE 31 Drehteller einsetzen DE 31 Grundreinigung DE 31 Elektrischer Anschluss DE 32 Aktuelle Uhrzeit einstellen DE 32 Erstes Aufheizen DE 32 Nachlauf d...

Page 3: ...egriff warnt vor m glichen Sachsch den Symbolerkl rung Folgende Symbole finden Sie in dieser Ge brauchsanleitung Dieses Symbol verweist auf n tzliche Zusatzinformationen Dieses Symbol warnt vor einer...

Page 4: ...n um Gef hrdungen zu vermeiden Verwenden Sie das Ger t ausschlie lich wie in dieser Gebrauchsanleitung beschrieben Jede andere Verwendung gilt als nicht be stimmungsgem und kann zu Sachsch den oder so...

Page 5: ...besch digt wird muss sie durch den Hersteller oder seinen Kun dendienst oder eine hnlich qualifi zierte Person ersetzt werden um Ge f hrdungen zu vermeiden Ger t regelm ig auf Sch den pr fen Das Ger...

Page 6: ...cken keine spitzen Ge genst nde verwenden Beim Reinigen beachten Auf keinen Fall Seife scharfe k rni ge soda s ure oder l semittelhal tige oder schmirgelnde Putzmittel verwenden Empfehlenswert sind Al...

Page 7: ...al koholhaltige Speisen erhitzen Nie frittieren oder l erhitzen Die ltemperatur ist nicht kontrollierbar Wenn Rauch abgegeben wird ist das Ger t abzuschalten oder der Stecker zu ziehen und die T r ge...

Page 8: ...t im K hlschrank auftauen lassen Die Auftaufl ssigkeit muss dabei abflie en k nnen da sich sonst sch dliche Mikroorganismen bilden k nnen Tauwasser kann speziell bei Fleisch und Gefl gel gef hrliche K...

Page 9: ...e Erw rmung durch Mikrowellen beendet ist Um ein Platzen zu ver meiden stechen Sie vor dem Garen L cher in Tomaten W rstchen Au berginen oder hnliche Speisen mit einer geschlossenen Haut VORSICHT Verb...

Page 10: ...en Plastikgef e aus dem Tiefk hlger t nur so lange erw rmen bis sich die Speise in ein anderes Gef umf llen l sst Keine besch digten Gef e verwen den Sie k nnten zerbrechen und der auslaufende Inhalt...

Page 11: ...t Transport sch den aufweist 4 Sollte die Lieferung unvollst ndig sein oder das Ger t einen Transportschaden aufweisen nehmen Sie bitte Kontakt mit unserem Service auf siehe Service auf Seite DE 35 W...

Page 12: ...on 12 Taste zum Einstellen der Auftaufunktion 13 Verschiedene Funktionsanzeigen im Display 14 Display 15 Programmanzeigen im Display 16 Taste zum Einstellen der Uhrzeit und Zeitvorwahl 17 Taste zum Ab...

Page 13: ...e Ersch tterung kann die Fl ssigkeit schlagartig heraus spritzen z B beim Herausnehmen aus dem Ger t Jede Speise ben tigt zum Garen bzw Auf tauen eine bestimmte Menge Energie nach der Faustformel gro...

Page 14: ...ungszeiten enorm Die Kombination von Grill und Mikrowelle ist gut geeignet f r Gratins Aufl ufe Fisch dickere Fleischst cke mit h herem Fettge halt Gefl gel H hnchen Ente Pute gebackene Kartoffeln ber...

Page 15: ...bdeckfolien verwenden die nicht hochhitzebest ndig sind Kein Backpapier o verwenden Das Ger t bietet verschiedene Betriebsarten Mikrowelle Grill Mikrowellen Kombibetrieb und Umluft W hlen Sie f r die...

Page 16: ...Auftauen spielen Gr e und Form eine bedeutende Rolle Kleine flache St cke tauen schneller und gleichm iger auf als gro e dicke W hrend des Auftauens die schon angetauten Teile trennen da frei liegende...

Page 17: ...sch ttelt werden und die Temperatur muss vor dem Ver brauch berpr ft werden um Ver brennungen zu vermeiden R hren Sie insbesondere Babynahrung gr ndlich um um Verbrennungen zu ver meiden Pr fen Sie un...

Page 18: ...nn zu einem Brand und zu Sach sch den f hren Das Ger t nicht an einer externen Zeitschaltuhr oder einem separaten Fernwirksystem betreiben Im Brandfall die Garraumt r ge schlossen halten sofort den Ne...

Page 19: ...nt und im Display 14 er scheint die Anzeige Um die Sicherungsverriegelung Kinder sicherung auszuschalten dr cken Sie erneut die Taste Stop L schen 17 ca 3 Sekunden lang Ein Signalton ert nt und die An...

Page 20: ...Programm Auftauen nach Gewicht d 1 Mehrstufiges Garen Um die Gardauer zu verl ngern dr cken Sie w hrend des Garvorgangs die Taste Start 30Sek Best tigen 18 Die verbleibende Garzeit verl ngert sich um...

Page 21: ...n Sekunden schritten herunter die Anzeige blinkt Sie k nnen die Gardauer verl ngern wie im Abschnitt Gardauer verl ngern auf Seite DE 20 beschrieben Garvorgang unterbrechen Um den Garvorgang zu unterb...

Page 22: ...10 Auf dem Display 14 leuchtet die Anzeige auf und die Anzeige G 1 blinkt 2 Dr cken Sie die Taste Taste Grill Kom bi 10 weitere Male um zwischen den Kombi Funktionen C 1 C 2 C 3 und C 4 zu w hlen Je...

Page 23: ...rheizens leuchten am Fu des Displays 14 links beginnend allm h lich alle Balken bis zum 200 C Balken auf Dies zeigt den Fortschritt des Vorheizens an Wenn der Garraum vorgeheizt ist ert nen 2 kurze Si...

Page 24: ...ise erscheint die Sie auf tauen m chten Sie k nnen Speisen bis zu einem Ge wicht von 2 000 g auftauen 3 Dr cken Sie die Taste Start 30Sek Be st tigen 18 Das Auftauen startet Im Display 14 wird die ben...

Page 25: ...nd 2 Drehen Sie das Einstellrad 19 bis auf dem Display 14 die Anzeige 10 00 er scheint 3 Dr cken Sie die Taste Mikrowelle 9 Auf dem Display 14 blinkt die Anzeige P100 und die Anzeige erscheint 4 Dr ck...

Page 26: ...rsinn bis auf dem Display 14 die Anzeige A5 zu blinken beginnt und die An zeigen und zu sehen sind 2 Dr cken Sie die Taste Start 30Sek Be st tigen 18 Die Anzeige A5 blinkt nicht mehr 3 Drehen Sie das...

Page 27: ...180 C Balken auf Dies zeigt den Fortschritt des Vorheizens an Wenn das Vorheizen abgeschlossen ist ert nen zwei Signalt ne 4 ffnen Sie die Garraumt r 1 und stellen Sie den Kuchen in den Garraum 5 ffne...

Page 28: ...3 50 350 g 350 g 5 00 450 g 450 g 600 650 g 650 g 7 30 A5 Gem se 150 g 150 g 2 30 350 g 350 g 4 30 500 g 500 g 6 00 A6 Getr nke Kaffee ca 240 g 1 1 40 ca 480 g 2 3 00 ca 720 g 3 4 00 A7 Nudeln 50 g1...

Page 29: ...in die L ftungsschlitze und in die elekt rischen Teile dringen Das Ger t darf nicht mit einem Dampfreiniger gereinigt werden Wasserdampf kann durch Ritzen zu unter Spannung stehenden Bauteilen geraten...

Page 30: ...owellenstrahlung austreten Das Ger t darf in so einem Fall nicht benutzt werden Besonders auf die Sauberkeit der T r dichtungen und der T rdichtfl chen mit allen angrenzenden Teilen ach ten Wenn die T...

Page 31: ...emessen vom Boden muss mindestens 85 cm betragen Drehteller einsetzen Benutzen Sie den Drehteller 7 bei jeder Ver wendung des Ger ts 7 Der Drehteller 7 dreht sich w hrend des Be triebs um eine gleichm...

Page 32: ...eis Das Ger t befindet sich immer im 24 Stunden Betrieb Wenn das Ger t ans Stromnetz angeschlos sen wird ert nt ein Signalton das Display 14 zeigt 0 00 1 Dr cken Sie die Taste Uhrzeit Ti mer 16 Im Dis...

Page 33: ...egelung defekt Garraumt r 1 reparieren lassen Ger t nicht benutzen Garraumbeleuchtung funktioniert nicht Leuchte defekt An unseren Service wenden siehe Service auf Seite DE 35 Drehteller 7 dreht sich...

Page 34: ...Speise war beim Hineinstellen sehr kalt Gef ist nicht geeignet wenn es hei er als die Speise wird Ein geeignetes Gef verwenden Ger t erzeugt Ger che Dies passiert bei der Erstinbetriebnahme des Ger ts...

Page 35: ...nleitung verursachte Sch den k nnen nicht anerkannt werden Allgemeiner Service Wenden Sie sich mit Fragen Reklamationen und Zubeh rbestellung bitte an die Produktberatung Ihres Versandhauses Ersatztei...

Page 36: ...iner umweltschonenden Entsorgung sowie einer Abfallvermeidung Ma nahmen der Abfallvermeidung haben nach den Vorschriften der Richtlinie 2008 98 EG grunds tzlich Vorrang vor Ma nahmen der Abfallbewirts...

Page 37: ...nd Um welt haben Kleben Sie daher bei lithiumhalti gen Batterien und Akkus vor der Entsorgung die Pole ab um einen u eren Kurzschluss zu vermeiden Batterien und Akkus die nicht fest im Ger t verbaut s...

Page 38: ...me Grill 1100 W Leistungsaufnahme Hei luft 2500 W Versorgungsspannung 230 V 50 Hz Garraum Volumen 25 Liter Drehteller Durchmesser ca 315 mm Ger tema e H he Breite Tiefe 30 6 cm 51 3 cm 49 5 cm Leergew...

Page 39: ...nual version 92446 EN 20220706 Order no 285902 Reproduction even of ex cerpts is not permitted Z e i twahl Gewicht A u t o M e n Gewicht Zeit Auftauen Hei luft Grill Kombi Mikrowelle Start 30Sek Best...

Page 40: ...nce EN 30 Getting started EN 31 The correct storage location EN 31 Inserting the turntable EN 31 Cleaning before use EN 31 Electrical connections EN 32 Setting the current time EN 32 Heating up the ap...

Page 41: ...OTICE This term warns against possible damage to property Explanation of symbols The following symbols can be found in this user manual This symbol refers to useful additional information This symbol...

Page 42: ...is user manual Any other use is deemed improper and may result in damage to prop erty or even personal injury The manufactur er accepts no liability for damage caused by improper use Safety notices In...

Page 43: ...class I and may only be connect ed to a plug with a protective conduc tor that has been properly installed Ensure that the voltage is correct when connecting it More detailed in formation about this...

Page 44: ...itable cleaning agents Use care products only on the outer sur faces Use only soft cloths for cleaning Ensure that water does not enter the ventilation slits or enter into the electrical components Th...

Page 45: ...use a suitable fire extinguisher with the designation F or a fire blanket Once the fire has been extinguished have the appliance checked by our Service department see Service on page EN 35 Opening th...

Page 46: ...er such circumstances the appliance may not be used If the door or door seals are dam aged the oven must not be operated until it has been repaired by a compe tent person It is hazardous for anyone ot...

Page 47: ...has elapsed Please wait a short moment after heating up carefully tip the dish and stir before removing the container from the cooking chamber Risk of burns Improper handling of the appliance can lead...

Page 48: ...is reason always push accessories all the way into the cooking chamber The oven should be cleaned regularly and any food deposits removed Failure to maintain the oven in a clean condition could lead t...

Page 49: ...mplete 3 Check whether the appliance was dam aged during transit 4 If the delivery is incomplete or the appli ance has been damaged during transit please contact our service department see Service on...

Page 50: ...set the convection function 12 Button for setting the defrost function 13 Various function indicators in the display 14 Display 15 Programme indicators in the display 16 Button for setting the time a...

Page 51: ...Even a small vi bration can cause the liquid to squirt out suddenly e g when being taken out of the appliance Every dish requires a certain amount of en ergy for cooking or defrosting A good rule of...

Page 52: ...st This shortens preparation times enormously The combination of grill and microwave is well suited for Gratins casseroles Fish Thicker pieces of meat with a higher fat content Poultry chicken duck tu...

Page 53: ...owave combi mode Do not use baking paper or similar The appliance has a range of operating modes Microwave grill microwave combi mode and convection Always choose the appropriate crockery for the diff...

Page 54: ...sting size and form play a key role Small flat food portions defrost faster and more evenly than larger thicker food portions During the defrosting process separate portions that have already begun to...

Page 55: ...jars shall be stirred or shak en and the temperature checked be fore consumption in order to avoid burns Always stir baby food in particular very thoroughly to avoid burns It is essential to check the...

Page 56: ...th an external timer or a separate remote control system If a fire starts keep the cooking cham ber door closed immediately pull the mains plug out of the socket or switch off the automatic circuit br...

Page 57: ...crowave hazard Microwave radiation can escape through a door that fails to close ade quately Under such circumstances the appliance may not be used Pay particular attention to the clean liness of the...

Page 58: ...ing time extension can be repeat ed several times if necessary Setting the power level As standard the microwave is set to power level P100 that is to 100 microwave pow er To change the power level 1...

Page 59: ...cess will be interrupted The display 14 will show the remaining cooking time Resuming an interrupted cooking process To continue an interrupted cooking process press the Start 30sec Confirm but ton 18...

Page 60: ...microwave functions are combined The following table gives an overview Display indicator Function indicators C 1 C 2 C 3 C 4 Example You want to cook for 10 minutes using the grill convection combina...

Page 61: ...ash 6 Open the cooking chamber door 1 and put the food to be cooked in the cooking chamber 7 Turn the adjustment dial 19 until the in dicator 20 00 appears on the display 14 8 Press the Start 30sec Co...

Page 62: ...isplay 14 The indicators and flash Once the defrosting time has elapsed 5 signal tones will sound The defrosting time will vary depending on the weight you wish to defrost For 100 g the defrosting tim...

Page 63: ...pears on the display 14 3 Press the Microwave button 9 On the display 14 the indicator P100 and the indicator will appear 4 Press the Microwave 9 button once again 5 The flashing display indicator cha...

Page 64: ...A5 starts to flash on the display 14 and the indicators and are visible 2 Press the Start 30sec Confirm but ton 18 The indicator A5 stops flashing 3 Turn the adjustment dial 19 clockwise again until...

Page 65: ...temperature has been reached 2 signal tones will sound 4 Place the dish in the cooking chamber 1 and put the cake into the cooking cham ber 1 5 Open the cooking chamber door 1 as well if you have put...

Page 66: ...g 250 g 03 50 350 g 350 g 05 00 450 g 450 g 600 650 g 650 g 07 30 A5 Vegetables 150 g 150 g 02 30 350 g 350 g 04 30 500 g 500 g 06 00 A6 Drinks coffee approx 240 g 1 01 40 approx 480 g 2 03 00 approx...

Page 67: ...surfaces and door seals can get damaged by improper handling Never use harsh soda acid solvent or abrasive cleaners All purpose clean ers with a neutral pH are recommend ed Use care products only on...

Page 68: ...any service or repair operation that in volves the removal of a cover which gives protection against exposure to microwave energy For your own safety check regularly that the appliance is intact Are t...

Page 69: ...85 cm Inserting the turntable Use the turntable 7 every time you use the appliance 7 The turntable 7 rotates during operation to ensure uniform heating When using the grill rack 6 the turntable 7 als...

Page 70: ...ted to the mains a beep will sound and the display 14 will show 0 00 1 Press the Time Timer button 16 The two left digits of the indicator will start flashing on the display 14 2 Turn the adjustment d...

Page 71: ...oor 1 repaired Do not use the appliance The cooking chamber light does not work Lamp defective Contact our service department see Service on page EN 35 The turntable 7 does not turn or does not turn p...

Page 72: ...e The dish was very cold when being placed inside Container is unsuitable if it becomes hotter than the dish Use a suitable container The appliance emits odours This happens the first time the applian...

Page 73: ...this manual cannot be recognised General customer service Please contact your mail order company s product advice centre if you have questions com plaints or accessory orders Spare parts Customers in...

Page 74: ...rmful sub Waste prevention According to the provisions of Directive 2008 98 EC waste prevention measures al ways take priority over waste management For electrical and electronic devices waste prevent...

Page 75: ...ences for people and the environment It is therefore important to tape off the poles of lithium batteries and rechargeable batteries before disposing of them to prevent an exter nal short circuit Befo...

Page 76: ...1100 W Convection power consumption 2500 W Supply voltage 230V 50Hz Cooking chamber volume 25 litres Turntable diameter approx 315 mm Appliance size height width depth 30 6 cm 51 3 cm 49 5 cm Unloade...

Reviews: