


Seite EN-6
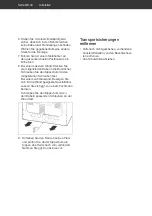
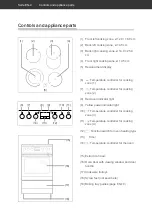
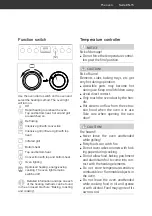
Controls and appliance parts
–
Keep the mains plug and cord away
from naked flames and hot surfac-
es.
■
Connection to the mains supply may
only be made by an authorised elec-
trician approved by the local energy
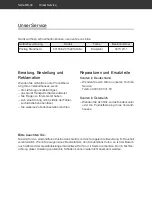
supply company (see „Our Service
Centre“ on page EN-31). Only then will
you benefi t from our warranty and a
suffi cient level of safety. Unauthor-
ised persons may not connect the ap-
pliance to the mains supply. You can
endanger your life and that of subse-
quent users! This also applies to dis-
connection from the power supply
and dismantling the old appliance.
■
Since all poles of the appliance can-
not be disconnected from the mains
via an accessible disconnecting de-
vice, an all-pole disconnecting device
in accordance with overvoltage cat-
egory III must be connected within
the house installation with at least 3
mm contact clearance; this includes
fuses, miniature circuit breakers and
protective devices.
■
Before connecting the device, switch
off the relevant electric circuit(s)
(switch off circuit breakers or unscrew
fuses).
■
Never open the housing.
■
Never try to repair a defective or sus-
pected defective appliance yourself.
You can put your own and future us-
ers’ lives in danger. Only authorised
specialists are allowed to carry out
this repair work.
■
Do not operate the appliance with an
external timer or an external remote
control system.
■
Do not put any objects in or through
the housing openings and also make
sure that children cannot insert any
objects through them.
■
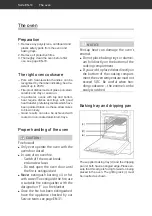
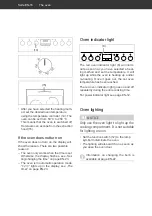
Oven lighting:
–
Before replacing the light ensure
that the appliance is switched off
to prevent the risk of electric shock.
–
First switch off the oven then un-
screw and/or switch off the fuses.
–
Replace the light bulb only when
the oven is no longer hot.
Risks to children
Risk of suffocation!
■
Do not allow children to play with the
packaging fi lm. They may get caught
up in this or suffocate.
■
Prevent children from pulling small
parts from the device or taking them
out of the accessory bag and putting
them in their mouths.
Risks for certain groups of people
Danger to children and persons with
reduced physical, sensory or mental
abilities (e.g. people with disabilities
to some extent, older persons with im-
paired physical and mental abilities)
or who lack experience and knowledge
(e.g. older children).
■
This appliance can be used by chil-
dren aged eight years and up, and by
persons with reduced physical, senso-
ry or mental abilities, or who lack ex-
perience and/or knowledge, if they
are supervised or have been instruct-
ed in the safe use and understand the
risks associated with its use.
Summary of Contents for 5010CE2.313eETaDJXv
Page 76: ......


