6
6
USAGE
This product is for overhead mounting only. For safety purposes, this projector should be mounted
on steady elevated platforms or sturdy overhead supports using suitable hanging clamps. In all cases,
you must use safety cables.
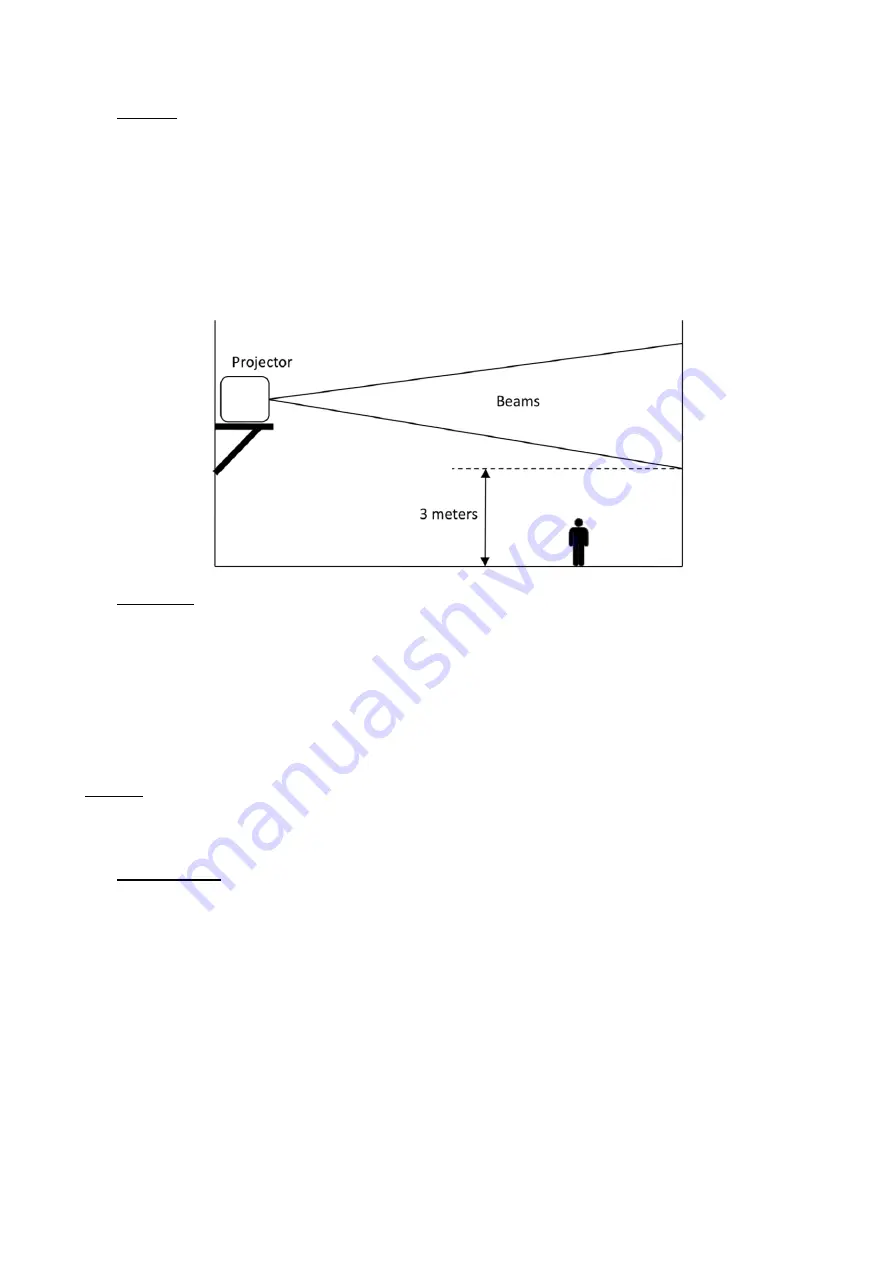
International laser safety regulations require that laser products must be operated in the fashion
illustrated below, with a minimum of 3 meters (9,8 ft.) of vertical separation between the floor and
the lowest laser light vertically. Additionally, 2,5 meters of horizontal separation is required
between laser light and audience or other public spaces.
7
RIGGING
⚫
Be sure that the structure onto which you are mounting this product can support its weight.
⚫
Mount the product securely. You can do this with a screw, a nut, and a bolt. You may also use
a mounting clamp if rigging this product onto a truss. The U-shaped support bracket has three
mounting holes which may be used to secure the clamps to the projector.
⚫
When mounting this product overhead, always use a safety cable.
⚫
Always consider ease of access to the unit before deciding on a location for this product.
Caution
: use of controls or adjustments or performance of procedures other than those specified
herein may result in hazardous radiation exposure.
This laser product is designated as Class 4 during all procedures of operation.
8
OPERATION
8.1
INSTRUCTIONS FOR POWERING ON THE LASER SYSTEM
1.
Connect the power cable.
2.
Connect the 2-pin interlock bypass plug to the rear of the projector. (Or if you have E-STOP BOX,
connect the box to the projector, pull up the red switch and turn on the key switch).
3.
Turn on the key switch on the projector to allow laser output.
4.
Choose the running programs on LED screen (see following detailed instructions of the LED
control system), it can run with auto, sound or DMX.
5.
Or if you connect the
ILDA cable to the projector, then it’s under laser software control, fo
r
example Pangolin Quickshow. Select the pattern on software. Notice:
please choose “Allow laser
output” in software.


