Pro24.z
Quick Reference Guide
Installing and Recharging the Battery
The Pro24.z uses a Lithium-Ion rechargeable battery that does not exhibit any type of “Memory Effect” from being charged
too often. The remote features convenient USB recharging capability, giving you even more control over how and where you
choose to recharge the remote’s battery.
The Pro24.z comes equipped with:
• One (1) standard USB programming cable (one Type A USB end and one micro USB end)
• One (1) micro USB-powered recharging cradle
• One (1) 5VDC universal AC adapter (integrated micro USB cable)
• Four (4) interchangeable AC adapter plugs for international applications
To recharge the Pro24.z follow either one of the methods listed below.
NOTE: 3rd party AC Adapter cables may not fit properly and
could result in damage to the unit. Only use the supplied
cable.
Method A
• Insert the
micro USB end
of the AC Adapter cable into the USB
port located on the bottom-side of the remote control unit.
• Plug the AC Adapter into a wall outlet.
• The Charging LED on the bottom of the unit will flash while the
battery is charging, and it will solidly illuminate when the
charging cycle is complete.
Method B
• Place the Pro24.z in the recharging cradle.
• Insert the
micro USB end
of the AC Adapter cable into the USB
port located on the topside of the recharging cradle.
• Plug the AC Adapter into a wall outlet.
• The Charging LED on the bottom of the unit will flash while the
battery is charging, and it will solidly illuminate when the charging
cycle is complete.
OR
To Wall Outlet
To Wall Outlet
Pro24.z Recharging
Cradle
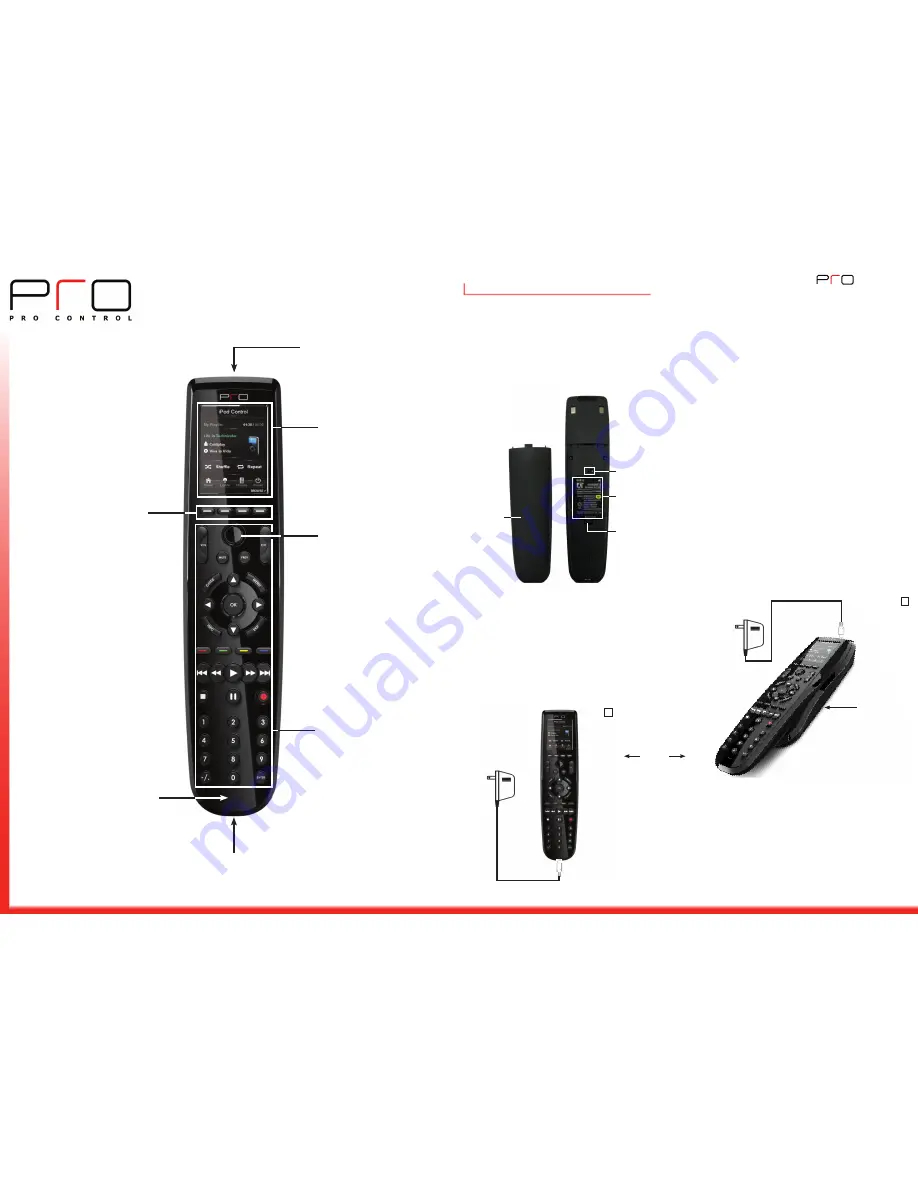
IR LED emitters
and IR Learning
Photodiode
240 X 320 pixel TFT
LCD touchscreen
Programmable
5-way joystick
Programmable
“hard buttons” for
tactile control of
commonly used
functions
Charging LED
USB Port
Power Switch
Lithium-Ion
Battery Pack
Battery Lock
Access Door
A
B
Programmable
“soft buttons” for
custom touchscreen
labeling
Follow the steps below to install/access the rechargeable
Lithium-Ion battery.
1 Remove the access door from the rear of the
remote by sliding it down and off.
2 Orient the battery so that the charging contacts
point toward the top of the remote, and insert the battery
into the battery compartment.
3 Ensure that the battery’s charge contacts are
touching the charging pins inside the battery
compartment.
4 Press the battery down into the compartment until it
snaps and locks in place. Turn the unit on
by sliding the power switch located above the
battery compartment to the “ON” position.
5 The battery can be removed by pressing the battery
lock down and lifting the battery out of the battery
compartment.
71-500000-13 V1.0
®
®
Get more control
®


