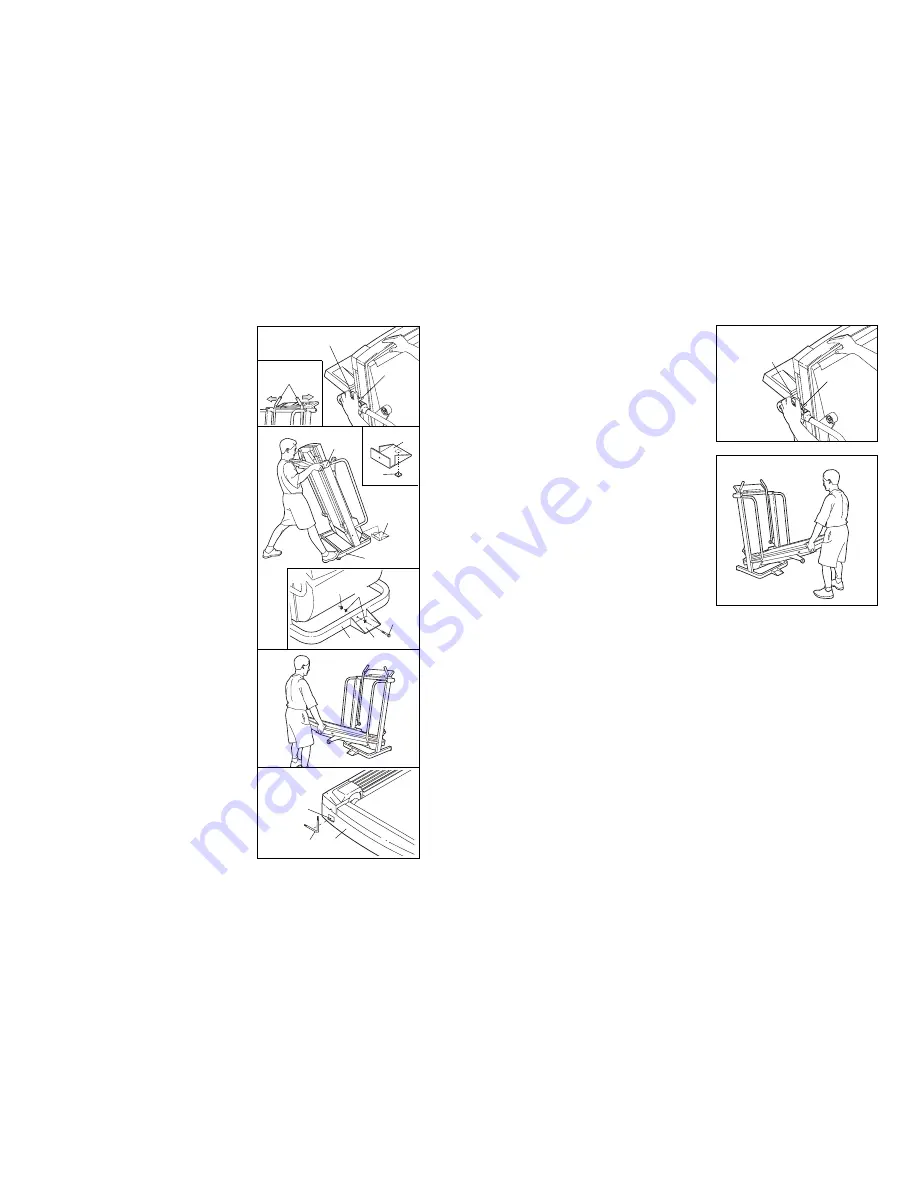
HOW TO LOWER THE TREADMILL FOR USE
1. Hold the upper end of the treadmill with your right hand
as shown. Using your left hand, lift the storage latch.
Pivot the treadmill slightly until the locking pin is out of
the storage latch. Close the storage latch.
2. Hold the treadmill firmly with both hands, and lower the
treadmill to the floor.
To decrease the possibility of in-
jury, bend your legs and keep your back straight.
19
6
Storage Latch
Locking Pin
5. See drawing 5A. Move your right hand to the position
shown, and hold the treadmill firmly. Using your left hand,
lift the Storage Latch (125). Raise the treadmill until the
locking pin snaps into the Storage Latch. It may be nec-
essary to move the Upper Body Arms (12) to the sides
slightly (see drawing 5B).
Make sure that the locking
pin is inside the Storage Latch, and that the Storage
Latch is fully closed.
6. See drawing 6B. Attach a Base Pad (73) to the bottom of
the Stabiliser Plate (88) in the indicated location.
See drawing 6A. Stand behind the treadmill. Hold the Left
Crossbar Bracket (4) and the Right Crossbar Bracket (not
shown). Place one foot on the Base (75) in the indicated
location. Tip the treadmill back slightly. Whilst the tread-
mill is held in this position, a second person should slide
the Stabiliser Plate (88) onto the Base (see drawing 6C).
Keeping your foot on the Base, carefully tip the treadmill
up until it is resting on the Base. Make sure that the
Stabiliser Plate (88) stays on the Base.
See drawing 6C. Attach the Stabiliser Plate (88) to the
Base (75) with a Stabiliser Plate Bolt (105), two Stabiliser
Plate Washers (97), and the Stabiliser Plate Nut (95) as
shown.
Before moving the treadmill, see HOW TO MOVE THE
TREADMILL on page 18.
7. Refer to assembly drawing 5 at the top of this page. Hold
the upper end of the treadmill with your right hand as
shown. Using your left hand, lift the Storage Latch (125).
Pivot the treadmill slightly until the locking pin is out of the
storage latch.
Hold the treadmill firmly with both hands, and lower the
treadmill to the floor.
To decrease the possibility of in-
jury, bend your legs and keep your back straight.
8. Remove the paper backing from the Adhesive Clip (44).
Press the Adhesive Clip onto the Frame (84) in the indi-
cated location. Press the Allen Wrench (57) into the
Adhesive Clip.
4
88
75
125
Locking
Pin
5A
7
8
44
84
57
88
73
6B
6A
105
95
97
88
75
6C
12
5B


