3
22
Note: # indicates a non-illustrated part. Specifications are subject to change without notice.
1
1
Frame
2
1
Front Stabiliser
3
1
Frame Rail
4
1
Seat Carriage
5
1
Backrest Frame
6
1
Seat Frame
7
1
Rear Stabiliser Cover
8
1
Front Stabiliser Cover
9
1
Rear Stabiliser
10
1
Backrest
11
1
Headrest
12
1
Seat
13
1
Upright
14
1
Upright Bushing
15
1
Handgrip Pulse Sensor
16
1
Console
17
1
Left Side Shield
18
1
Right Side Shield
19
1
Side Shield Cover
20
2
Seat Carriage Bushing
21
2
Small Hand Weight
22
2
Medium Hand Weight
23
2
Large Hand Weight
24
1
Left Pedal
25
1
Left Pedal Strap
26
1
Right Pedal
27
1
Right Pedal Strap
28
2
Adjustment Knob
29
1
Adjustment Pin
30
2
Wheel
31
1
Left Front Endcap
32
1
Right Front Endcap
33
2
Levelling Foot
34
1
Adjustment Motor
35
1
Upper Wire Harness
36
1
Lower Wire Harness
37
1
Flywheel
38
1
Magnet
39
1
Flywheel Axle
40
2
Flywheel Bearing
41
1
“C” Magnet
42
1
Left Crank Arm
43
1
Reed Switch/Wire
44
2
Crank Bearing
45
1
Crank Shaft
46
1
Adjustment Cable
47
1
Return Spring
48
1
Idler Arm Assembly
49
2
Bushing
50
1
Backrest Frame Endcap
51
1
1/2” x 70mm Bolt
52
1
1/2” Nylon Locknut
53
1
“J” Bolt
54
1
Pulley
55
1
Idler Bolt
56
2
Flange Screw
57
1
Right Crank Arm
58
2
M6 Eye Bolt
59
2
“U” Bracket
60
4
M6 Nut
61
4
M8 Nylon Locknut
62
2
Flywheel Washer
63
3
M10 Black Nylon Locknut
64
1
Snap Ring
65
2
M10 x 112mm Carriage Bolt
66
2
M10 Zinc Nylon Locknut
67
1
“C” Magnet Bolt
68
2
M10 x 52mm Button Bolt
69
3
M6 x 50mm Screw
70
8
M5 x 6mm Screw
71
3
M6 Flat Washer
72
5
M4 x 25mm Screw
73
6
M4 x 16mm Screw
74
2
M10 x 45mm Button Screw
75
4
M4 x 38mm Screw
76
3
M10 x 27mm Button Screw
77
3
M10 Black Split Washer
78
2
M5 Nut
79
1
M6 x 25.4mm Button Screw
80
2
M6 x 72mm Button Screw
81
4
M5 x 12mm Screw
82
1
Reed Switch Clamp
83
1
Belt
84
2
M4 x 12mm Screw
85
2
M10 Zinc Split Washer
86
4
M5 Nylon Locknut
87
5
M6 x 16mm Screw
88
1
M6 x 25mm Bolt
#
1
Audio Wire
#
1
Splitter
#
1
Adapter
#
1
User’s Manual
#
1
Allen Wrench
Key No. Qty.
Description
Key No. Qty.
Description
PART LIST—Model No. PFEVEX39911
R0202A
BEFORE YOU BEGIN
Congratulations for selecting the new PROFORM
®
970 crosstrainer. The unique PROFORM
®
970 com-
bines a comfortable recumbent cycle with a conve-
nient weight bench to let you enjoy both aerobic exer-
cise and strength training exercise in the convenience
of your home.
For your benefit, read this manual carefully before
you use the crosstrainer. If you have questions after
reading the manual, please call our Customer Service
Department at 08457 089 009. To help us assist you,
please note the product model number and serial
number before calling. The model number is
PFEVEX39911. The serial number can be found on a
decal attached to the crosstrainer (see the front cover
of this manual for the location of the decal).
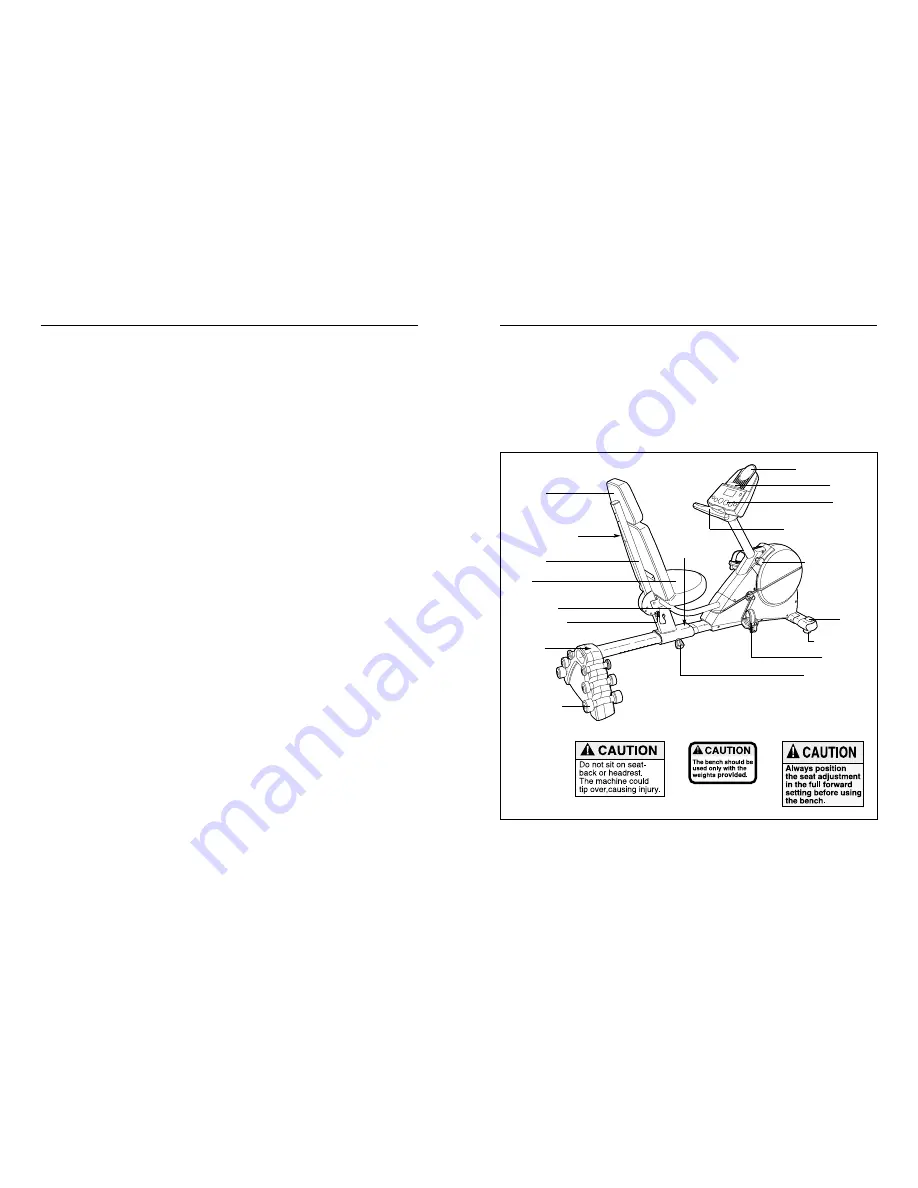
Before reading further, please familiarise yourself with
the parts that are labelled in the drawing below.
Handgrip Pulse Sensor
Seat Handle
Adjustment Knob
Hand Weights
Note: The
decals are
not shown at
actual size.
Wheel
Pedal/Strap
Console
Bookrack
Water Bottle Holder
Adjustment Pin
Headrest
Backrest
CAUTION Decal 1
CAUTION
Decal 2
CAUTION
Decal 3
Seat
Levelling Foot
Adjustment Knob
CAUTION: The decals shown below are found on the cross-
trainer in the locations indicated above. If a decal is missing
or illegible, call 08457 089 009 to order a free replacement
decal. Apply the decal in the location shown.
2
3
1


