background image

13

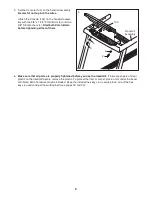
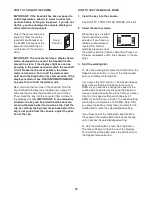
4. Change the incline of the treadmill as desired.

To change the incline of

the treadmill, press the

Incline increase or de-

crease button. Each

time you press one of

the buttons, the incline

will gradually change until it reaches the selected

incline setting.

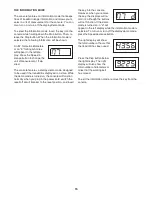
5. Follow your progress with the displays.

The track

—The track

represents a distance of

1/4 mile (402 meters).

As you walk or run on

the treadmill, the indica-

tors around the track will

appear in succession until the entire track appears.

The track will then disappear and the indicators will

again begin to appear in succession.

The left display

—As

you exercise, the left

display can show the

elapsed time, the incline

of the treadmill, and the

approximate number of

calories that you have burned. Press the Disp but-

ton below the left display until the desired informa-

tion or the scan mode is selected. When the scan

mode is selected, the time, incline, and number of

calories will appear in the display for a few sec-

onds each. When the scan mode is selected, the

word SCAN will appear in the display.

The right display

—The

right display can show

the distance that you

have walked or run and

the speed of the walking

belt. The display also

shows your heart rate when you use the handgrip

pulse sensor (see step 6). Press the Disp button

below the right display until the desired information

or the scan mode is selected.

To reset the displays, press the Stop button, re-

move the key, and then reinsert the key.

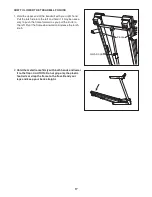
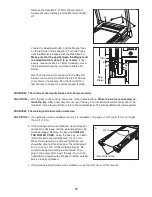
6. Measure your heart rate if desired.

Before using

the handgrip

pulse sensor,

remove the

sheets of clear

plastic from

the metal con-

tacts. In addi-

tion, make

sure that your

hands are

clean.

To measure your heart rate,

stand on the foot

rails and hold the contacts for approximately 10

seconds—avoid moving your hands.

When your

pulse is detected, your heart rate will be shown.

For the most accurate heart rate reading, con-

tinue to hold the contacts for about 15 sec-

onds.

7. When you are finished exercising, remove the

key from the console.

Step onto the foot rails, press the Stop button, and

adjust the incline of the treadmill to the lowest

setting. The incline must be at the lowest setting

or you may damage the treadmill when you fold

it to the storage position.

Next, remove the key

from the console and put it in a secure place.

When you are finished using the treadmill, switch

the reset/off circuit breaker to the “off” position and

unplug the power cord.

IMPORTANT: If you do

not do this, the treadmillʼs electrical compo-

nents may wear prematurely.

Contacts

Summary of Contents for PETL60708.0

Page 1: ...ing complete customer satisfaction If you have questions or if there are missing parts please contact us at the numbers or addresses listed below Call 08457 089 009 Outside UK 0 44 113 3877133 Fax 0 4...

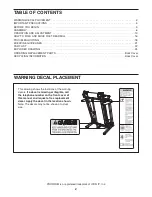
Page 2: ...RAWING 24 ORDERING REPLACEMENT PARTS Back Cover RECYCLING INFORMATION Back Cover PROFORM is a registered trademark of ICON IP Inc This drawing shows the locations of the warning decals If a decal is m...

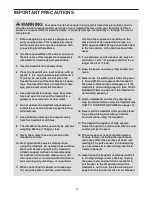
Page 3: ...eplacing the fuse an ASTA approved BS1362 type should be fitted to the fuse carrier A 13 amp fuse should be used 12 If an extension cord is needed use only a 3 conductor 1 mm2 14 gauge cord that is no...

Page 4: ...readmill 23 Inspect and properly tighten all parts of the treadmill regularly 24 DANGER Always unplug the power cord immediately after use before cleaning the treadmill and before performing the maint...

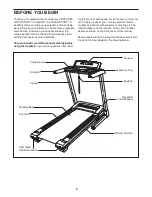
Page 5: ...before using the treadmill If you have questions after read ing this manual please see the front cover of this man ual To help us assist you note the product model number and serial number before cont...

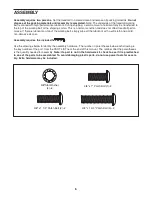
Page 6: ...walking belt simply wipe off the lubricant with a soft cloth and a mild non abrasive cleaner Assembly requires the included hex keys Use the drawings below to identify the assembly hardware The numbe...

Page 7: ...pright 86 Partially tighten a 3 8 x 1 Patch Bolt 1 with a 3 8 Star Washer 4 into the right Upright and the Base 94 do not fully tighten the Patch Bolt yet Attach the left Upright 86 to the Base 94 in...

Page 8: ...nnect the Upright Wire 87 to the handrail assembly wire A See the inset drawing The connectors should slide together easily and snap into place If they do not turn one connector and try again IF THE C...

Page 9: ...ning either of them 5 6 Make sure that all parts are properly tightened before you use the treadmill If there are sheets of clear plastic on the treadmill decals remove the plastic To protect the floo...

Page 10: ...See drawing 2 Press the pins on the power cord into the metal clips in the adapter as shown Close the adapter cover over the end of the power cord and tighten the screw in the adapter IMPORTANT Make...

Page 11: ...d and incline of the tread mill as it guides you through an effective exercise ses sion To turn on the power see page 12 To use the man ual mode see page 12 To use a preset workout see page 14 To use...

Page 12: ...ps backward if the key is not pulled from the console adjust the posi tion of the clip HOW TO USE THE MANUAL MODE 1 Insert the key into the console See HOW TO TURN ON THE POWER at the left 2 Select th...

Page 13: ...f the walking belt The display also shows your heart rate when you use the handgrip pulse sensor see step 6 Press the Disp button below the right display until the desired information or the scan mode...

Page 14: ...he height of the flashing segment indicates the speed setting for the current segment At the end of each segment a series of tones will sound and the next segment of the profile will begin to flash If...

Page 15: ...de designed to be used if the treadmill is displayed in a store While the demo mode is turned on the console will function normally when you plug in the power cord switch the reset off circuit breaker...

Page 16: ...the latch knob is locked in the storage position To protect the floor or carpet from damage place a mat under the treadmill Keep the treadmill out of di rect sunlight Do not leave the treadmill in the...

Page 17: ...t may be neces sary to push the frame forward as you pull the knob to the left Pivot the frame downward and release the latch knob 2 Hold the metal frame firmly with both hands and lower it to the flo...

Page 18: ...wait for five minutes and then press the switch back in b Make sure that the power cord is plugged in If the power cord is plugged in unplug it wait for five minutes and then plug it back in c Remove...

Page 19: ...he key The treadmill will automatically rise to the maximum incline level and then return to the minimum level This will recalibrate the incline system PROBLEM The walking belt slows when walked on SO...

Page 20: ...n the power cord insert the key and run the treadmill for a few minutes Repeat until the walk ing belt is centered b If the walking belt slips when walked on first re move the key and UNPLUG THE POWER...

Page 21: ...our goal is to strengthen your cardiovascular system you must perform aerobic exer cise which is activity that requires large amounts of oxygen for prolonged periods of time For aerobic ex ercise adju...

Page 22: ...40 1 Walking Platform 41 2 Platform Cushion 42 2 Belt Guide 43 1 Left Front Platform Support 44 2 Frame Cap 45 2 Frame Spacer 46 1 Magnet 47 1 Drive Roller Pulley 48 1 Walking Belt 49 1 Right Front P...

Page 23: ...ght Handrail Cover 113 3 Cable Tie 114 1 Grommet 115 1 M4 x 10mm Bolt 116 2 M4 2 Star Washer 117 1 M4 Nut 118 1 8 x 1 2 Screw 4 Black Wire 2F 8 Blue Wire 2F 8 Blue Wire F Flag 16 Blue Wire M F 8 White...

Page 24: ...0 20 42 42 44 33 46 44 33 48 47 51 59 54 57 45 36 35 7 50 7 31 9 58 61 7 21 28 29 58 55 6 56 6 41 6 7 43 7 7 17 17 17 37 38 37 40 17 17 17 15 41 6 17 17 31 37 38 37 39 45 49 60 63 63 24 EXPLODED DRAWI...

Page 25: ...5 5 84 6 85 34 34 34 8 11 11 80 69 68 65 67 72 83 64 18 66 70 82 71 79 74 81 75 78 16 16 16 16 27 5 30 30 30 8 8 27 27 77 76 16 73 116 115 118 117 116 EXPLODED DRAWING B Model No PETL60708 0 R1208A 2...

Page 26: ...19 95 32 95 14 31 94 101 99 87 100 22 93 97 96 12 13 31 89 90 31 88 14 31 26 1 26 31 24 98 4 23 2 86 87 4 1 4 19 23 32 31 31 91 92 22 22 22 93 97 96 4 2 114 26 EXPLODED DRAWING C Model No PETL60708 0...

Page 27: ...103 7 7 102 7 7 7 7 7 107 7 7 7 108 97 22 112 7 7 31 97 7 110 7 109 106 105 22 4 3 104 4 3 111 16 31 7 7 7 7 7 7 7 108 7 7 113 27 EXPLODED DRAWING D Model No PETL60708 0 R1208A...

Page 28: ...art s see the PART LIST and the EXPLODED DRAWING near the end of this manual RECYCLING INFORMATION This electronic product must not be disposed of in municipal waste To preserve the environment this p...

Reviews: