background image

5

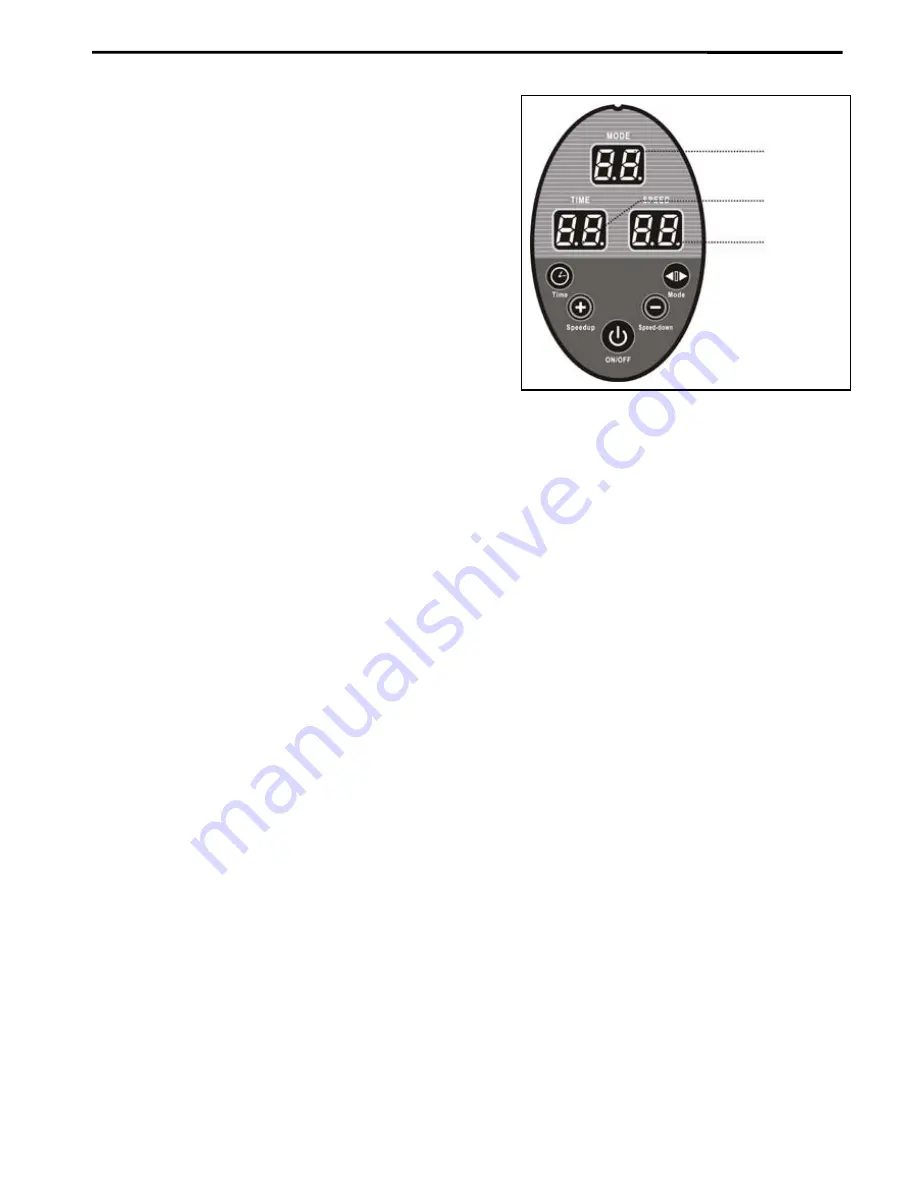
CONSOLE DETAILS

“ON/OFF” Button : Turn on electrical source, press 

this key and the machine begins the workout. Press this

key again and this will stop the machine.

“Mode” Button : 9 different modes. 88 is a manual mode.

This function you can manually adjust speed and time.

P1,P2,P3,P4,P5,P6,P7 and P8 are automatic modes. 

When you select these modes, speed and time will run

automatically. (Timing and speed cannot be adjusted).

“Time” Button : Press this key and you can adjust the

Time. Each press adds one minute to the time of exer-

sice up to a maximum of 15 minutes.

“Speed up +” Button : Press this key to increase the speed

“Speed down -” Button : Press this key to decrease the speed


USAGE INSTRUCTIONS

Connect the power supply and press the “On” switch at the back of the machine. Then the ma-

chine is ready to use. Press “xxxx” button, the machine begins to workout. Press this button 

again and the machine will return stop.

Please refer to the control details instruction to operate the machine

If you intend to adopt a standing position to use this machine, please stand on the machine be

-

fore you switch it on.

Please refer to the exercise example on page 10 for the ideal position on the machine.  

Icon Health & Fitness accept no responsibility for injury caused by misuse of this product.

Many exercises are possible with this product, seek a professional advice from either a personal 

trainer or doctor.

For your safety and wellness, please do not use this product more than 15 minutes per day and 3 

time per week.

MODE

TIME

SPEED

Summary of Contents for PFICVU39607.0

Page 1: ...ustomer satisfaction If you have questions or if there are missing or damaged parts please call 08457 089 009 or write ICON Health Fitness Ltd Customer Service Department Unit 4 Revie Road Industrial...

Page 2: ...OF CONTENTS IMPORTANT PRECAUTIONS 2 BEFORE YOU BEGIN 3 ASSEMBLY 4 CONSOLE DETAILS 5 PROGRAM DETAILS 6 EXERCISE DETAILS 7 EXERCISE guide 8 EXPLODED DRAWING 9 PARTS LIST 10 ORDERING REPLACEMENT PARTS Ba...

Page 3: ...before using the vibration platform Knee or hip implant Pacemaker Recently placed screws pins bolts or spirals Acute hernia discopathy or spondylitis Serious heart or vascular disease Acute thrombosi...

Page 4: ...read this manual carefully before using the WESLO energy PLATE vibration platform If you have questions af ter reading this manual please see HOW TO CONTACT CUSTOMER CARE the back cover To help us ass...

Page 5: ...not tighten these screws at this stage After they are all in place then tighten correctly 4 Insert the arm on the upright Than place the protec tion washer as shown on picture 4 5 With the 4 M6 screws...

Page 6: ...e the speed USAGE INSTRUCTIONS Connect the power supply and press the On switch at the back of the machine Then the ma chine is ready to use Press xxxx button the machine begins to workout Press this...

Page 7: ...l last 5 seconds Program 4 or Interval inverse The speed will increase to 16 only by odd numbers then reduce also by odd numbers each point will last 1 Second Program 5 or Interval training Endurance...

Page 8: ...middle of the plate at shoulder width apart The fingers point away from the user Hold the feet near the machine lift the heels sustain the body with only the feet and the arms Affected area trapezius...

Page 9: ...Down Bent Knee Press Up Press Up Tricep Dips Crunch Sit Crunch with Twist Leg Lift Scissor Kicks Calf Massage Hamstring Massage Quad Massage I T band Massage Calf Stretch Hamstring Stretch Groin Stre...

Page 10: ...EXPLODED DRAWING Model No PFICVU39607 0 9...

Page 11: ...pping screw GB T845 ST3X20 Self tapping screw GB T70 1 M6X20 Bolt Handle Cover Control Board Panel Qty 2 1 2 1 4 1 2 1 2 1 1 2 1 1 1 1 1 1 1 1 2 1 1 1 2 Item 1 2 3 4 5 6 7 8 9 10 11 12 13 14 15 16 17...

Page 12: ...ning n caso a los cubos de basura municipales Con el fin de preservar el medio ambiente este producto deber reciclarse una vez concluida su vida til seg n lo estipulado en la legislaci n vigente Utili...

Reviews: