background image

9

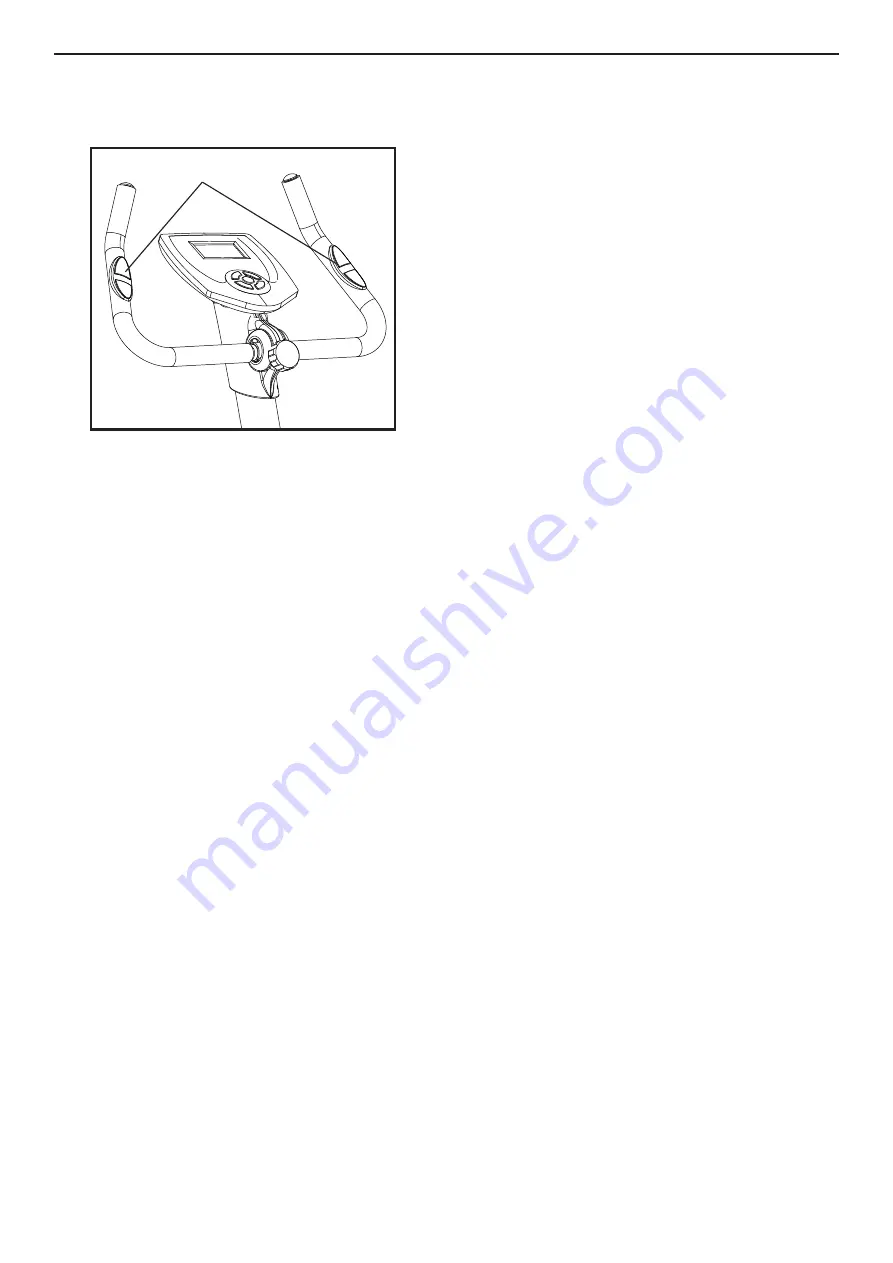
MEASURE YOUR HEART RATE IF DESIRED

You can measure you heart rate using either the

handgrip pulse sensor or the optional chest pulse

sensor.

Note: If you hold the handgrip pulse sensor and

wear the chest pulse sensor at the same time, the

console will not display your heart rate accurately.

If there are sheets of clear plastic on the metal 

contacts on the handgrip pulse sensor, remove

the plastic. In addition, make sure that your hands 

are clean. To measure your heart rate, hold the

handgrip pulse sensor with your palms resting

against the metal contacts. Avoid moving your

hands or gripping the contacts tightly.

When you are finished exercising

If the pedals do not move for several minutes and

the buttons are not pressed, the console will turn

off and the display will be reset.

MEASURE YOUR HEART IF DESIRED

Contacts

Summary of Contents for PFIVEX86013.0

Page 1: ...t Keep this manual for future reference QUESTIONS If you have questions or if there are missing parts please contact us UK Call 08457 089 009 From Ireland 053 92 36102 Website www iconsupport eu E mai...

Page 2: ...LIST 18 MAINTENANCEANDTROUBLESHOOTING 19 ORDERING REPLACEMENT PARTS Last Page WARNING DECAL PLACEMENT This drawing shows the location s of the warning decal s If a decal is missing or illegible call...

Page 3: ...in the front and rear of the bike and 2 ft 0 6 m on each side 6 Inspect and properly tighten all parts regularly Replace any worn parts immediately 7 Keep children under age 12 and pets away from the...

Page 4: ...manual carefully before you use the exercice bike If you have questions after reading this manual please see the front cover of this manual To help us assist you note the product model number and seri...

Page 5: ...tool s assembly requires a Phillips screwdriver and an adjustable wrench As you assemble the exercice bike use the drawings below to identify small parts The number in parentheses below each drawing...

Page 6: ...Cross solid wrench Note The left pedal 22L should be tighten in the counterclockwise direction the right pedal 22R should be tighten in the clockwise direction STEP 3 Insert the vertical post cover 1...

Page 7: ...n frame 1 secured with the Pop pin knob 30 at a proper height as shown STEP 5 Put the pulse sensor wire 4 through the hole of vertical tube 12 Use the T shaped bolt 25 to secure the handle cover 10 an...

Page 8: ...NDLEBAR To adjust the angle of the handlebar loosen the pivot handle rotate the handlebar to the desired angle and then retighten the pivot handle HOW TO ADJUST THE PEDAL STRAPS To adjust the pedal st...

Page 9: ...s of clear plastic on the metal contacts on the handgrip pulse sensor remove the plastic In addition make sure that your hands are clean To measure your heart rate hold the handgrip pulse sensor with...

Page 10: ...reset the values START STOP For a quick start press this button to start the counting of the console it will start from 0 If you press this button for more than 2 seconds your values will be reset PUL...

Page 11: ...ogram select it according to your goals and to the profile shown on the display Press ENTER to validate Note Programs 2 3 6 and 8 being Performance programs and programs 4 5 7 9 and 10 being Endurance...

Page 12: ...d STOP will appear in the display and the console will enter the PAUSE mode If the pedals do not move for a few minutes the console will automatically turn off USER SETTING PROGRAMS 1 Turn on the cons...

Page 13: ...dy fat measurement place both your palms on the contact pads The test result are FAT The total body fat in our body measured by percentage BMR Basal Metabolic Rate metabolism is the energy measured in...

Page 14: ...body uses carbohydrate calories for energy Only af ter the first few minutes of exercise does your body begin to use stored fat calories for energy If your goal is to burn fat adjust the intensity of...

Page 15: ...lles Stretch With one leg in front of the other reach forward and place your hands against a wall Keep your back leg straight and your back foot flat on the floor Bend your front leg lean forward and...

Page 16: ...16 EXPLODED DRAWING Model No PFIVEX86013 0 part 1...

Page 17: ...17 EXPLODED DRAWING Model No PFIVEX86013 0 part 2 84...

Page 18: ...2 2 2 1 1 1 1 2 2 1 1 1 1 1 1 4 1 2 2 2 2 1 2 1 1 1 9 6 2 1 1 1 1 1 3 2 8 1 1 1 1 Item 1 2 3 4 5 6 7 8 9 10 11 12 13 14 15 16 17 18 19 20 21 22 23 24 25 26 27 28 29 30 31 32 33 34 35 36 37 38 39 40 4...

Page 19: ...Replace any worn parts immediately To clean the elliptical use a damp cloth and a small amount of mild detergent Important To avoid damaging the console keep liquids away from the console and keep the...

Page 20: ...of this manual IMPORTANT RECYCLING INFORMATION FOR E U CUSTOMERS This electronic product must not be disposed of in municipal waste To preserve the environment this product must be recycled after its...

Reviews: