background image

© Pro-Ject Audio Systems · Pro-Ject Debut Pro · Revision 2021.09.01 


10 

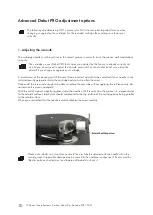
Advanced Debut PRO adjustment options  
 

The following adjustments are NOT necessary for first time set-up but important later on when 

changing or upgrading the cartridge! For the included cartridge these settings are factory set 
correctly.


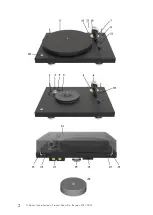
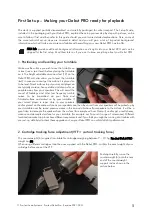
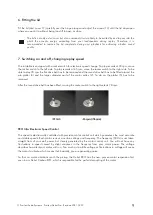
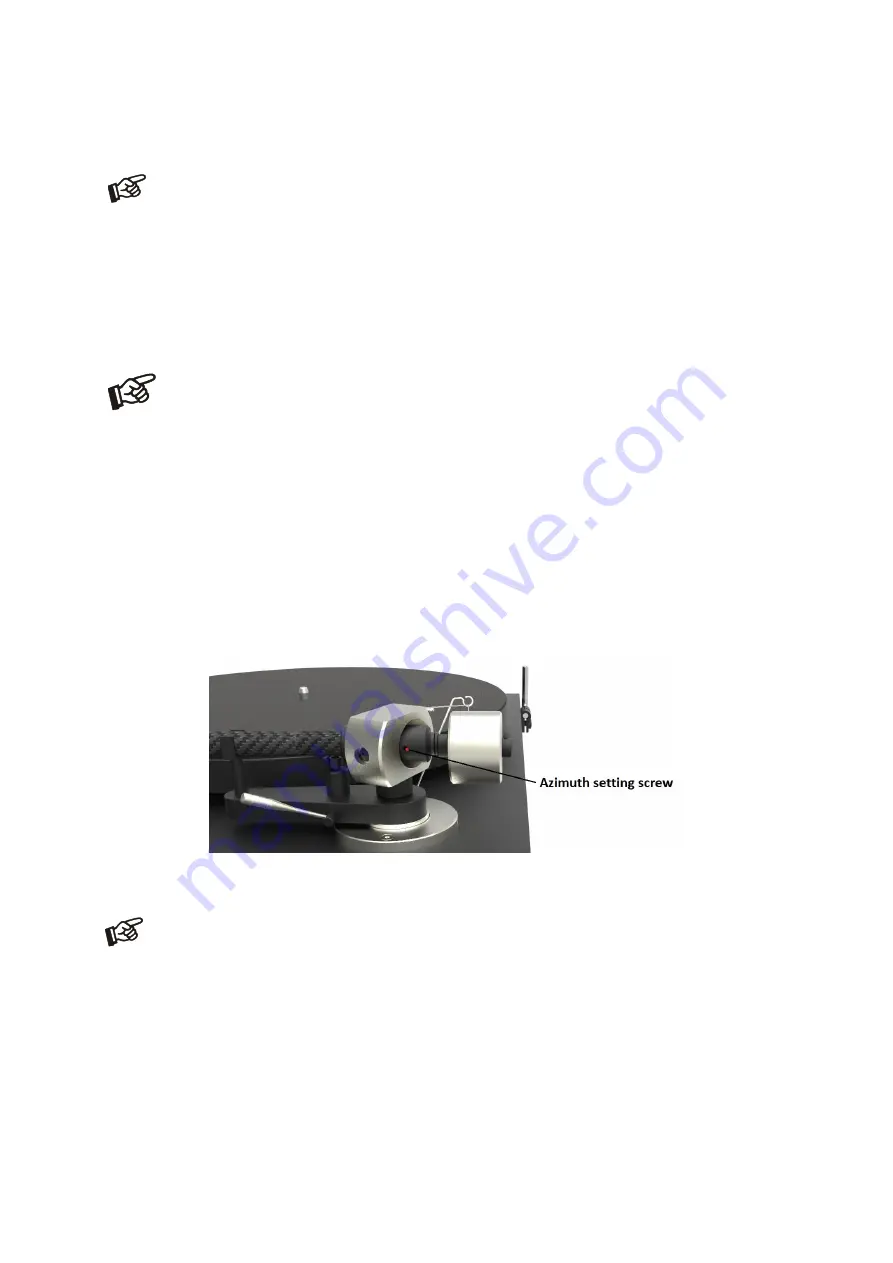
1. Adjusting the azimuth 

 
The cartridge  needle must be vertical in the record groove in order to trace the groove wall modulations 
correctly. 

The cartridge on your Debut PRO that comes pre-adjusted by the factory, is already correctly set 
up and you do not need to adjust the azimuth anymore! You should check and/or re-adjust the 
azimuth if you change or upgrade your cartridge.  

 
A small screw at the bearing end of the arm allows incorrect azimuth to be corrected if your needle  is not 
mounted exactly perpendicular to the cartridge body (which is often the case). 
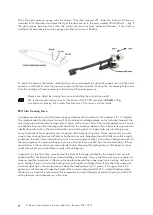
Slacken off the screw just enough to be able to revolve the arm tube without applying force. Please note: do 
not remove the screw completely!


With the aid of a good magnifying glass adjust the needle until it is vertical in the groove (i.e. perpendicular 
to the record's surface). Ideally this should correspond to the top surface of the cartridge body being parallel 
to the record surface. 
When you are satisfied that the needle is vertical retighten the screw carefully. 


Please note: Under no circumstances should the arm tube be adjusted with the needle still in the 

record groove! Irreparable damage may be caused to the cantilever suspension! The arm must be 
lifted to make each adjustment and lowered afterwards to check it. 


Summary of Contents for Debut PRO

Page 1: ...Debut PRO Manual...

Page 2: ...INSTRUCTIONS FOR USE Debut PRO...

Page 3: ...Pro Ject Audio Systems Pro Ject Debut Pro Revision 2021 09 01 2...

Page 4: ...ocket 16 Anti skating weight 17 Anti skating weight support hoop 18 Anti skating weight adjustment scale 19 Height adjustable feet with TPE damping 20 Speed selector 21 Headshell with finger lift and...

Page 5: ...utionized the Debut series in 2020 the Debut PRO raises the bar even higher We designed not only a new turntable but also a completely new cartridge Now for the 30th anniversary we are again going bac...

Page 6: ...are typically massive heavy stable and also as far as possible away from your speakers This will avoid the sound of footsteps and other low frequency rumble noises to be transmitted via your floor and...

Page 7: ...rt from the recommendations If your stylus is new you want to ideally stay pretty much at the recommendation as a starting point As it gets older we are talking many many thousands of hours playtime y...

Page 8: ...hen the tonearm will stay in its place and not move at all The groove of a vinyl record will generate different levels of friction for the tonearm and is not comparable to a CD at all Please don t mea...

Page 9: ...nnect it E with even higher quality cables such as the separately available Pro Ject Connect IT C CC or Si For detailed product information regarding Pro Ject Audio interconnect cables and phono ampli...

Page 10: ...the round drive belt has to be fitted around the sub platter 4 and the larger diameter part of the motor pulley 2 To do so the platter 5 has to be removed After the round drive belt has been fitted m...

Page 11: ...w at the bearing end of the arm allows incorrect azimuth to be corrected if your needle is not mounted exactly perpendicular to the cartridge body which is often the case Slacken off the screw just en...

Page 12: ...of development Professor Leif Johannsen to develop a unique cartridge Thanks to the excellent manufacturing skills of Ortofon we were able to produce a very special cartridge The Pick it PRO Cartridg...

Page 13: ...arm up or down until it is parallel Retighten the hexagon screws without applying excessive force which would deform the arm pillar finger tight is quite sufficient 4 Maintenance and cleaning Your rec...

Page 14: ...mA DC set at 0 5mA universal power supply Dimensions W x H x D 415 x 118 x 320mm dust cover open 415 x 365 x 405mm Weight 6 0kg Dimensions packaging W x H x D 488 x 235 x 393mm Weight incl packaging 8...

Page 15: ...dirty platter bearing without oil dirty or damaged Service Should you encounter a problem which you are not able to alleviate or identify despite the above information please contact your dealer for f...

Page 16: ...Pro Ject Audio Systems Pro Ject Debut Pro Revision 2021 09 01 15...

Reviews: