background image


18

Horn - Electric


The horn is used to signal, warn or alert other boats or persons on shore.  The horn switch is located on the 
switch panel.  The horn device is located on the gunwale at the starboard side of the bow area.


Depress the horn 

switch to the up or forward position to activate the horn, then release the horn switch to deactivate the horn.  
Using different sequences of horn blasts indicates different and sometimes dangerous situations to you or 
someone around you. 
 
See the Safety Section in this manual for more information.  Avoid any horn use without an appropriate purpose.  
Additional information regarding audible warning signals should be covered in a safe boating course. 
 

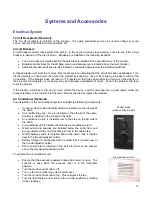
Full Instrumentation / Analog Gauges (Digital – Suzuki 300 and Verado)


All gauges are installed on the console but the configuration and specific location of your gauges will vary 
depending upon the selection of the various optional engine packages.  If your engine package includes the 
standard analog gauges (i.e., Faria), the gauges will light up when the navigation lights are on. 
 
Digital Gauges (Optional) - If your engine package is compatible, you may select to have the optional digital 
gauges installed.  With digital gauges, the gauge lights will only be illuminated when the engine is on. 

Note:  Digital Gauges are not available with a Suzuki engine package. 

 
Tachometer - To ensure the tach is working properly, simply turn the ignition key on and start the engine.  While 
the engine is idling, the tach should be reading in the proper RPM range recommended for the engine.  Your 
engine manual will indicate the appropriate RPM range.  When you are running at wide-open throttle, the tach 
should read near the top end of the recommended RPM range. 
 
If the RPM gauge is reading correctly and the engine throttle settings are correct, the tachometer is operating 
properly.  If the tachometer is not reading correctly, refer to the manual provided by the manufacturer of the gauge 
that was included in your owner’s package.   
 
Speedometer - To ensure that the speedometer is working properly, get the boat on a planing speed and check to 
see if it is reading at the approximate running speed at which the boat is traveling. 

 
Note:  The speed-reading on the Speedo may vary a few mph from the actual speed that the boat 
is traveling.  Either a GPS or a radar gun can check the running speed. 

 
Fuel - The fuel gauge reads the amount of fuel remaining in the tank.  To check the fuel gauge, place a known 
amount of fuel into the fuel fill and fill the tank.  Turn the ignition key on and the fuel gauge should read the 
approximate amount of fuel in the tank. 
 

For example:  If the fuel tank holds 125 gallons of fuel and you pumped 31 - 32 gallons of fuel into 
the tank, the fuel gauge should read approximately ¼ of a tank.  This ensures that the fuel gauge 
and the fuel sender are working properly. 

 
If the fuel gauge is not reading correctly, we recommend that you have the fuel sender checked by a qualified 
professional before considering changing out the gauge.  For more information, please refer to the Fuel/Oil 
Systems section of this manual. 
 
For specific information related to your gauges, refer to the materials in your owner’s package that was provided 
by the gauge manufacturer. 
 
Trim - To ensure the trim gauge/indicator is working properly, start by making sure the engine is trimmed all the 
way down.  Locate the trim gauge on the instrument panel and check to see if the level on the trim gauge is in the 
full down position.  As you trim the engine up, watch the trim gauge and ensure that it coincides with the actual 
trim of the engine.  When finished trimming the engine all the way up, the level on the trim gauge should read in 
the full up position. 
 
Volts - To system check the volt gauge, turn the ignition key on and turn on the engine.  With the engine running, 
check the reading on the volt gauge.  It should be reading between 12 and 14½ volts.  This reading ensures that 
the charging system and the volt gauge are working properly. 

Summary of Contents for 2010 23 XP

Page 1: ...Manual 23 XP Specifications subject to change without notice Actual boats may vary from drawings and or photos Copyright 2007 Pro Line Boats Inc PO Box 1348 Crystal River FL 34423 All rights reserved...

Page 2: ...ii...

Page 3: ...y 8 Regulations 8 Rules of the Road 8 Alcohol 9 Controls Throttle and Shift Controls 10 Ignition Binnacle Forward Neutral and Reverse Gear Operation 10 Key Switch Alarm 10 Lanyard Stop Switch 10 Shift...

Page 4: ...Fresh Water Cockpit Shower Faucet Optional 21 Fresh Water Pump Optional 21 Fresh Water Tank and Fill Optional 22 Cabin Sink and Cabinet 22 Fuel Oil Systems 22 Fuel Tank 22 Fuel Fill Fitting 23 Fuel S...

Page 5: ...he Engines 34 After Starting the Engines 34 Fueling 34 Before Fueling 34 While Fueling 35 After Fueling 35 Loading 35 Trailering and Launching Selecting A Trailer 36 Check Before You Go Out On The Hig...

Page 6: ...Products 47 Appendix Helpful Check Lists 48 Each Time You Go On A Boat Trip 48 Once A Month 48 Once A Year 48 Boat Identification Information 49 Trouble Shooting Chart 50 While we endeavor to be as a...

Page 7: ...ake is safe for you your passengers and others on the water Always use common sense when boating Specifications Length Overall LOA 23 0 Cockpit Depth 25 Beam 8 6 Maximum Horsepower 300 hp Draft Hull 1...

Page 8: ...or less are required to display a capacity plate Your boat is rated for the following capacities Maximum capacity of persons may not exceed 8 passengers The combined weight of those passengers may no...

Page 9: ...ailable when calling or writing HIN Hull Identification Number Selling dealer s name and location Servicing dealer if different from selling dealer Nature of problem Names of dealership personnel invo...

Page 10: ...ers for a nominal fee Please contact your dealer or Pro Line Boats to obtain the applicable transfer form so that the new owner will have piece of mind knowing that their pre owned boat comes with the...

Page 11: ...hrobbing temples inability to think coherently ringing in the ears tightness across the chest headaches drowsiness nausea dizziness fatigue vomiting collapse and convulsions Do not stand or swim near...

Page 12: ...back drafting At slow speeds while idling or stopped Be aware that CO can remain in or around your boat at dangerous levels even if your engine or the other boat s engine is no longer running How to P...

Page 13: ...o use it properly and instruct others as well Use water to fight a fire as a last resort after making arrangements to abandon the boat if a fire should get out of control Keep the following in mind if...

Page 14: ...underway and knows to keep the boat balanced At least one other person knows how to operate the boat in case of an emergency Your passengers are aware of propeller dangers and the possibility of sudd...

Page 15: ...ntion with horn blast s and waits for a response then completes maneuver When approaching head on both boats give way after giving appropriate horn blast s preferably to starboard When crossing a vess...

Page 16: ...alarm is actually is a warning alarm that goes off when any overheating problems may occur with the engine To check the key switch alarm turn the ignition key to the right but do not start the engine...

Page 17: ...ed by your engine manufacturer After every 24 hours of operation check all nuts caps and hose fittings for tightness Make sure the hoses are not chafing or kinking on sharp corners Also check that hos...

Page 18: ...mple if the starboard trim tab switch is being pressed down the port trim tab should be going down Repeat the same process for the opposite side While underway and in open water clear of other boaters...

Page 19: ...e switch and wiring are in good repair either the breaker is faulty or it is too small for the load Reduce the load or replace the breaker Air Conditioner Optional The installation of the air conditio...

Page 20: ...ted parts Please refer to their owner s manual and follow their recommendations for scheduled maintenance and service All service and or warranty repairs must be performed by a repair facility that is...

Page 21: ...hould be in the closed position To activate the pump depress the switch to the up or forward position To turn the pump off after the baitwell tub is full depress switch to the down or aft position 5 F...

Page 22: ...ngine s Caution To avoid possible alternator battery damage on twin engine installations make sure that the dual battery switches are never left so both engines are connected together i e never leave...

Page 23: ...of the hard top Two push in switches for the spreader light and courtesy light are located on the base of the dome shaped courtesy light which is mounted to the bottom of the hard top The spreader li...

Page 24: ...to the manual provided by the manufacturer of the gauge that was included in your owner s package Speedometer To ensure that the speedometer is working properly get the boat on a planing speed and ch...

Page 25: ...eodorant following the instructions on the deodorant container Replace the cap firmly Before using Set the portable toilet in the upright position and remove the cap located on the right rear side of...

Page 26: ...allow water to flow through the fitting Lever on the washdown fitting is closed Lever on the washdown fitting is open Bilge Pumps The aft 1100 gph bilge pump and float switch are installed as far aft...

Page 27: ...kpit shower faucet nozzle is located just outside the transom door behind a white cap cover Pull open the cap and pull out the faucet shower nozzle and hose Press the lever on the nozzle to ensure pro...

Page 28: ...e of the same gelcoat covered fiberglass that is used in the construction of the deck and hull of the boat Note Do not place any hot materials on this Fiberglass countertop as this surface could melt...

Page 29: ...gines come equipped with a built in fuel water separator Please refer to the owner s manual provided by the manufacturer of your engine package for operational procedures and for information related t...

Page 30: ...ey are double clamped where needed and that there are no fuel leaks in any of the hoses Also inspect the oil system if applicable and ensure that the oil tank and hoses remain properly connected and s...

Page 31: ...equipment Windows Doors and Hatches Windshield Tempered Glass The windshield assembly is constructed of white powder coated aluminum and tempered glass and is vented on both sides Each of the side ve...

Page 32: ...sed via the deck hatches and access pies The boat in this photo includes optional seating arrangements i e helm bench seat with storage and folding aft facing bench and folding rear bench seat Note Re...

Page 33: ...hatch The hatch should be in the closed and latched position when the vessel is underway Cabin Portholes Two portholes are installed in the cabin One is located on each side of the cabin Hardware Clea...

Page 34: ...be drained via the fitting Never remove the drain plug when the boat is sitting static in the water If you live in an area where it snows and you are storing your boat on a lift during the winter make...

Page 35: ...d or gear Rope locker storage at the bow V berth storage Shelf around V berth Cargo net in the cabin Shelf at the cabin sink Stainless steel drink holders Under the standard captain s chairs or the op...

Page 36: ...he deck and hull of the boat For information on keeping the sink and countertop looking like new please refer to the Gelcoat and Fiberglass areas in the Service and Care section of this manual If you...

Page 37: ...dinating pillows curtains and bolsters Patterns available for boats built in early model year 2009 are outfitted in your choice of Geometric Spice or Cosmic Caribbean Cabin interiors for boats built l...

Page 38: ...f the burner does not light repeat the ignition procedure How to control the flame Turning the ignition knob slowly toward the off position from the on position can regulate the size of the flame How...

Page 39: ...at speed and economy due to increased drag of hull and drive More spray over bow General trim up or out characteristics are Raises the bow of the boat out of the water resulting in less hull in the wa...

Page 40: ...inspect the bilge for fuel and check for vapors Visually make sure that the propellers are clear of obstructions or swimmers Make sure that the engine cooling water intakes are submerged Lock the hel...

Page 41: ...Reduce the load to permit safe operation in rough and adverse conditions Heavy loads reduce the performance and increase fuel consumption The load positioning greatly affects the performance of your...

Page 42: ...port left side of your trailer to insure it has an adequate gross vehicle weight rating GVWR for the combined boat and trailer The tow vehicle must be capable of handling the weight of the trailer boa...

Page 43: ...spare bearing and race set for long trips Towing Precautions Allow more time to brake accelerate pass and stop Remember the turning radius is also much greater Curbs and roadside barriers must be give...

Page 44: ...thing has been double checked proceed slowly to the ramp remembering that your boat is just resting on the trailer and attached only at the bow The ideal situation is to have one person in the boat an...

Page 45: ...touching the trailer winch smoothly apply power until the boat eases to the bow rest Winch the boat onto the trailer and secure it Drive the trailer with the boat aboard carefully out of the ramp to...

Page 46: ...power buff with Mirror Glaze No 1 Then follow up with a good waxing Caution When power buffing use care not to leave swirl marks or burn the surface You may want to leave power buffing to a profession...

Page 47: ...ust be applied in order to properly complete the application process therefore we recommend that a qualified professional do this process While barrier coating and bottom painting are the best prevent...

Page 48: ...orides to clean the aluminum and or nearby components Chlorides can leach onto the aluminum when nearby Never clean with acids or bleaches Avoid abrasive cleaning products NEVER use sandpaper steel wo...

Page 49: ...s more than 50 eroded Your motor and or drive unit have a sacrificial zinc anode to mitigate the effects of electrolysis which causes corrosion Maintain this anode in accordance with the maintenance s...

Page 50: ...Gel website http www wolfwire com tefgel frameset htm for more details Curtain Aft Canvas Curtain Canvas One of the best ways to keep Sunbrella brand fabrics looking good and to delay the need for de...

Page 51: ...ners and steel wool will damage vinyl as do strong solvents lacquer solutions and inks Lotions suntan oil waxes and polishes etc contain oils and dyes that can cause stiffening and staining of the vin...

Page 52: ...it left the factory If you launch the boat prior to storing it for the winter please complete and or comply with the following check list in order to ensure an easy fitting out in the spring Pre Stora...

Page 53: ...tenance Products Flitz For use on brass copper stainless steel chrome silver gold pewter nickel factory gun bluing bonze platinum tin aluminum magnesium anodized aluminum painted surfaces fiberglass P...

Page 54: ...exhaust hoses for burned cracked or deteriorated sections All rubber hoses should be pliable and free of kinks Clean the bilge and all bilge components with a mixture of bleach and water Then follow u...

Page 55: ...Vertical Clearance Hull Deck Interior Warranty Registration Date Fuel Capacity Gallons Ignition Key Cabin Head Door Key Other Key Radio Call Letters Bat Engine Make Model HP Port Engine S N Port Drive...

Page 56: ...ive unit Entangled in lines or weeds Anchor is down Prop cavitates Trim out too far Motor is too high Weeds on prop Bow heavy damage to hull Prop is damaged Excessive vibration Propeller engine or dri...

Reviews: