14
PRO-LINE RACING / PRO-FUSION SC 4×4 / INSTRUCTION MANUAL
HARDWARE USED
(ACTUAL SIZE)
B
A
G
G
BAG G
× 4
× 4
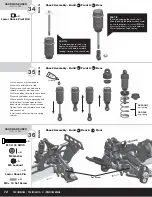
Lower Shock Pivot Ball
Lower Shock Pivot Ball
Shock Assembly - Build
Shock Assembly - Build
2
×
Front &
Front &
2
×
Rear
Rear
34
B
A
G
G
BAG G
35
HARDWARE USED
(ACTUAL SIZE)
B
A
G
G
BAG G
× 4
× 4
M3 X 30 SHCS
M3 X 30 SHCS
× 4
× 4
M3 Washer
M3 Washer
× 4
× 4
M3 Locknut
M3 Locknut
× 4
× 4
Lower Shock Pin
Lower Shock Pin
× 4
× 4
M3 × 10 Set Screw
M3 × 10 Set Screw
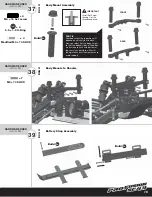
Shock Assembly - Build
Shock Assembly - Build
2
×
Rear &
Rear &
2
×
Front
Front
36
× 4
M4 × 16 Set screw
× 4
6.5 × 1.5 O-Ring
× 4
Modifi ed M3 × 14 SHCS
× 7
M3 × 10 SHCS
PRO TIP
To avoid damage to the X-ring,
apply a small amount of shock
oil on the shaft before carefully
feeding it through the shock body.
PRO TIP
To avoid damaging the shock shaft
when threading the bottom shock eyelet
on, use shock pliers
(not included)
OR
use
a 5mm nut driver
(not included)
to hold the
2.5mm locknut on top of piston.
1.
With shock shaft fully extended,
fi ll shock to within 2mm of top.
2.
Slowly move shaft up and down to
remove air from under the piston.
3.
Wait for bubbles to come to the surface.
4.
Place shock bladder into shock cap.
5.
With shock shaft fully compressed and
held in place, thread cap onto shock
body slowly, letting excess oil escape.
6.
Tighten shock cap completely and wipe
away excess oil.
7.
Install shock collar, spring, and spring
retainer.
60 WT
.
OIL
FOR FRONT
Short spring
FOR REAR
Long spring
Shock Assembly - Build
Shock Assembly - Build
2
×
Front &
Front &
2
×
Rear
Rear
Set Screw
(included)
Summary of Contents for PRO-Fusion SC 4x4
Page 1: ...INSTRUCTION MANUAL INSTRUCTION MANUAL ...
Page 24: ......


