OFT-3 User's Guide Rev A 2/7/14
34
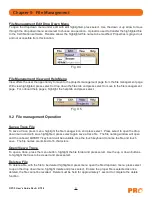
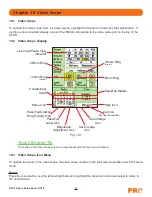
Pass/Fail Grading Overlay
Press the menu button, use the left and right buttons to highlight the pass/fail overlay icon and press select to
toggle on and off the grading rings.
Pass/Fail Label
Press the menu button, use the left and right buttons to highlight the pass/fail label icon to cycle the between
no grade, pass and fail indicators.
Brightness
Press the menu button, use the left and right buttons to highlight the brightness icon, use the up and down
buttons to adjust the brightness level of the display.
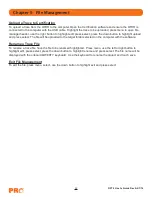
Save Image
Press the menu button, use the left and right buttons to highlight the save icon and press the select button to
store the image to the next available location. The storage location may be changed by using the up and down
buttons and once the desired storage position is displayed, press the select button.
Load Image
Press the menu button, use the left and right buttons to highlight the load icon, use the up and down buttons
to change the number of the image to viewed and press select to load the image. Pressing select again will
increment to the next image storage position.
Cal
This is not a user accessible feature.
Help
Press the menu button, use the left and right buttons to highlight the help icon and press select to view the help
information.
10.4 Video Scope Operation
Viewing a connector
Plug the video probe into the top panel of the OTDR. With the proper tip installed, either insert the connector
into the end of the probe or insert the probe into the patch panel. With the connector pressed firmly into the tip
of the probe use the bottom most knurled knob on the probe to adjust the focus. Once focused, use the LRUD
buttons to center the image on the display (ensure the focus of the LRUD buttons is on the display operation
and not in the menu mode, if necessary, press the menu button to toggle out of menu mode.
Using Grading Rings
Turn on the grading rings by entering the menu mode with the menu button, use the LRUD buttons to highlight
the pass/fail grading rings overlay icon and press the select button. Exit the menu mode and use the LRUD
buttons to center the image in the rings. Use the appropriate table from below to grade the connector end
face. 2, 3, 5 and 10 micron contaminant examples are displayed just below the connect image on the video
scope display.
Chapter 10 Video Scope

