background image

X K 3 1 9 0 - A 9+ 

22

Chapter Four      Maintenance and Cautions 

1.


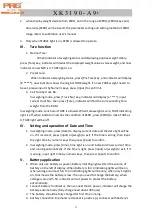
To guarantee the clarity and using life, the indicator shouldn’t be placed directly under 

sunshine and should be placed in the flat place. 

2.


The indicator should avoid dust pollution, vibration and moisture. 

3.


Load cell should connect with indicator reliably, and the system should be connected into 

ground properly. The indicator must be kept away from high electrical and magnetic field, 

high corrosion, flammable and explosive objects. 

▲ 

Do not apply this indicator to the environment with flammable gas or steam, 

and the indicator can not be applied in the system with pressure tank.   

▲ 

In the area where thunder is frequent happen, it must install anti-thunder 

devices to ensure operator’s safety and prevent indicator and other device will 

be damaged by thunder. 

▲ 

Load cell and indicator are static sensitive devices; you must adopt static free 

measure. Strictly forbid welding or other super electric field operation on the 

platform. In the thunder storm season, it must be installed with reliable 

anti-thunder device to prevent any damage to load cell and indicator from 

thunder and ensure operator’s safety and weighing device or other related 

device’s safe operation. 

4.


It is strictly forbidden to clean the case of indicator with intensive solvents (for example: 

benzene and nitro oils) 

5.


Liquid and electrical conducting particles should not be poured into the indicator, otherwise 

the electronic components will be damaged and electric shock is likely to happen. 

6.


You should cut off power supply of indicator and relevant device before you pull-in and out 

the connecting line of indicator and external device. 

▲ 

You must cut off power supply of the indicator, before you plug the 

connecting line of the load cell in and out. 

▲ 

You must cut off power supply of the indicator and the printer, before you 

plug in connecting line of the printer. 

▲ 

You must cut off power supply of the indicator and the scoreboard, before 

you plug connecting line of the scoreboard in and out. 

▲ 

You must cut off power supply of the indicator and the master computer, 

before you pull connecting line of communication in and out. 

▲ 

You must cut off power supply of the indicator and upper monitor, before you 

pull connecting line of control output in and out. 

7.


Company kindly notice: before using our indicator, please check and inspect the 

indicator. Our company only be responsible to the quality of indicator itself, the 

maximum compensation of indicator’s malfunction will not be over 2 times of indicator’s 

own value. We are not responsible for the problem of the system where indicator is 

applied. 

Summary of Contents for XK3190-A9+

Page 1: ...XK3190 A9 Weighing Indicator USER S MANUAL...

Page 2: ...2 I Start and Start with Auto zero 12 II Manual zero semi auto zero 12 III Tare function 12 IV Setting and operation of Date and Time 13 V Battery application 13 VI Inner code display 13 VII Saving fo...

Page 3: ...status indicating lights 3 battery indicating lights Display circulation 100ms Division 1 2 5 10 20 50 100 optional Clock Can display year month day hour minute second auto reap year and moth Number...

Page 4: ...tandard blank paper width 44 5 0 5mm thickness 0 07mm paper roll external diameter less then 50mm Life span for Printing head 0 5 10 6 lines Printing ribbon blue ribbon are installed in the removable...

Page 5: ...er Two Installation I Indicator front and back scheme Graph 2 1 Front View Graph 2 2 Back View II Connection between Load cell and Indicator 1 The 9 pin socket is used for connection with load cell wh...

Page 6: ...and indicator are static sensitive devices you must adopt anti static measures In order to protect the operator indicator and relevant devices you should install lightning rod in the thunderstorm fre...

Page 7: ...t may damage the indicator and printer Please NOTICE THAT Due to the various type of printer exists in the market which has different function and capability please use the printer with the model whic...

Page 8: ...600 Each frame has 11 bytes of data 1 start bit 0 8 data bit lower bit is in the front 1 stop bit 1 3 Every unit of data is send out in every 100ms each unit of data contains 3 frames data its definit...

Page 9: ...ofessional people please don t connect it at your will XK3190 A9 has RS232 RS422 optional RS485 optional serial communication interface can communicate with computer 1 Communication interface adopts 1...

Page 10: ...t and note 1 02 XON start 2 A Z address S N 3 A F Order A handclasp Order B send G W Order C send TARE Order D send N W Order E send truck No Order F send cargo No 4 Output corresponding data accordin...

Page 11: ...end For example if it is 6 plus 30h then it equals 36h that is 6 in ASC II code to send out if it is 9 then plus 37h that will become a letter of ASCII to send out For example it is B plus 37h equals...

Page 12: ...nsmit from low to high each frame divided by Sending data is N W the displaying weight on indicator if current display weight is 70 15 then indicator continuously sending like this 51 07000 51 07000 5...

Page 13: ...on of ZERO press ZERO to make TARE as 0 TARE light will be off IV Setting and operation of Date and Time 1 In weighing mode press date to display current date and the date light will be on If it is co...

Page 14: ...e VII Saving for Data record 1 Indicator regulates that truck No should be 5 digits cargo No is 3 digits The maximum storage is 1000pcs of truck No 201pcs of cargo No 2 Every complete unit of weighing...

Page 15: ...E g 03217 3 Input cargo No Press input hn hn 035 Input cargo No E g 35 4 Press 10 Press input BFL BFL 10 Input percentage of deduction ratio E g 10 End of storage Indicator s data storage can be set...

Page 16: ...ht to this unit of record 6 If truck No is over 1000 indicator will show Err 10 then you can refer to Chapter 7 to clear one truck No or all truck No VIII Printing operation 1 Printing set Table 3 2 S...

Page 17: ...ting weight L must be larger than 10 divisions E g 1 00 7 Press 0 5 Press Input b b 05 Setting paper rolling lines 0 30 E g 05 8 Press 1 Press Input Ode Ode Selecting blank filling print format 0 blan...

Page 18: ...el is 5 these steps will be invalid when you select other models Tel numbers are 7 digits then tH input 3 digits and tl input 4 digits Tel numbers are 3 digits then tl input 3 digits step 12 will be s...

Page 19: ...ter first storage indicator only shows LoAd about 1 5 seconds to hint the operator without any printing because this group of data is incomplete But if you print supply print can still print out this...

Page 20: ...truck No and its memorized TARE weight statistic report X Delete of Data record 1 this indicator allows methods of deleting data as follow Delete all record Include all truck No and memorized tare we...

Page 21: ...ARE key then input truck No and press input 3 when each group of weighing record is store if there is no memorized TARE weight of this truck No then TARE weight of this group of weighing record will b...

Page 22: ...afe operation 4 Itis strictlyforbiddentocleanthecaseofindicatorwithintensivesolvents forexample benzeneandnitrooils 5 Liquidandelectricalconducting particles shouldnotbepouredintotheindicator otherwis...

Page 23: ...rbidden to use built in printer in the environment of dust Please don t use built in printer while battery is charge While printing please don t pull out the paper to prevent damage to printing head P...

Page 24: ...ly 3 Err 02 It means the load cell s wires are wrongly connected or the signal value exceeds the A D converting range 1 If this scale is in working previous working good then can judge that the wire c...

Page 25: ...e 2008 01 01 Time 12 02 31 Time 12 02 31 Time 12 02 31 Truck No 12345 Truck No 12345 Truck No 12345 C No 022 C No 022 C No 022 G W 2 000 kg G W 2 000 kg G W 2 000 kg TARE 0 300 kg TARE 0 300 kg TARE 0...

Page 26: ...l G W 8 000 kg N W 6 800 kg Daily report 2 Date 2008 01 01 S N Truck No Truck weight kg Times Total weight kg Total N W kg 0001 12345 0 300 0002 4 000 3 400 0002 00888 0 300 0002 4 000 3 400 Daily rep...

Page 27: ...E g 11 hn 011 If needs original cargo No press input directly no need to change 8 Press input Prnt Print weighing bill II One time manually print cargo weighing bill directly Step Condition Operation...

Page 28: ...d auto printing weighing bill Step Condition Operation Display note 1 Press print set Auto Select 1 auto printing 2 Press 1 Auto 1 3 Press input type Following no need to amend 4 Press weigh 0 Back to...

Page 29: ...to input new truck No 3 press input P Preset tare weight 4 Input preset tare weight E g 100 P 100 5 press input 000 Back to weighing mode Store various truck s preset TARE weight Set various truck s...

Page 30: ...eeded press input no need of input new cargo No 5 press input Prnt Printing weighing bill VIII Daily repot printing triplicate step operation display Note 1 Press printing P 00 printing selection 2 Pr...

Reviews: