background image

Operating instructions SPEEDY F1 


14


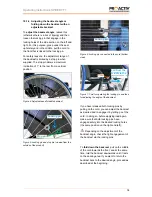
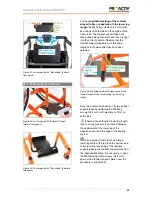
Figure 13: Then re-apply the tensioning loops back 
on the back system 


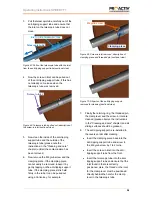
Figure 14: Tensioning loops applied slightly to the 
back system 


Then re-mount the back upholstery using the 
fleece hook-and-loop straps. 


If the belt should have mistakenly been 
threaded out during the adjustment, see the 
following figures for 

threading the belt in 

correctly


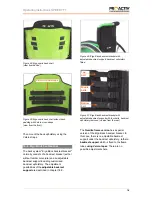
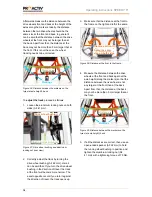
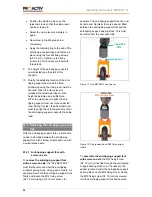
Figure 15: Step 1: Threading in the belt 


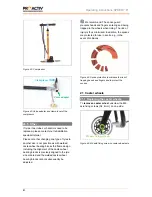
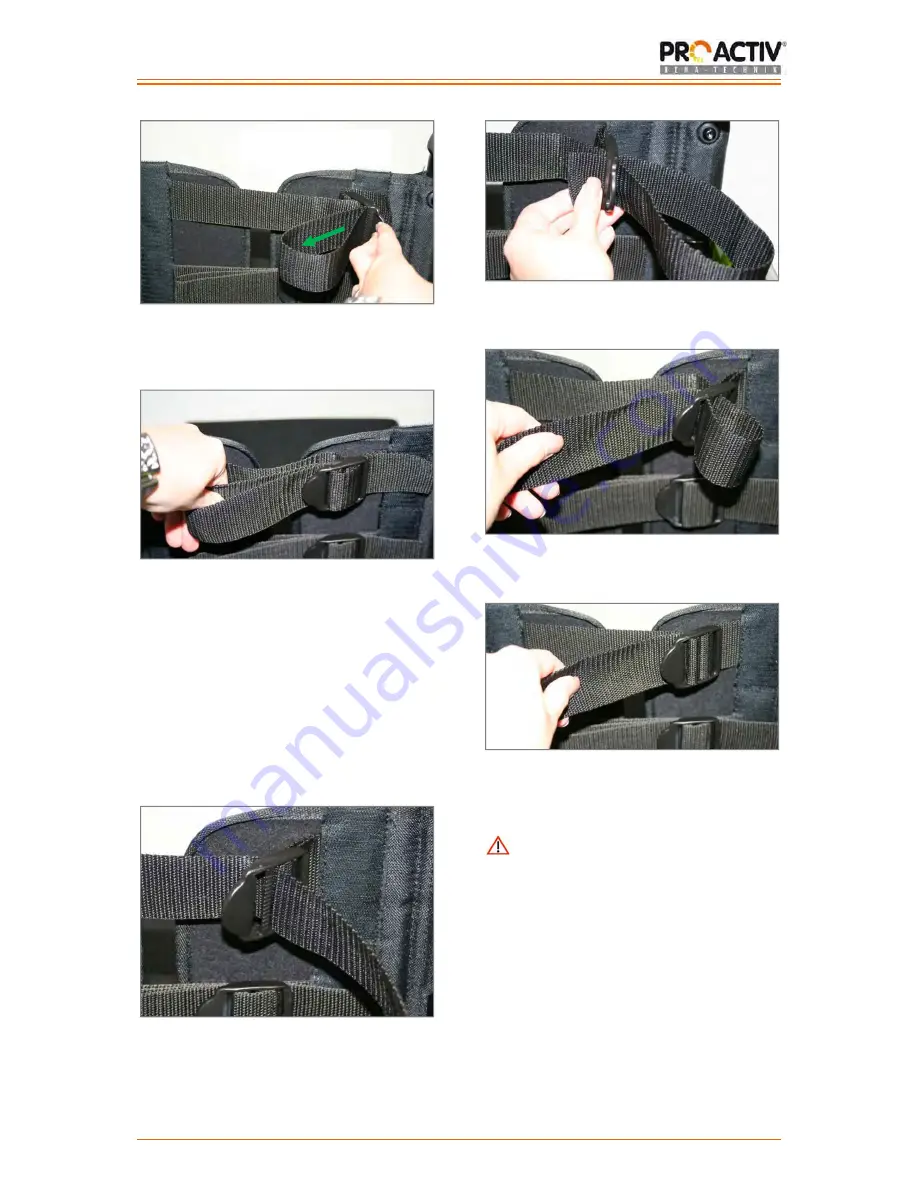
Figure 16: Step 2: Threading in the belt 


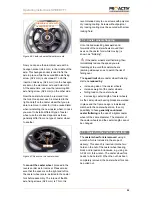
Figure 17: Step 3: Pulling the belt through 


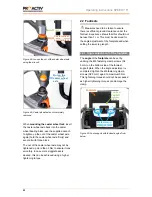
Figure 18: Step 4: Simple threading in of the belt 
through the tensioning loops 


 The belts must always be threaded 

through the tensioning loops twice, otherwise 
the belts will slacken when using the product, 
and with heavy loads, the middle web of the 
tensioning loops will sag strongly. 

Pull the rear loop part 
to the left 

Summary of Contents for SPEEDY 4badminton

Page 1: ...Operating instructions SPEEDY F1 0 MOBILITY MADE SIMPLE Operating instructions Service booklet SPEEDY F1 sports wheelchair SPEEDY 4basket SPEEDY 4tennis SPEEDY 4badminton...

Page 2: ...he product 7 13 Safety instructions prior to driving use 7 14 Safety instructions while driving using 8 15 Safety instructions regarding obstacles 9 16 Safety instructions regarding dangerous location...

Page 3: ...upport 25 23 1 Height adjustment 25 23 2 Replacing the anti tipping support fork 29 23 2 1 Anti tipping support fork with screw on axle 29 23 2 2 Anti tipping support fork with quick release axle 30 2...

Page 4: ...tening torques securing details and tools 36 35 Appendix Medical product passport record of training 37 36 Appendix Hand over certificate 38 36 1 Required compliance criteria to authorise use 38 36 2...

Page 5: ...ditional information Assembly instructions for the rehabilitation specialist dealer see table of contents 3 CE Declaration of Conformity other information 3 1 Classification SPEEDY F1 fixed frame whee...

Page 6: ...e from doctors therapists and the rehabilitation specialist dealer should be followed Overestimating your own ability or underestimating dangerous situations and actions with the product can result in...

Page 7: ...The service life of the product is 6 years in accordance with the medical products law 9 Rating plate The rating plate is located on the frame of the product The rating plate includes the precise mod...

Page 8: ...ch you wish to use the product Look out for obstacles and learn how to overcome or avoid them 13 Safety instructions prior to driving use When getting into the wheelchair do not tread on the footrests...

Page 9: ...ed sensitivity For this reason the product should not be exposed to such extreme temperatures PRO ACTIV cannot accept any liability or provide any warranty for personal injury and material damage caus...

Page 10: ...etely shifted sideways you lift yourself out of the seat or slide out of the seat forwards Your buttocks should always be in contact with the backrest Never stretch out both hands at the same time you...

Page 11: ...the wet There is an increased risk of slipping Adjust your driving braking and steering behaviour accordingly 17 Safety instructions after driving use When getting out of the wheelchair do not tread o...

Page 12: ...d secure these with thread lock fluid Figure 3 Adjusting the backrest position using holes in the side panel 18 1 2 Adjustment possibilities with an adjustable backrest If equipped with an adjustable...

Page 13: ...ide of the product Figure 6 Locking pin connected to the cord bottom view Figure 7 Cord for operating the locking pin and thus for adjusting the angle of the backrest If you have released both locking...

Page 14: ...e slack in the belt system the tensioning loops of the respective belt are held on their strap and pressed strongly to the right until the belt slackens Figure 9 Push the tensioning loop onto its stra...

Page 15: ...ustment see the following figures for threading the belt in correctly Figure 15 Step 1 Threading in the belt Figure 16 Step 2 Threading in the belt Figure 17 Step 3 Pulling the belt through Figure 18...

Page 16: ...back shell its setting options The back system Ergonomic back shell comprises an aluminium shell Velcro cross straps and a back padding There is already a slack integrated in the back shell due to th...

Page 17: ...adjustment possibilities of the adjustable backrest support are described in chapter 18 2 Figure 26 Ergo Back backrest bracket with adjustable backrest support backrest upholstery fitted Figure 27 Erg...

Page 18: ...padding back shell as it significantly increases the risk of an adjustment falling down or defects The seat system generally either comprises a spring suspended Body Contour seat upholstery or an ope...

Page 19: ...serted in the drive wheel bearings When doing this special attention should be paid to ensure that the locking knob springs out again after attaching the wheel as otherwise the wheels are not properly...

Page 20: ...d that If you turn the drive wheel bushing in the direction of travel the track at the front will become more narrow The exact opposite occurs if you turn it against the direction of travel the track...

Page 21: ...ith the temperature If the pressure is too high the tyre may burst For this reason product tyres may not be exposed to unusually high temperatures such as under glass in the summer When inflating the...

Page 22: ...tyre size ordered and the welded caster wheel bearing blocks cannot subsequently be adjusted We recommend The spoke guard prevents hands and fingers entering and being trapped in the wheels when ridin...

Page 23: ...without polymer dry locking coating must be secured with screw locking fluid 21 2 Caster wheels flapping Uncontrolled swivelling backwards and forwards of the caster wheels around their axes on the c...

Page 24: ...Measures need to be taken to ensure there is sufficient ground clearance under the footrest Experience shows that this should not be less than 1 cm This must be observed for the angle adjustment of th...

Page 25: ...fixing screw with washer and slot in footrest support tube for adjusting the lower leg length Once the position has been set fix the footrest support tubes by tightening the M6 fixing screws AF 4 mm...

Page 26: ...ding spacers with different heights If you need spacers to make adjustments please contact your rehabilitation specialist dealer or PRO ACTIV Figure 57 Anti tipping support forks with screw on axles F...

Page 27: ...ngth adjustable Tennis opening and closing the clamp lever Figure 60 Central anti tipping support with oversized tube length adjustable Tennis telescopic tube and anti tipping support tube Figure 61 C...

Page 28: ...amp lever and M6 grub screw sectional view In this case the anti tipping support must be cleaned To do this proceed as follows 1 Remove the retaining ring on the end of the anti tipping support tube b...

Page 29: ...ece still is held firmly in the tube it can be pulled out using an Allen key for example Figure 69 Screw in inlet removed description of clamping piece and threaded pin sectional view Figure 70 All pa...

Page 30: ...With the anti tipping support forks a distinction needs to be made between the anti tipping support fork with a screw on axle and one with a quick release axle 23 2 1 Anti tipping support fork with s...

Page 31: ...le the anti tipping support fork with quick release axle press the locking knob again and insert the anti tipping support fork from underneath onto the anti tipping support fork axle When doing this p...

Page 32: ...is damaged 25 Storage When being stored the product should be kept in a dry environment and covered up where possible To avoid corrosion and therefore malfunctions or breakages of components the produ...

Page 33: ...roduct with its user needs to be transported over an obstacle and there are suitable facilities such as a ramp or a lift available then these should be used If such facilities are not available then t...

Page 34: ...CTIV Tightening torques and securing details for fastening elements as shown in the table in chapter 34 must be observed 29 2 Service schedules There is some maintenance work or checks which should be...

Page 35: ...nclude the cleaning or disinfection of the product before the disposal In the following text you will find a description of the materials for the disposal and recycling of the product and its packagin...

Page 36: ...general terms and conditions at www proactiv gmbh com Any modifications to the product which have not been expressly approved by PRO ACTIV will invalidate the warranty Such modifications can lead to...

Page 37: ...e are no securing clamps on the screw connections present or there is a lubrication requirement with grease or copper paste In the following table you will find tools and care products for your PRO AC...

Page 38: ...lso advised about situations where the assistance of another person is required The operating instructions were handed to me us Instructor Name date signature 1 Person being trained Name date signatur...

Page 39: ...tended use as described in the operating instructions see the intended use chapter The product s equipment is suitable to allow the customer safe use with maximum reduction of risks The customer s dri...

Page 40: ...nstrated and then tested by the user themselves and or their assistant Test drive Forward and reverse travel incl slalom driving around some obstacles Information for care cleaning and maintenance of...

Page 41: ...wheel tracking and drive wheel bearing are firmly seated tightening torque 70 Nm Checking and replacing if necessary the plastic protective hose on the ram bar Functional and safety check of the anti...

Page 42: ...Functional safety check of anti tipping supports Functional safety check of the seat and back system Functional safety check of drive wheels Check wheel tracking and drive wheel bearing are firmly sea...

Page 43: ...Functional safety check of anti tipping supports Functional safety check of the seat and back system Functional safety check of drive wheels Check wheel tracking and drive wheel bearing are firmly sea...

Page 44: ...Functional safety check of anti tipping supports Functional safety check of the seat and back system Functional safety check of drive wheels Check wheel tracking and drive wheel bearing are firmly sea...

Page 45: ...Functional safety check of anti tipping supports Functional safety check of the seat and back system Functional safety check of drive wheels Check wheel tracking and drive wheel bearing are firmly sea...

Page 46: ...Functional safety check of anti tipping supports Functional safety check of the seat and back system Functional safety check of drive wheels Check wheel tracking and drive wheel bearing are firmly sea...

Page 47: ...Functional safety check of anti tipping supports Functional safety check of the seat and back system Functional safety check of drive wheels Check wheel tracking and drive wheel bearing are firmly sea...

Page 48: ...Functional safety check of anti tipping supports Functional safety check of the seat and back system Functional safety check of drive wheels Check wheel tracking and drive wheel bearing are firmly sea...

Page 49: ...Functional safety check of anti tipping supports Functional safety check of the seat and back system Functional safety check of drive wheels Check wheel tracking and drive wheel bearing are firmly sea...

Page 50: ...Functional safety check of anti tipping supports Functional safety check of the seat and back system Functional safety check of drive wheels Check wheel tracking and drive wheel bearing are firmly sea...

Page 51: ...Functional safety check of anti tipping supports Functional safety check of the seat and back system Functional safety check of drive wheels Check wheel tracking and drive wheel bearing are firmly sea...

Page 52: ...657 11 2015 PRO ACTIV Reha Technik GmbH All rights reserved in accordance with Directive 93 42 EEC for medical products PRO ACTIV Reha Technik GmbH Im Hofst tt 11 D 72359 Dotternhausen Germany Phone 4...

Reviews: