Usage instructions SPEEDY F4 and F2
25
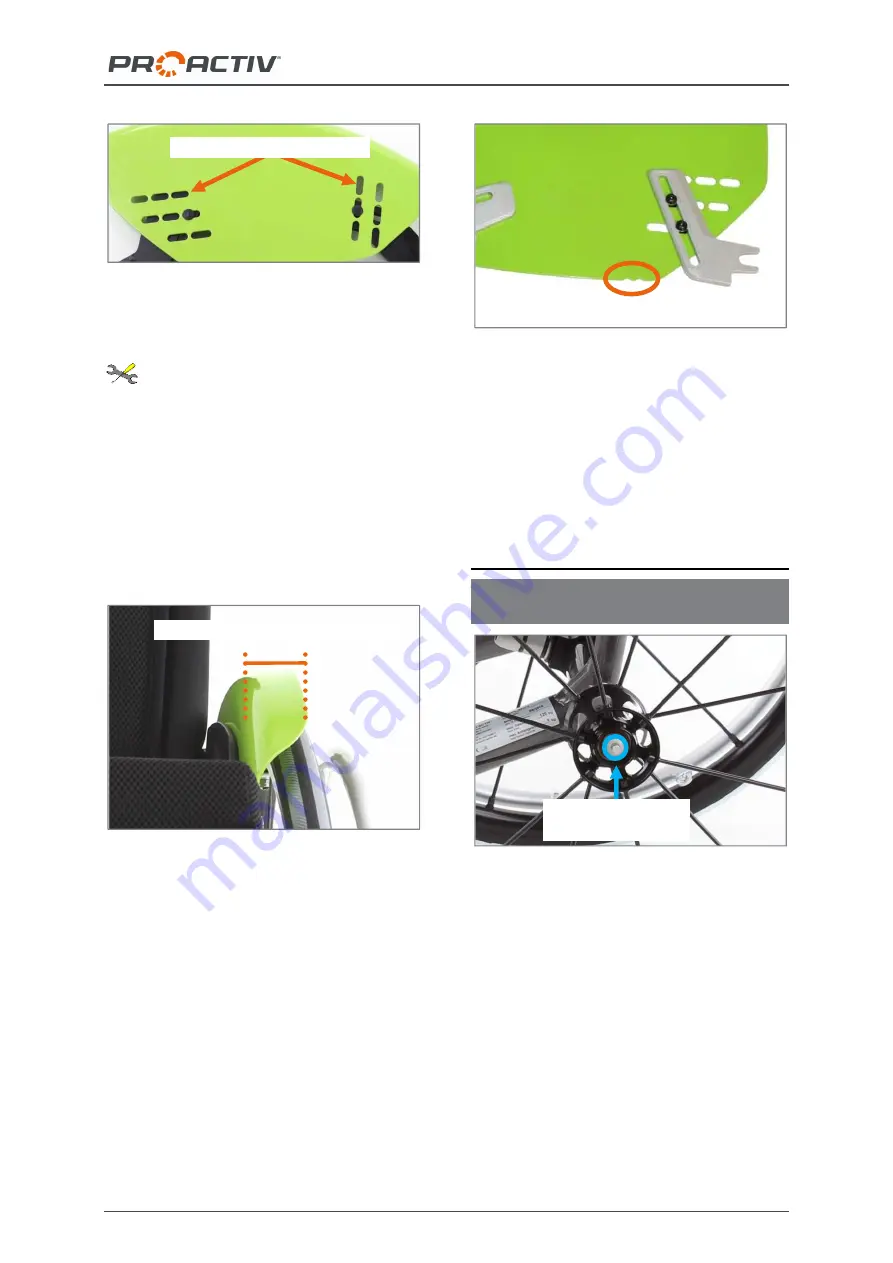
Figure 51: Slots of the clothing guard
20.3.4 Clothing guard size
The following instructions are intended for
and may only be carried out by a rehabilitation
specialist dealer or PRO ACTIV
The clothing guard (aluminium and carbon) is
available in three different sizes. The dimen-
sions of the wheel arches differentiate with the
different sizes:
30 mm (size 1), 36 mm (size 2),
46 mm (size 3).
Figure 52: Dimensions of the wheel arches
The size of the clothing guard can be read-off
the notches on the bottom edge of the clothing
guard. One notch means size 1, two notches
mean size 2 and three notches mean size 3.
Figure 53: Size marking on the clothing guard
After changing to a wider tyre size or after
changing the wheel camber, it may be neces-
sary to change to another clothing guard size.
Where required, such a change may be ar-
ranged by your rehabilitation specialist dealer.
21 Drive wheels
21.1 Removing and attaching the drive
wheels
Figure 54: Locking knob of the quick-release axle in
the middle of the wheel axle
To
remove the drive wheels
grip through the
spokes around the wheel hub with your fingers.
The wheels can be unlocked and removed by
pressing and holding the locking knob at the
centre of the wheel axle with your thumb.
To
attach the drive wheels
, press the locking
knobs and insert the drive wheels with quick-
release axle into the drive wheel bushings.
When doing this, special attention should be
paid to ensure that the locking knob springs
out again after attaching the wheel, as other-
Locking knob of the
quick-release axle
Slots of the clothing guard
Size marking for size 2
Dimensions of the wheel arches


