Usage instructions SPEEDY F4 and F2
33
able to remove in order for it to be reused later
when reinstalling the new caster wheel. In case
you want to install a different type of caster
wheel, use the enclosed spacers as these
generally differ from one type of caster wheel
to another.
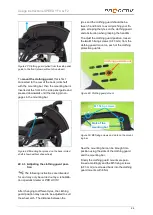
Figure 84: Spacer on the caster wheel
To
mount the caster wheel
, proceed in the
reverse order as for removal. Please make
sure that the spacers on the right and left on
the caster wheel are re-installed in the caster
fork before assembly. The torque of the M6
axle fixing screws (AF 4 mm) is 7 Nm. It is
recommended only to use screws with polymer
dry locking coating. Screws without polymer
dry locking coating must be secured with screw
locking fluid.
22.1.2 Replacing the caster wheels when
mounted using an axle fixing screw
and nut
To
remove the caster wheel
, hold the M6 nut
(AF 10 mm) firmly and loosen the M6 axle
fixing screw (AF 4 mm). Now you can remove
the M6 nut and washer, the M6 axle fixing
screw with washer and the caster wheel.
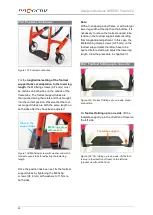
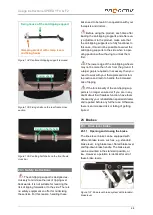
Figure 85: M6 axle fixing screw of caster wheel axle
(view from outer side of product)
Figure 86: M6 caster wheel axle nut (view from inner
side of product)
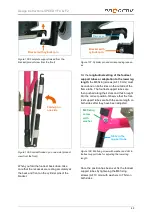
Figure 87: Caster wheel with aluminium axle
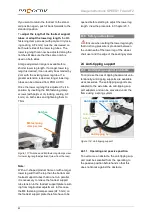
Figure 88: Spacer on the caster wheel
When
mounting the caster wheel
, position
the caster wheel with its spacers in the caster
wheel fork, hold it in position and insert the M6
axle fixing screw with its washer from the out-
side of the product to the inside through the
axle of the caster wheel. Now attach the wash-
er and the M6 nut (AF 10 mm) from the other
side. The tightening torque of the axle fixing
screws (AF 4 mm) is 7 Nm.
Spacer
M6 axle fixing screw with washer
M6 nut with washer
Spacer
Aluminium axle


