6
UNFOLDING YOUR ROLLATOR
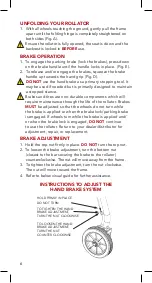
1. With all wheels touching the ground, gently pull the frame
apart until the folding hinge is completely straightened on
both sides (Fig. A).
Ensure the rollator is fully opened, the seat is down and the
backrest is locked in
BEFORE
use.
BRAKE OPERATION
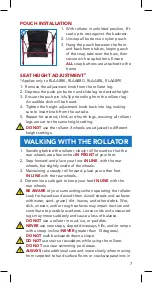
1. To engage the parking brake (lock the brakes), press down
on the brake handle until the handle locks in place. (Fig. E).
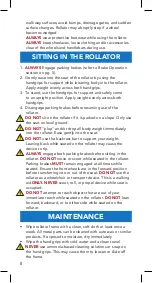
2. To release and/or engage the brakes, squeeze the brake
handle up towards the hand grip (Fig. D).
DO NOT
use the hand brake as a primary stopping tool. It
may be used if needed but is primarily designed to maintain
a stopped stance.
Brakes and tires are non-durable components which will
require maintenance through the life of the rollator. Brakes
MUST
be adjusted so that the wheels do not turn while
the brake is applied or when the brake lock/parking brake
is engaged. If wheels turn while the brake is applied and/
or when the brake lock is engaged,
DO NOT
continue
to use the rollator. Return to your dealer/distributor for
adjustment, repair, or replacement.
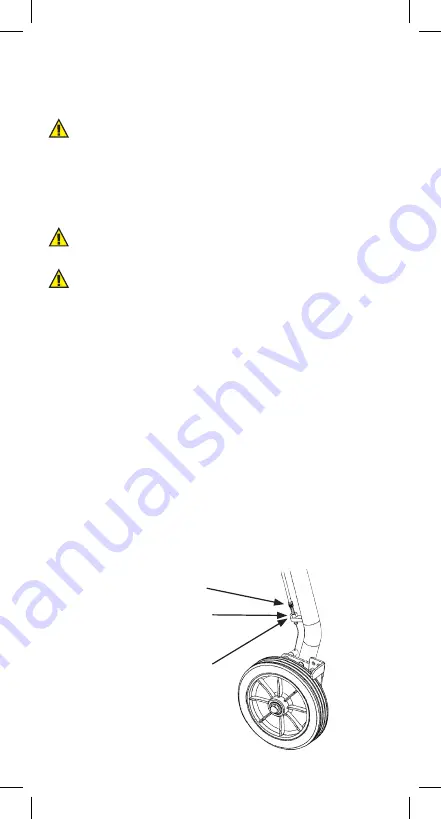
BRAKE ADJUSTMENT
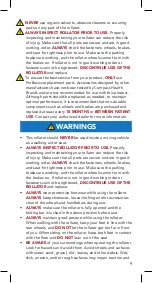
1. Hold the top nut firmly in place.
DO NOT
turn the top nut.
2. To loosen the brake adjustment, turn the bottom nut
(closest to the bar securing the brake to the rollator)
counterclockwise. The nut will move away from the frame.
3. To tighten the brake adjustment, turn the nut clockwise.
The nut will move toward the frame.
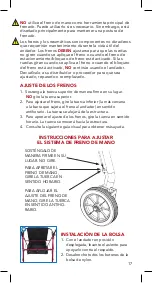
4. Refer to below visual guide for further assistance.
INSTRUCTIONS TO ADJUST THE
HAND BRAKE SYSTEM
HOLD FIRMLY IN PLACE.
DO NOT TURN
TO TIGHTEN THE HAND
BRAKE ADJUSTMENT,
TURN THE NUT CLOCKWISE
TO LOOSEN THE HAND
BRAKE ADJUSTMENT,
TURN THE NUT
COUNTER CLOCKWISE
Summary of Contents for RLA6BG
Page 12: ...Andador Rollator...
Page 25: ...25 NOTES NOTAS REMARQUES...
Page 26: ...D ambulateur...
Page 39: ...39 NOTES NOTAS REMARQUES...


