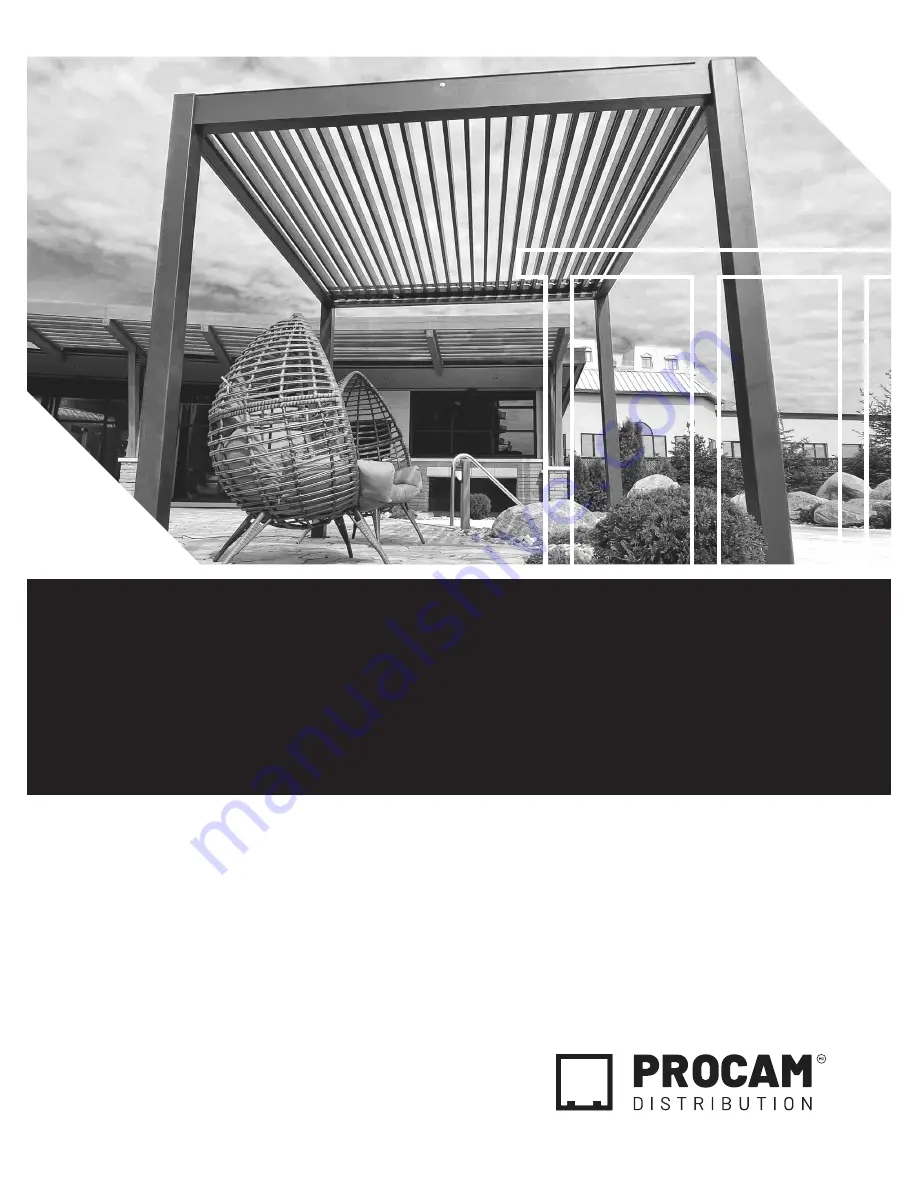
background image

1-844-776-2266

WWW.PROCAMDISTRIBUTION.CA

INFO@PROCAMDISTRIBUTION.CA

User Instructions

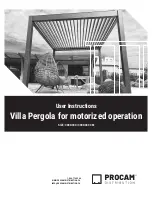
Villa Pergola for motorized operation

SIZE: 300X300 / 300X400 CM

Summary of Contents for Villa Pergola

Page 1: ...1 844 776 2266 WWW PROCAMDISTRIBUTION CA INFO PROCAMDISTRIBUTION CA User Instructions Villa Pergola for motorized operation SIZE 300X300 300X400 CM ...

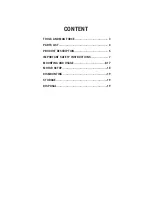
Page 2: ...CONTENT TOOLS AND MAN FORCE 3 PARTS LIST 4 PRODUCT DESCRIPTION 6 IMPORTANT SAFETY INSTRUCTIONS 7 MOUNTING AND USAGE 8 17 MOTOR SETUP 18 DISMOUNTING 19 STORAGE 19 DISPOSAL 19 ...

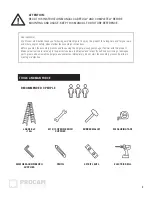
Page 3: ... s instructions Before you start the assembly process and then using the Pergola we suggest you get familiar with this product Make sure all parts are listed up in the part lists below are delivered and intact If you find any missing or damaged parts please do not install the pergola and contact us immediately Do not start the assembly process if parts are missing or defective RECOMMENDED 3 PEOPLE...

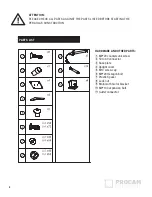
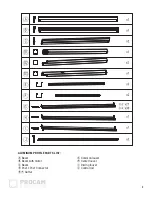
Page 4: ... LISTED BEFORE STARTING THE PERGOLA S CONSTRUCTION HARDWARE AND OTHER PARTS M8 20 countersunk screw 50 to 40 connector Base plate Upright cover M10 screw cap M8 20 Hexagon bolt Plastic Spacer Lock nut Motor with motor bracket M8 100 expansion bolt Gutter connector ...

Page 5: ...5 ALUMINUM PROFILE PARTS LIST Ⓐ Beam Ⓑ Beam with motor Ⓒ Beam Ⓓ Post Post Connector ⒺⒻ Gutter Ⓖ Common louver Ⓗ Center louver Ⓘ Driving louver Ⓙ Control rod ...

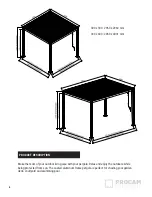
Page 6: ...tdoor living area with your pergola Relax and enjoy the outdoors while being protected from sun The coated aluminum frame pergola is perfect for shading your garden deck courtyard and swimming pool 300 x 300 2960 x 2960 mm 300 x 400 2960 x 4031 mm ...

Page 7: ...HILDREN AND PETS OUT OF THE WORKING AREA DURING ASSEMBLY AND ADJUSTMENTS THIS PRODUCT AND ITS FIXING PARTS ARE ONLY SUITABLE FOR INSTALLATION ON A RAW CEMENT WALL OR STABLE BRICKWORK CONSULT A PROFESSIONAL IF YOUR WALL BRICKWORK SHOWS CRACKS NOBODY IS ALLOWED TO CHANGE THE PRODUCTS DESIGN AND STRUCTURE without the permission of the manufacturer or it authorized deputy Make sure your hands are clea...

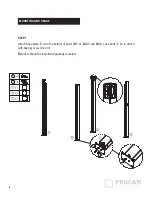
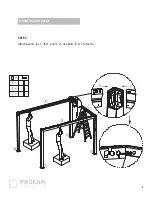
Page 8: ...8 Mounting and Usage STEP 1 Attach base plate x4 to the bottom of posts D1 x1 D2 x2 and D3 x1 use bolts x8 to attach with hex key or electric drill D2 posts should be installed diagonally as below ...

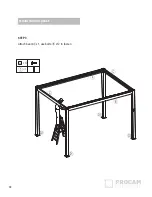
Page 9: ...9 Mounting and Usage STEP 2 Attach beams Ⓐ x1 Ⓑ x1 and Ⓒ x1 use bolts x12 to fasten ...

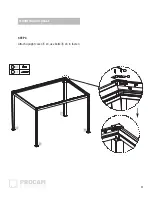
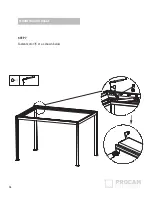
Page 10: ...10 Mounting and Usage STEP 3 Attach beam Ⓒx1 use bolts x12 to fasten ...

Page 11: ...11 Mounting and Usage STEP 4 Attach upright cover x4 use bolts x8 to fasten ...

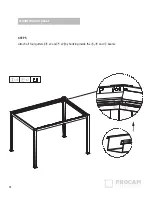
Page 12: ...12 Mounting and Usage STEP 5 Attach all four gutters Ⓔ x2 and Ⓕ x2 by hooking inside the Ⓐ Ⓑ and Ⓒ beams ...

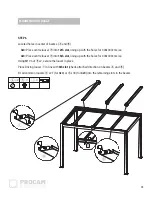
Page 13: ...holes for 300x300cm size 4x3 Place centre louver Ⓗ into 16th slot lining up with the holes for 400x300cm size Using M10 nut x2 secure the louver in place Place Driving louver Ⓘ in line with 6th slot check attached direction on beams Ⓐ and Ⓑ Fit all common louvers Ⓖ x21 for 3x3 or Ⓖ x30 for 4x3 into the remaining slots in the beams ...

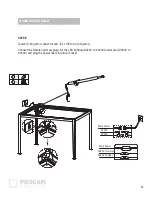
Page 14: ...14 Mounting and Usage STEP 7 Fasten motor x1 as shown below ...

Page 15: ...ter connector and x1 50 to 40 connector Connect the female and male plugs for the LED lighting DC24V to DC24V and motor DC24V to DC24V and plug the power cable into local socket Main Power DC24V DC24V Main Power DC24V for motor DC24V for light ...

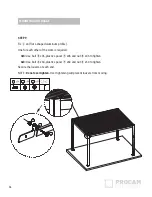
Page 16: ...e One for each other of the slats is required 3x3 Use bolt x46 plastic spacer x46 and nut x46 to tighten 4x3 Use bolt x64 plastic spacer x64 and nut x64 to tighten Secure the louvers at each end NOTE Do not over tighten Over tightening will prevent louvers from moving ...

Page 17: ... each post NOTE the drill size should be 12 mm Insert the bolts Use a hammer drill if necessary Place the posts over the bolts Tighten the nuts Once installed make sure any remaining plastic is removed and silicone is used along all corners and gutters to waterproof ...

Page 18: ...WITH LAMP CONTROL Indicator light Closing button Stop button Opening button Product model ZC31 03 2AD Input voltage AC100V 240V Load power Lamp 500W Motor 48W Recieving transmitting frequency 433 92MHz working temperature 30 C 65 C Receiving sensitivity 110dBm Number of transmitters allowed 8 pcs Operation mode Remote manual control PARAMETERS INSTALLATION NOTES The main power source must be cut o...

Page 19: ...ealed by a professional If you don t want to use the Pergola for a longer time it is recommended to take the Pergola out of the brackets and store it Make sure the frame is dry completely before storing Store the Pergola at a dry safe and unreachable place for children Do not dispose this Pergola with other household wastes To prevent possible harm to the environment or human health from uncontrol...

Page 20: ...1 844 776 2266 WWW PROCAMDISTRIBUTION CA INFO PROCAMDISTRIBUTION CA ...

Reviews: