background image

                 CR2 Manual 29/03/21 


     Page 19 of 29 


CLEANING UPHOLSTERY 

 
CAUTION – WE STRONGLY RECOMMEND ATTENDING AN UPHOLSTERY CLEANING COURSE BEFORE 
ATTEMPTING TO CLEAN FABRIC UPHOLSTERY. 
 
General instructions 

Cleaning upholstery with success requires a good knowledge of the type of fabric to be worked on. Look for the 
cleaning instruction label sewn on the underside of the furniture for the recommended method of cleaning the 
fabric. If it calls for dry cleaning, do not attempt to clean with the wet extraction method. Otherwise, damage to 
the fabric could occur. Extraction works perfectly on most wet-cleanable fabrics including synthetic (acrylic) 
velvets. 
 
Before proceeding, test the fabric for colour-fastness. Apply a small amount of ready-to-use cleaning solution on 
the fabric in an inconspicuous area. Wait for 2 to 3 minutes and blot the area with a white terry cloth towel. If no 
colour comes off onto the towel, the fabric should be safe to clean. If a little colour comes off, there is some risk 
of colours running when you clean. It may be possible to stabilise colours by cleaning with B109 Fibre & Fabric 
Rinse. 
 
Prepare the machine in the same manner as for carpet (see preparing the machine) cleaning except attach the 
upholstery tool to the vacuum hose. Connect the solution hose. Pour warm water into the solution tank. Turn on 
the vacuum and pump switches. 
 
Clean with the upholstery tool using as little solution as possible by decreasing the pump pressure with regulator 
valve. Make overlapping passes to prevent streaking. Go over the area you just cleaned without depressing the 
lever (vacuum only) and gauge the amount of moisture extracted for dryness. On heavily soiled areas like arm 
rests, pre-treat with a recommended pre-spray. 

 
STORAGE AND TRANSPORTATION 

 
The machine can be prepared for storage (indoors only), by ensuring the power cord is coiled and secured using 
the cord storage provided. 
The solution tank and waste tank are empty and clean. 
The drain hose cap is  fitted to the waste tank. 
Transporting the machine to another site in a vehicle can be carried out if the previous conditions are met but the 
machine must be securely stowed. 
If the machine is to be lifted into a vehicle two lifting points are supplied one being the handle recess on the front 
of the machine and the other the handle recess on the back of the machine.


Due to the weight of the machine it may require two people to lift it into any vehicle, or carry it upstairs. 

Caution,

 under no circumstances should the machine be bumped up a flight of stairs using the handle, always 

empty the tanks before storage or transporting the machine. 


USE OF PERSONAL PROTECTIVE EQUIPMENT (PPE) 

 
Operation of this machine requires the use of protective latex gloves. Please be aware that the chemicals may 
require specific PPE to be worn. This can be found on the Material Safety Data Sheet (MSDS) for that particular 
product.

Summary of Contents for RC2700 CR2

Page 1: ...TI SURFACE EXTRACTOR SAFETY OPERATION MAINTENANCE INSTRUCTIONS MODEL RC2700 CR2 MULTI SURFACE EXTRACTOR CAUTION READ THE INSTRUCTION MANUAL BEFORE USING THE APPLIANCE ORIGINAL INSTRUCTIONS MANUAL ALSO...

Page 2: ...rochem co uk Website www prochem uk com All information and specifications in this manual are current at the date of issue However because of Prochem Europe s policy of continual product improvement w...

Page 3: ...T 12 HARD SURFACE ACCESSORIES TOOLS 14 ASSEMBLE ACCESSORY RACKS OPENING MACHINE 15 CHEMICAL FEED SYSTEM DILUTION RATIO CHART 16 OPERATING INSTRUCTIONS RESTROOM CLEANING MODE 17 OPERATING INSTRUCTIONS...

Page 4: ...information regarding the disposal treatment recycling and recovery of this product please contact Prochem Europe Sales Department Telephone 44 0 20 8974 1515 Prochem Europe Ltd EEE Producer Registra...

Page 5: ...f the warranty is approved but DISTRIBUTORS will be responsible for fitting service labour and related charges including travel if applicable and the cost of returning the machine or parts to Prochem...

Page 6: ...tion concerning the use of the machine in a safe way and understand the hazards involved Caution this machine is for indoor use only Caution this machine shall be stored indoors only Warning This mach...

Page 7: ...gularly inspected for signs of damage If the power supply cord is damaged it must be replaced RCD CIRCUIT BREAKER In common with other household and commercial electrical equipment an RCD circuit brea...

Page 8: ...t dry Always switch off and disconnect the machine and or heating unit electrical supply when re filling with solution ALWAYS use a clean bucket to fill the solution tank AFTER USE flush solution syst...

Page 9: ...ID THE WARRANTY WARNING The machine was designed for use on hard surfaces and carpet and upholstery applications using optional accessories as per instructions and recommendations written in this manu...

Page 10: ...tional guide is given in the following sections however the following important points must be emphasised FAILURE TO OBSERVE THESE INSTRUCTIONS MAY SERIOUSLY AFFECT THE PERFORMANCE OF THE MACHINE AND...

Page 11: ...ace of the machine with a clean damp cloth 3 Inspect cord for damage Do not use machine with a damaged cord PERIODIC MAINTENANCE Use only chemicals recommended by Prochem Europe or your distributor Ad...

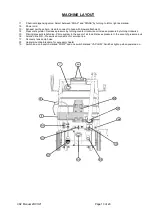
Page 12: ...e racks on one side and three small racks on each side of the machine 5 Wand storage bracket and Velcro strap Allows the operator to secure a wand attachment to the machine for ease of transport 6 Non...

Page 13: ...ator Decrease pressure by turning counter clockwise or increase pressure by turning clockwise 15 Priming pressure relief valve Prime system in the event of air lock Relieves pressure in the event of p...

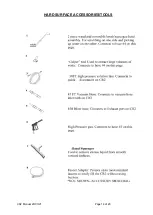
Page 14: ...CR2 Manual 29 03 21 Page 14 of 29 HARD SURFACE ACCESSORIES TOOLS...

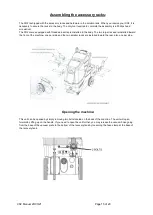
Page 15: ...installed in the body The two larger racks are installed toward the front of the machine one per side and the two smaller racks are installed toward the rear also one per side Opening the machine Thi...

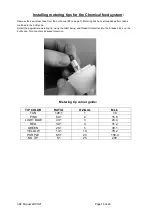
Page 16: ...is matched to the bottle cap Select the appropriate metering tip using the chart below and thread it clockwise into the threaded tube on the bottle cap Turn counter clockwise to remove Metering tip c...

Page 17: ...rding to the chemical manufacturers recommendations You may use the brush on your squeegee brush wand to agitate particularly soiled areas When you are ready to rinse away the chemical simply turn the...

Page 18: ...D OPERATING INSTRUCTIONS CARPET WAND Important Use only Prochem wands and hand tools with the CR2 machine They are designed to deliver and maintain the correct amount of solution and pressure when att...

Page 19: ...switches Clean with the upholstery tool using as little solution as possible by decreasing the pump pressure with regulator valve Make overlapping passes to prevent streaking Go over the area you jus...

Page 20: ...Replace vacuum motor NO PUMP PRESSURE With the pump switch in the on position the pump will not run PROBABLE CAUSES CORRECTIVE ACTION Defective pump switch Replace switch Defective internal by pass o...

Page 21: ...ula containing a high concentration of low foaming detergents builders and anti resoiling agents for effective cleaning of synthetic and natural fibre carpets S775 has an approximate pH of 9 5 and sho...

Page 22: ...CR2 Manual 29 03 21 Page 22 of 29 PARTS DIAGRAM UPPER...

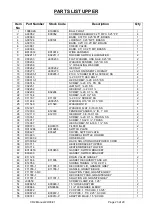
Page 23: ...E11540 WASHER 5 16 2 26 C12021 WASHER FLAT 9 16 ID SS 1 27 C12039 E12039 FENDER WASHER ID 1 OD 4 28 C12110 E12110 HEX BOLT 3 8 16 X1 3 4 2 29 C13361 SCREW 20 X 1 TRUSS SS 2 30 C14017 SCREW 10 32 X TRU...

Page 24: ...CR2 Manual 29 03 21 Page 24 of 29 56 K11185 E11185 90 DEGREE ELBOW SCH40 MPT SF 1 57 K11965 RETURN BEND 1 5 1 58 K13724 DRAIN HOSE ASSEMBLY 1 59 S11179 NON SKID TAPE 1 60 S13706 A STRAP WAND VELCRO 1...

Page 25: ...CR2 Manual 29 03 21 Page 25 of 29 PARTS DIAGRAM BASE...

Page 26: ...WITH ADHESIVE 2 25 B02229 E02229 BRIDGE RECTIFIER 25A 1 26 B11606 STRAIN RELIEF PIGTAIL 1 27 B11821 STRAIN RELIEF 1 28 B11832 STRAIN RELIEF NUT 1 29 B13695 BE4901 POWER CORD 13A 25FT 1 5MM 1 30 C0023...

Page 27: ...500PSI 1 68 G14021 CHEMICAL INJECTOR 1 69 J00618 E00618 2 ID HOSE 2 70 J00632 1 PULSE HOSE 32 1 71 J00635 CLAMP TUBE 0 5 ID 1 72 J00639 2 ID HOSE CLAMP 4 73 J00651 HOSE CLAMP 0 25 TO 0 625 2 74 J1115...

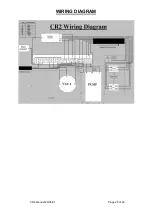
Page 28: ...CR2 Manual 29 03 21 Page 28 of 29 WIRING DIAGRAM...

Page 29: ...the following standards and specifications BS EN 60335 1 BS EN 60335 2 68 EN 55014 1 EN 55014 2 BS EN 61000 3 2 BS EN 61000 3 3 BS EN 50366 And comply with the requirements of as amended 2014 35 EU L...

Reviews: