
Optional Features
(on select models)
Auto Shutoff Reset Button/Light
This light comes on when iron is first plugged in. After
one
hour,
iron will shut off and light will go out. Push Reset Button
to turn iron back on for another hour of ironing.
Power On Light
This light comes on when iron is plugged in and remains on
until iron is unplugged. The light stays on even if Temperature
Control Dial is turned to Off.
Spray/Blast
Turn knob to select Spray or Blast. On Spray, push to release
a fine spray of water for difficult wrinkles in cotton or linen.
On Blast, push for an extra blast of steam.
Steam Settings
NOTE:
The Temperature Control Dial steam setting should
match the Adjustable Steam Dial setting. For example, if
steam ironing wool, the Adjustable Steam Dial should be
set to light steam.
1.
Unplug iron. Pour 8 ounces/250 ml (1 cup) of ordinary tap
water into water tank opening. Do not overfill past MAX
indicators. Plug iron into outlet.
2.
Turn Temperature Control Dial to desired setting in the
steam range. Allow two minutes for the iron to reach
desired temperature.
3.
Turn the Adjustable Steam Dial to desired steam setting.
Water:
Please use ordinary tap water. If you have extremely
hard water, alternate between tap water and distilled water
for use in the iron.
How to Steam Iron
1.
Turn the Adjustable Steam Dial to
O
.
2.
Turn Temperature Control Dial to desired temperature.
Allow two minutes for iron to reach desired temperature.
How to Dry Iron
4
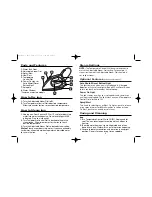
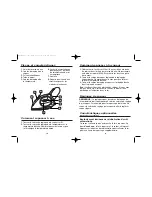
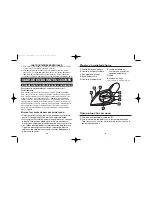
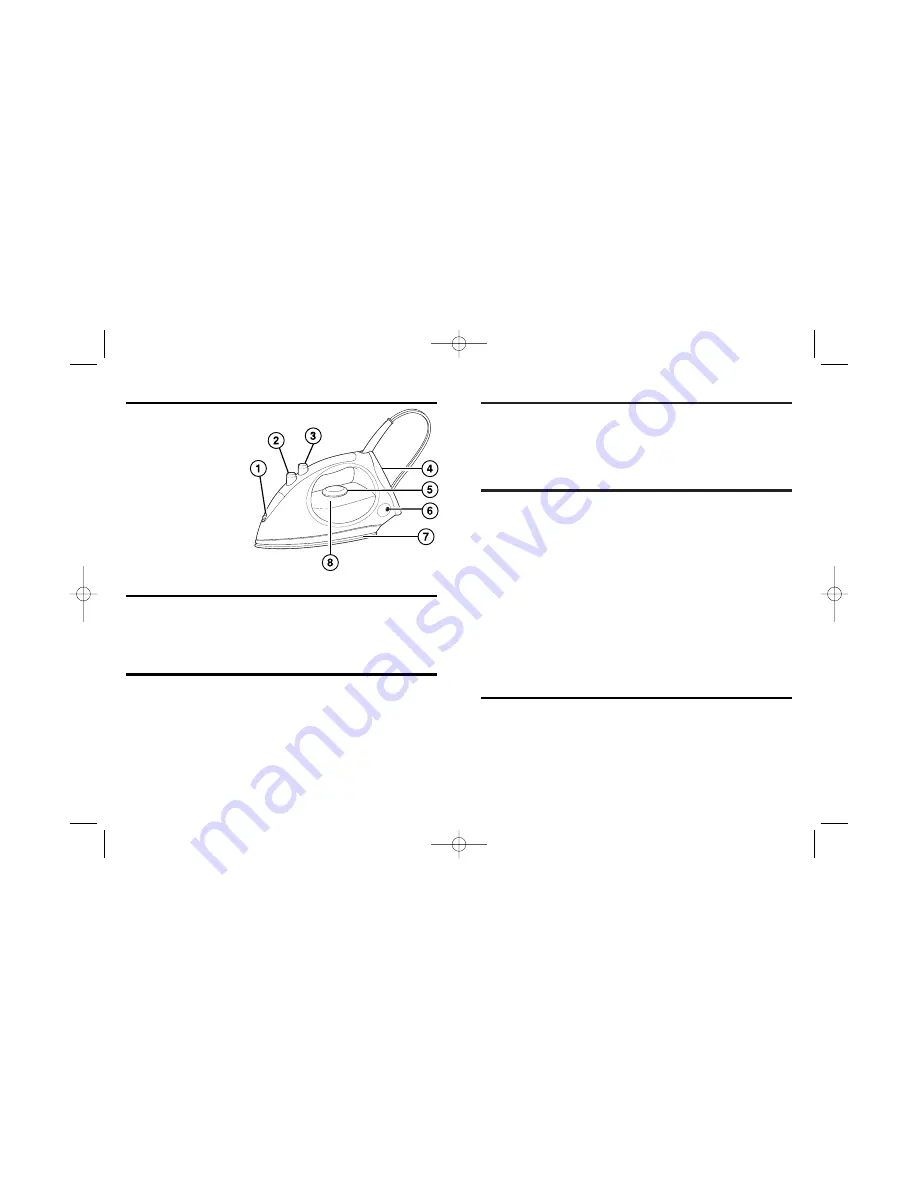
Parts and Features
1.
Water Tank Door
2.
Adjustable Steam Dial
3.
Spray/Blast
4.
Heel Rest
5.
Temperature
Control Dial
6.
Power On Light or
Auto Shutoff Reset
Button/Light*
7.
Soleplate
8.
Water Window
*
feature on selected models
Caring and Cleaning
Iron
1.
Turn Temperature Control Dial to Off (
O
). Unplug and let
cool. The iron takes longer to cool down than it does to
heat up.
2.
To empty water from iron, slowly tilt pointed end of iron
down over a sink. Water will run out of water tank opening.
3.
Wrap cord loosely around iron and store iron in an upright
position. Do not store iron laying flat on soleplate.
5
840127100 Ev03.qxd 6/10/04 1:39 PM Page 4