background image

PC-DR3093_IM 

19.01.21

34

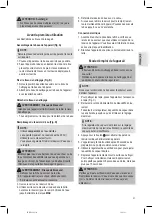
Riempire il serbatoio dell’acqua durante il funziona

-

mento

Non uscirà vapore se il serbatoio dell’acqua è vuoto. La 

pompa proseguirà il suo funzionamento e l’elemento 

riscaldante farà sì che il termostato si accenda e si spenga 

periodicamente.

Riempire come qui di seguito descritto:

1.  Premere l’interruttore  .

2. 

Estrarre la spina di alimentazione dalla presa!

3. 

Riempire con acqua fino al segno massimo.

4.  Collega la spina alla presa di corrente di nuovo e ac-

cendi l’apparecchio per continuare il funzionamento.

Fine operazione

1.  Premere l’interruttore  .

2. 

Estrarre la spina di alimentazione dalla presa!

3. 

Lasciar raffreddare completamente l’unità.

4.  Rimuovere il panno per la pulizia dalla base dell’appa-

recchio.

5. 

Svuotare il serbatoio dell’acqua.

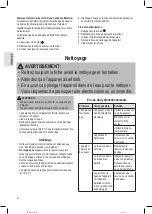
Pulizia

  AVVISO: 

•  Prima di procedere alla pulizia e alla manutenzione estrarre

• 

Attendere che il dispositivo si raffreddi.

• 

In nessun caso immergere l’apparecchio in acqua per la pulizia. 

Ne potrebbe conseguire un corto circuito o incendio.

  ATTENZIONE:

•  Non usare pagliette o altri oggetti abrasivi.

•  Per la pulizia non usare detersivi forti o abrasivi.

•  Prima di essere riposto o pulito l’apparecchio deve 

essere completamente raffreddato.

• 

Svuotare il serbatoio dell’acqua.

•  Pulire il dispositivo e gli accessori con un panno legger-

mente umido.

• 

I panni possono essere lavati a 60 °C in lavatrice. Non 

asciugare i panni nell’asciugatrice.

Conservazione

•  Pulire l’apparecchio come indicato. Lasciare asciugare 

completamente tutti i componenti del dispositivo.

• 

Non

 stoccare l’apparecchio con il serbatoio dell’acqua 

pieno.

•  Si consiglia di conservare l’apparecchio nell’imballaggio 

originale quando non lo si utilizza per periodi prolungati.

•  Rimessare sempre l’apparecchio in un luogo asciutto e 

ben ventilato al di fuori della portata dei bambini.

• 

L’impugnatura può essere ripiegata per risparmiare 

spazio (vedi fig. E).

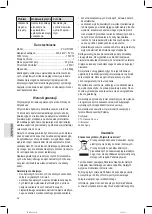
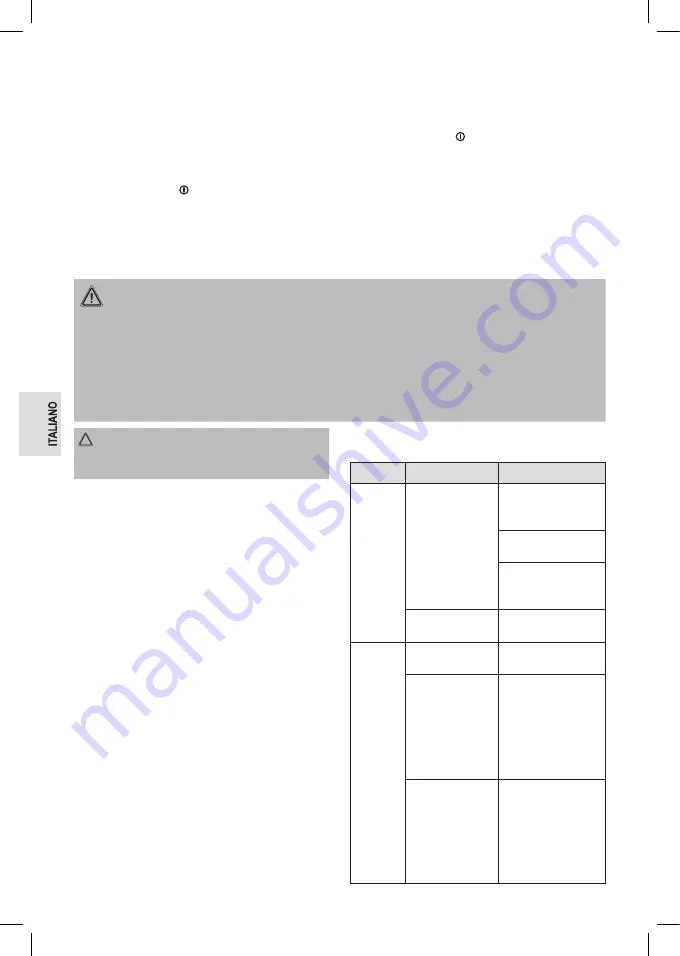
Rimozione guasti

Problema Possibile causa

Rimedio

L’appa-

recchio 

è senza 

funzione.

L’apparecchio non 

viene alimentato.

Controllare la presa 

con un’altro apparec-

chio.
Inserire la spina corret-

tamente.
Controllare l’inter-

ruttore di circuito 

principale.

L’apparecchio è 

difettoso.

Contattare il centro as-

sistenza e un tecnico.

L’apparec-

chio non 

emette 

vapore.

Il serbatoio dell’ac-

qua è vuoto.

Riempire il serbatoio 

dell’acqua con acqua.

Il serbatoio 

dell’acqua non 

è stato inserito 

correttamente.

Inserire il serbatoio 

dell’acqua corret

-

tamente Spingerlo 

nell’alloggiamento, 

verso il basso, fino a 

quando non scatta in 

posizione.

Le guarnizioni della 

base dell’appa-

recchio non sono 

state posizionate 

correttamente o 

sono state danneg-

giate.

Contattare il centro as-

sistenza e un tecnico.

Summary of Contents for 330930

Page 1: ...anual de instrucciones Istruzioni per l uso Instruction Manual Instrukcja obs ugi Gwarancja Haszn lati utas t s PC DR3093_IM 19 01 21 Dampfmop PC DR 3093 Stoomreiniger Nettoyeur vapeur Mopa con vapor...

Page 2: ...ngsanleitung Seite 5 Gebruiksaanwijzing Pagina 12 Mode d emploi Page 18 Manual de instrucciones P gina 24 Istruzioni per l uso Pagina 30 Instruction Manual Page 36 Instrukcja obs ugi Strona 41 Haszn l...

Page 3: ...er Bedienelemente Overzicht van de bedieningselementen Liste des diff rents l ments de commande Indicaci n de los elementos de manejo Elementi di comando Overview of the Components Przegl d element w...

Page 4: ...PC DR3093_IM 19 01 21 4 Abbildungen Afbeeldingen Illustrations Ilustraciones Illustrazioni Illustrations Rysunki br k...

Page 5: ...iebnahme dieses Ger tes die Bedie nungsanleitung sehr sorgf ltig durch und bewahren Sie diese inkl Garantieschein Kassenbon und nach M glichkeit den Karton mit Innenverpackung gut auf Falls Sie das Ge...

Page 6: ...em Ger t spielen Dieses Ger t kann von Personen mit verringerten physischen sensorischen oder mentalen F higkeiten oder Mangel an Erfah rung und Wissen benutzt werden wenn sie beaufsichtigt werden ode...

Page 7: ...dienelemente Lieferumfang 1 Griff 2 Ein Ausschalter 3 Entriegelungstasten 4 Dampfmengenregler 5 Tragegriff 6 Betriebskontrollleuchte 7 Fu 8 Wischtuch mit Klettverschl ssen 9 Teppichgleitsohle 10 Messb...

Page 8: ...n F llen Sie Wasser bis zur MAX Markierung ein 5 Verschlie en Sie den Wassertank wieder mit dem Ver schluss 6 Haben Sie den Wassertank zuvor entnommen setzten Sie diesen wieder in das Ger t Dr cken Si...

Page 9: ...gereinigt wird muss es vollst ndig abgek hlt sein Entleeren Sie den Wassertank Reinigen Sie das Ger t und das Zubeh r mit einem leicht feuchten Tuch Die T cher k nnen Sie in der Waschmaschine bei 60 C...

Page 10: ...zum Beispiel Glas oder Kunststoff Schlie lich sind Garantieanspr che ausgeschlossen wenn nicht von uns autorisierte Stellen Arbeiten an dem Ger t vornehmen 6 Durch Garantieleistungen wird die Garanti...

Page 11: ...Sie die f r die Entsorgung von Elektro ger ten vorgesehenen Sammelstellen und geben dort Ihre Elektroger te ab die Sie nicht mehr benutzen werden Sie helfen damit die potenziellen Auswirkungen durch...

Page 12: ...het garantiebewijs de kassabon en zo mogelijk de doos met de binnenverpakking Geef ook de handleiding mee wanneer u de machine aan derden doorgeeft Gebruik het apparaat uitsluitend priv en uitsluitend...

Page 13: ...met het gebruik van een dergelijk apparaat begrijpen Richt de stoomstraal nooit op personen of dieren De stoomstraal mag niet worden gericht op elektrische apparaten en op apparatuur die elektrische...

Page 14: ...ie met was behandeld zijn kan de was worden verwijderd door de hitte en stoom Gebruik het apparaat niet op niet behandelde houten vloeren Laat het apparaat in geen enkel geval gedu rende een lange per...

Page 15: ...er voor gebruik van het appa raat te stofzuigen 1 Om vloerbekleding te reinigen plaats het apparaat op de zool van het tapijthulpstuk Fig C 2 Wikkel het snoer volledig van de opbergmogelijkheid voor s...

Page 16: ...rende opslag zie Fig E Verhelpen van storingen Probleem Mogelijke oorzaak Maatregel Het apparaat functioneert niet Het apparaat ontvangt geen voeding Controleer het stopcontact met een ander apparaat...

Page 17: ...r de elektrische apparaten af die u niet meer gebruikt Daardoor helpt u de potenti le effecten te voorkomen die een verkeerde afvoer op het milieu en de menselijke gezondheid kunnen hebben Op deze wij...

Page 18: ...marche pour la premi re fois Conservez le mode d emploi ainsi que le bon de garantie votre ticket de caisse et si possible le carton avec l emballage se trouvant l int rieur Si vous remettez l appare...

Page 19: ...doivent pas jouer avec l appareil Cet appareil peut tre utilis par des personnes aux capacit s sensorielles physiques ou mentales r duites ou sans connais sance ni exp rience tant qu elles sont super...

Page 20: ...transport 6 Voyant de fonctionnement 7 Base 8 Tissu de nettoyage avec attaches velcro 9 Accessoire pour moquettes 10 Verre mesureur 11 Rembobineur de cordon 12 Verrou du r servoir d eau 13 R servoir d...

Page 21: ...o te ou retirez le r servoir pour le remplir Versez de l eau jusqu atteindre la marque MAX 5 Refermez le r servoir d eau avec le verrou 6 Si vous avez retir le r servoir pour le remplir remet tez le m...

Page 22: ...ou le nettoyer Videz le r servoir eau Nettoyez l appareil et les accessoires l aide d un tissu l g rement humide Les tissus se lavent 60 C dans la machine laver Ne s chez pas les tissus dans le s che...

Page 23: ...n les derniers r glements de s curit limination Signification du symbole Poubelle Prot gez votre environnement ne jetez pas vos appareils lectriques avec les ordures m nag res Utilisez pour l liminati...

Page 24: ...este aparato lea deteni damente el manual de instrucciones y guarde ste bien in cluido la garant a el recibo de pago y si es posible tambi n el cart n de embalaje con el embalaje interior En caso de d...

Page 25: ...aparato Esta unidad puede ser utilizada por personas con capacidades f sicas sensoriales o mentales reducidas y por personas con falta de experiencia y conocimientos siempre y cuando hayan recibido s...

Page 26: ...ransporte 6 Testigo de funcionamiento 7 Pie 8 Gamuza de limpieza con fijadores velcro 9 Accesorio para alfombras 10 Vaso medidor 11 Enganche para el cable 12 Bloqueo del dep sito de agua 13 Dep sito d...

Page 27: ...posici n Conexi n el ctrica 1 Antes de introducir el enchufe en la toma de corriente compruebe que la tensi n de la red de suministro que se va a utilizar coincide con la del aparato Encontrar la info...

Page 28: ...les pa os en la secadora Almacenamiento Limpie el aparato tal y como se describe Deje secar todo completamente No guarde el aparato con el dep sito de agua lleno Recomendamos que guarde el aparato en...

Page 29: ...ltimas normas de seguridad Eliminaci n Significado del s mbolo Cubo de basura Proteja nuestro medio ambiente aparatos el c tricos no forman parte de la basura dom stica Haga uso de los centros de rec...

Page 30: ...ra unitamente al certificato di garanzia allo scontrino e se possibile alla scatola di cartone con la confezione interna Se passate l apparecchio a terzi consegnate anche le istruzioni per l uso Utili...

Page 31: ...devono giocare con l apparecchio Questo dispositivo pu essere utilizzato da parte di persone con ridotte capacit fisiche sensoriali o mentali o mancanza di cono scenza o esperienza se sono controllat...

Page 32: ...de 8 Panno di pulizia con chiusura in velcro 9 Accessorio per tappeti 10 Recipiente graduato 11 Avvolgicavo 12 Chiusura del serbatoio dell acqua 13 Serbatoio dell acqua 14 Cavo di alimentazione Non ne...

Page 33: ...ello MAX 5 Chiudere nuovamente il serbatoio dell acqua con la sicura 6 Se stato rimosso in precedenza il serbatoio dell acqua reinserirlo nell apparecchio Spingerlo nell alloggiamento verso il basso f...

Page 34: ...dell acqua Pulire il dispositivo e gli accessori con un panno legger mente umido I panni possono essere lavati a 60 C in lavatrice Non asciugare i panni nell asciugatrice Conservazione Pulire l appare...

Page 35: ...icurezza Smaltimento Significato del simbolo Eliminazione Salvaguardare l ambiente gli elettrodomestici non vanno eliminati come rifiuti domestici Per l eliminazione degli elettrodomestici fare uso de...

Page 36: ...luding the warranty the receipt and if possible the box with the internal packing If you give this appliance to other people please also pass on the operating instructions The appliance is designed ex...

Page 37: ...e steam jet at persons or animals The steam jet must not be pointed at electric devices and equip ment containing electric components e g interior of ovens Always disconnect the mains plug after use a...

Page 38: ...sensitive floors Too much heat could cause the glue in the floor to melt or become dis coloured Do a test cleaning on a non visible portion first We also recommend that you check the manufacturer s ma...

Page 39: ...used then there is not enough steam 4 Press the switch to turn on the appliance The power indicator light will come on 5 The appliance will be ready to operate after approxi mately 30 seconds The pum...

Page 40: ...he water tank with water The water tank has not been inserted properly Insert the water tank properly Push it downwards until it snaps into place The seals on the appliance base have not been po sitio...

Page 41: ...dok adnie przeczyta instrukcj obs ugi Prosz zachowa j wraz z kart gwarancyjn paragonem i w miar mo liwo ci r w nie kartonem z opakowaniem wewn trznym Przekazuj c urz dzenie innej osobie oddaj jej tak...

Page 42: ...ostygni cia Dzieci nie powinny bawi si tym urz dzeniem To urz dzenie mog u ytkowa osoby z ograniczeniami fizycz nymi ruchowymi czy umys owymi z brakiem wiedzy czy do wiadczenia o ile s one pod nadzor...

Page 43: ...pary 5 Uchwyt do przenoszenia 6 Kontrolka dzia ania 7 Stopa 8 ciereczka czyszcz ca z zatrzaskami velcro 9 Nak adka do dywan w 10 Miarka 11 Zwijarka kabla 12 Blokada zbiornika wody 13 Zbiornik na wod 1...

Page 44: ...by jej poziom osi gn oznaczenie MAX 5 Z kolei nale y zakr ci korek zbiornika 6 Je li celem nape nienia zbiornik wyj to nale y go ponownie zamontowa w urz dzeniu Nale y go wcisn w d a zablokuje si w sw...

Page 45: ...Przed odstawieniem lub czyszczeniem urz dzenie musi ca kowicie ostygn Zbiornik wody nale y opr ni Czy ci urz dzenie wy cznie delikatnie nawil on szmatk Szmatki mo na pra w pralce w temperaturze 60 C N...

Page 46: ...ia elektrycz nego zasilanie z nieodpowiedniego gniazda zasilania sznur w po czeniowych sieciowych ar wek baterii akumulator w uszkodze wyrobu powsta ych w wyniku niew a ciwego lub niezgodnego z instru...

Page 47: ...alev llel a p nzt ri nyugt val s lehet leg a csomagol kartonnal ill az abban l v b l sanyaggal egy tt Amennyiben a k sz l ket harmadik szem lynek adja tov bb a haszn lati tmutat t is adja a k sz l khe...

Page 48: ...gos haszn lat ra megtan tot t k ket s meg rtett k a kapcsol d vesz lyeket Ne ir ny tsa a g z ramot szem lyekre vagy llatokra A g z ram nem ir ny that elektromos k sz l kekre s elekt romos r szegys gek...

Page 49: ...rv ny ker mia vinyl lin leum lez rt fapadl k s parketta alapos tiszt t s ra szolg l VIGY ZAT Viasszal kezelt fel leteken a viaszt h s g z seg ts g vel elt vol thatjuk Ne haszn lja lez ratlan fapadl n...

Page 50: ...ben ne m k dtesse a k sz l ket tiszt t kend n lk l MEGJEGYZ S A k sz l k haszn lata el tt javasolt egy porsz v z st 1 A sz nyegek tiszt t s hoz helyezze a k sz l ket a sz nyegsikl talp ra C bra 2 Teke...

Page 51: ...ztart llyal Javasoljuk hogy a k sz l ket az eredeti csomagol s ban t rolja ha hosszabb ideig haszn laton k v lre helyezi Mindig j l szell z sz raz helys gben gyermekekt l t vol t rolja a k sz l ket A...

Page 52: ...lt Selejtez s A kuka piktogram jelent se K m lje k rnyezet nket az elektromos k sz l kek nem a h ztart si szem tbe val k Haszn lja az elektromos k sz l kek rtalmat lan t s ra kijel lt gy jt helyeket...

Page 53: ...PC DR3093_IM 19 01 21 53 3 4 53 53 55 55 55 55 56 56 B 56 56 D 56 56 56 56 57 57 57 57 58 58 58...

Page 54: ...PC DR3093_IM 19 01 21 54 c...

Page 55: ...PC DR3093_IM 19 01 21 55 1 2 3 4 5 1 3 5 1 2 3 4 5 6 7 8 9 10 11 12 13 14 1500 1 5...

Page 56: ...PC DR3093_IM 19 01 21 56 4 1 2 B 1 2 D 450 1 2 5 3 4 MAX 5 6 1 2 1 2 3 4 5 30 6 7 8 15 1 2...

Page 57: ...PC DR3093_IM 19 01 21 57 3 4 1 2 3 4 5 60 C...

Page 58: ...PC DR3093_IM 19 01 21 58 PC DR 3093 220 240 50 60 1500 45 450 2 65 CE...

Page 59: ...PC DR3093_IM 19 01 21 59 PC DR 3093 50 240 220 1500 I 45 450 2 65 CE...

Page 60: ...PC DR3093_IM 19 01 21 60 1 2 3 4 1 2 3 4 5 60 E...

Page 61: ...PC DR3093_IM 19 01 21 61 1500 1 5 4 A 1 2 B 1 2 D 450 1 2 5 3 4 MAX 5 6 1 2 1 C 2 3 4 5 30 6 7 8 15...

Page 62: ...PC DR3093_IM 19 01 21 62 1 2 3 4 5 1 3 5 1 2 3 4 5 6 7 8 9 10 11 12 13 14...

Page 63: ...PC DR3093_IM 19 01 21 63 3 4 63 63 62 62 61 61 61 61 A 61 B 61 61 D 61 61 60 60 60 60 60 59 59 59...

Page 64: ...PC DR3093_IM 19 01 21...

Page 65: ...PC DR3093_IM 19 01 21...

Page 66: ...PC DR3093_IM 19 01 21 Stand 01 2021 Internet www proficare germany de Made in P R C PC DR 3093...

Reviews: