background image

PC-HSM-R3013_IM 

11.01.18

33

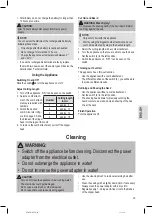
•  After initial use, do not charge the battery for longer than 

10 hours at one time.

 CAUTION: 

After 10 hours always disconnect from mains power 

supply.

 NOTE:

You can extent the lifetime of the rechargeable battery by 

following these steps:
•  Only charge after the battery is nearly exhausted.

•  Do not charge for more than 10 hours.

•  Charge the appliance at temperatures between 0 ° 

and + 40 °C.

•  In case the rechargeable batteries are faulty, replace 

them with two new ones of the same types. Observe the 

details under “Technical Data”.

Using the Appliance

Switching On and Off

Slide the switch   to turn the appliance on or off. 

Adjust Cutting Length

1.  Turn off the appliance. “ON” can be seen on the switch.

Number Cutting length  

in mm

1

approx. 4

2

approx. 10

3

approx. 14

4

approx. 18

2.  Select a comb attach-

ment. The comb attach-

ments are labelled with 

numbers.

3.  Attach the desired 

comb: Also refer to fig-

ure B on page 3. Slide 

the blades of the clipper 

head into the jags of the comb. 

4.  To remove the comb attachment, pull it off the clipper 

head.

Cut Hair and Beard

 WARNING: Risk of injury!

Do not press the shaving head of the hair / beard trimmer 

too firmly against the skin.

  NOTE: 

•  Only cut dry hair with this appliance.

•  Start by using the biggest comb attachment and cut 

your hair / beard step by step to the desired length.

1.  Select the cutting length with a comb attachment.

2.  Turn the appliance so that you are able to see the back. 

Set the switch (2) to the left position.

3.  Switch the appliance on. “OFF” can be seen on the 

switch. 

Thinning out Your Hair

This appliance has a thin-out function.
•  Use the appliance with a comb attachment.

•  The different positions of the switch (2), you will be able 

to produce different results.

Outlining and Shaving the Neck

•  Use the appliance without a comb attachment.

•  Set the switch (2) to the left position.

•  The shaving head allows for precisely outlining the 

beard contours, as well as a clean shaving of the hair 

line at the neck.

Finish Operation

Turn the appliance off.

Cleaning

  WARNING: 

•  Switch off the appliance before cleaning. Disconnect the power 

adapter from the electrical outlet.

•  Do not submerge the appliance in water!

•  Do not immerse the power adapter in water!

 CAUTION: 

•  Also do not clean the appliance under running water! 

The electronics could get damaged.

•  Do not use a wire brush or other abrasives.

•  Do not use sharp or abrasive cleaning agents.

•  Use the cleaning brush to remove remaining hair after 

use.

•  Clean the casing with a slightly damp cloth, if necessary.

•  Always clean the power adapter with a dry cloth.

•  Regularly apply 1 - 2 drops acid-free oil onto the blades 

of the clipper head.

Summary of Contents for PC-HSM/R 3013

Page 1: ...anual Instrukcja obs ugi Gwarancja Haszn lati utas t s PC HSM R3013_IM 11 01 18 Haar Bartschneidemaschine PC HSM R 3013 Tondeuse baardtrimmer Tondeuse cheveux barbe M quina cortapelo recortador de bar...

Page 2: ...jo P gina 3 Manual de instrucciones P gina 20 Datos t cnicos P gina 24 Eliminaci n P gina 24 ITALIANO Indice Elementi di comando Pagina 3 Istruzioni per l uso Pagina 25 Dati tecnici Pagina 29 Smaltime...

Page 3: ...icht van de bedieningselementen Liste des diff rents l ments de commande Indicaci n de los elementos de manejo Elementi di comando Overview of the Components Przegl d element w obs ugi A kezel elemek...

Page 4: ...Ausgangsstrom spannung und die Polarit t des Netzteils mit den Angaben auf dem ange schlossenen Ger t bereinstimmen Ber hren Sie das angeschlossene Netzteil nicht mit feuchten H nden Zur Reinigung tre...

Page 5: ...as Ger t nicht wenn der Scherkopf besch digt ist Nehmen Sie niemals einenAufsatz w hrend des Betriebes ab Dieses Ger t darf von Kindern ab 8 Jahren sowie von Personen mit eingeschr nkten k rperlichen...

Page 6: ...as Ger t mit nicht wiederaufladbaren Batterien in die Abstell Ladestation stellen darf das Netzteil auf keinen Fall an die Abstell Ladestation angeschlossen werden Einlegen der Batterien Akkus 1 Nehme...

Page 7: ...es Scherkopfes in die Zacken des Kammaufsatzes 4 Um den Kammaufsatz zu entfernen ziehen Sie ihn vom Scherkopf ab Haare schneiden und Bart trimmen WARNUNG Verletzungsgefahr Dr cken Sie den Scherkopf de...

Page 8: ...ie f r elektromagnetische Vertr glichkeit 2014 30 EU kodesign Richtlinie 2009 125 EG RoHS Richtlinie 2011 65 EU Garantie Garantiebedingungen 1 Gegen ber Verbrauchern gew hren wir bei privater Nutzung...

Page 9: ...istungen erbringen k nnen Unser Serviceportal www sli24 de bietet Ihnen weitere Leistungen an Downloadbereich f r Bedienungsanleitungen Downloadbereich f r Firmwareupdates FAQ s die Ihnen Probleml sun...

Page 10: ...eit van de voedingsadapter overeenkomen met de specifi caties aangegeven op het aangesloten apparaat De voedingsadapter niet met natte handen aanraken Het apparaat voor het reinigen indien nodig losko...

Page 11: ...Gebruik het apparaat niet als het trimmerkop beschadigd is Verwijder een opzetstuk nooit tijdens de werking Dit apparaat mag worden gebruikt door kinderen vanaf 8 jaar en door personen met beperkte l...

Page 12: ...plaadbare batterijen in de standaard het laadstation plaatst dan mag de voe dingsadapter in geen geval ermee worden verbonden De batterijen oplaadbare batterijen plaatsen 1 Haal het apparaat en de opl...

Page 13: ...deren Haar en baard trimmen WAARSCHUWING Risico op letsels Druk de scheerkop van de haar baardtrimmer niet te stevig tegen de huid OPMERKING Trim alleen droog haar en droge baard Begin met de grootste...

Page 14: ...n Laadtijd 10 12 uur Het recht om technische en ontwerpaanpassingen te ma ken in de loop van voortdurende productontwikkeling blijft voorbehouden Dit apparaat is gekeurd conform de op dit moment van t...

Page 15: ...e courant de sortie la tension et la polarit de l adaptateur lectrique correspondent aux informa tions sur l appareil branch Ne touchez pas l adaptateur lectrique branch avec des mains humides En cas...

Page 16: ...st endommag e Ne d montez jamais un accessoire lorsque l appareil est en cours de fonctionnement Cet appareil peut tre utilis par les enfants d s l ge de 8 et aux personnes ayant des capacit s physiqu...

Page 17: ...daptateur d alimentation Si vous placez l appareil quip de piles non rechar geables dans le poste support de charge l adaptateur d alimentation ne doit en aucun cas tre connect celui ci Insertion des...

Page 18: ...du peigne 4 Pour enlever l accessoire de peigne retirez le de la t te de tonte Coupe des cheveux de la barbe AVERTISSEMENT Risque de blessures Ne pas appuyer la t te de la tondeuse cheveux barbe trop...

Page 19: ...ccumulateurs 2x1 2V type AA R6 600mAh NiMH Temps de fonctionnement 80 minutes max Temps de charge 10 12 heures Nous nous r servons le droit d apporter des modifications techniques ainsi que des modifi...

Page 20: ...ridad del adaptador de corriente coinciden con la informaci n del aparato conectado No toque un adaptador de corriente conectado con las manos mojadas Cuando sea necesario realizar una limpieza descon...

Page 21: ...a AVISO Riesgo de lesiones No use el aparato si el cabezal recortador est da ad No extraiga nunca un accesorio durante el su uso Este dispositivo puede ser usado por ni os a partir de 8 a os y persona...

Page 22: ...adaptador de alimentaci n Si coloca el aparato equipado con pilas no recarga bles en el soporte estaci n de carga el adaptador de alimentaci n bajo ninguna circunstancia debe estar conectado a l Inse...

Page 23: ...e la cortadora en los dientes del peine 4 Para quitar el accesorio de peine s quelo del cabezal de recortador Cortar el pelo y la barba AVISO Riesgo de lesiones No presione el cabezal de afeitado de l...

Page 24: ...100 240V 50 60Hz 0 2A Salida CC 3 0V 200mA Pilas recargables acumuladores 2x1 2V tipo AA R6 600mAh NiMH Tiempo de funcionamiento 80 minutos m x Tiempo de carga 10 12 horas El derecho de realizar modi...

Page 25: ...o solo all uso in ambienti asciutti Verificare se la corrente in uscita la tensione e la pola rit dell adattatore corrispondano alle informazioni sul dispositivo connesso Non toccare l adattatore con...

Page 26: ...apparecchio se la testina tagliacapelli danneg giata Non togliere un accessorio durante il funzionamento Questo dispositivo pu essere utilizzato da bambini a partire da 8 anni e persone che hanno cap...

Page 27: ...hio con le batterie non ricarica bili nel supporto stazione di ricarica l adattatore non deve essere in nessun caso collegato ad esso Inserimento delle batterie batterie ricaricabili 1 Rimuovere l app...

Page 28: ...macchinetta per capelli barba contro la pelle NOTA Tagliare solo i capelli asciutti con questa unit Iniziare ad usare il pettine pi grande e tagliare peli barba a fasi alla lunghezza desiderata 1 Sel...

Page 29: ...caricamento 10 12 ore Si riserva il diritto di apportare modifiche tecniche e di design nel corso dello sviluppo del prodotto Questo apparecchio stato controllato sulla base di tutte le direttive CE a...

Page 30: ...tput current voltage and the polarity of the power adapter match the information on the con nected appliance Do not touch the connected power adapter with wet hands When cleaning if necessary disconne...

Page 31: ...k of injury Do not use the appliance if the clipper head is damaged Never remove an attachment during operation This appliance may be used by children from the age of 8 and persons with reduced physic...

Page 32: ...batteries into the stand charging station the power adapter shall under no circumstances be connected to it Inserting the Batteries Rechargeable Batteries 1 Take the appliance and the rechargeable bat...

Page 33: ...s appliance Start by using the biggest comb attachment and cut your hair beard step by step to the desired length 1 Select the cutting length with a comb attachment 2 Turn the appliance so that you ar...

Page 34: ...of continuous product development remains reserved This appliance has been tested according to all relevant current CE guidelines such as electromagnetic compatibil ity and low voltage directives and...

Page 35: ...ko w suchych pomieszczeniach Sprawdzi czy nat enie pr du na wyj ciu napi cie oraz bieguny adaptera sieciowego pasuj do informacji na pod czonym urz dzeniu Nie dotyka pod czonego zasilacza sieciowego m...

Page 36: ...ywa urz dzenia z uszkodzon g owic do strzy enia Po w czeniu urz dzenia nie dokonywa wymiany nasadek To urz dzenie mo e by u ywane przez dzieci w wieku od 8 lat oraz przez osoby o ograniczonych zdolno...

Page 37: ...ymi nale y si upewni e pod adnym pozorem nie jest ono pod czone do zasilacz Je li baterie jednorazowe zostan w o one do pod stawy stacji aduj cej zasilacz w adnym przypadku nie mo e zosta do niej pod...

Page 38: ...niem 4 Aby zdj nasadk grzebieniow ci gnij j z g owicy Przycinanie w os w i brody OSTRZE ENIE Ryzyko obra e G owicy maszynki do strzy enia w os w brody nie wolno przyciska zbyt mocno do sk ry WSKAZ WKA...

Page 39: ...zwoju produktu Niniejsze urz dzenie odpowiada wymaganiom normy bezpiecze stwa u ytkowania oraz spe nia wymagania dyrektywy niskonapi ciowej i kompatybilno ci elektroma gnetycznej Og lne warunki gwaran...

Page 40: ...a nasze rodowisko sprz t elektryczny nie nale y do mieci domowych Prosz korzysta z punkt w zbiorczych przewidzianych do zdawania sprz tu elektrycz nego i tam prosz oddawa sprz t elektryczny kt rego ju...

Page 41: ...atra alkalmas Ellen rizze hogy a h l zati adapteren felt ntetett ki men ramer ss g fesz lts g s polarit s megegyezik a csatlakoztatott k sz l ken tal lhat adatokkal Ne rjen nedves k zzel a csatlakozta...

Page 42: ...vesz ly Ne m k dtesse a k sz l ket ha a v g fej megs r lt Soha ne szereljen le felt tet m k d s k zben Ak sz l ket a 8 let v ket bet lt tt gyermekek illetve korl tozott testi rz kszervi vagy szellemi...

Page 43: ...em jrat lthet elemekkel ell tott k sz l ket az llv nyra t lt llom sra helyezi akkor a t pegys get semmilyen k r lm nyek k z tt nem szabad csatla koztatni Az elemek akkumul torok behelyez se 1 Vegye ki...

Page 44: ...s szak ll v g sa FIGYELMEZTET S S r l svesz ly A haj szak llv g v g fej t ne nyomja t l er sen a b rre MEGJEGYZ S A k sz l kkel csak sz raz sz rzetet v gjon Kezdje a nagyobb f s felt t haszn lat val s...

Page 45: ...og t a folyamatos term kfejleszt s miatt fenntartjuk Ezt a k sz l ket az Eur pa Tan cs minden vonatkoz ak tu lis ir nyelve szerint pl elektrom gnesess g elvisel k pess g vagy kisfesz lts g elvisel k p...

Page 46: ...PC HSM R3013_IM 11 01 18 46...

Page 47: ...PC HSM R3013_IM 11 01 18 47 8...

Page 48: ...PC HSM R3013_IM 11 01 18 48 1 2 3 4 5 6 7 4 10 14 18 2x AA R6 1 2 600 NiMH Mignon AA R6 1 5 1 2 3 4...

Page 49: ...PC HSM R3013_IM 11 01 18 49 AA R6 NiMH 600 ON 12 10 10 10 0 40 C 1 ON 1 4 2 10 3 14 4 18 2 3 B 3 4 1 2 2 3 OFF 2 2...

Page 50: ...PC HSM R3013_IM 11 01 18 50 1 2 C D 3 PC HSM R 3013 350 DC 3 0 0 2 AC 100 240 50 60 0 2 DC 3 0 200 2x1 2 AA R6 600 NiMH 80 10 12...

Page 51: ...PC HSM R3013_IM 11 01 18 51 2 1 3 PC HSM R 3013 350 III 0 2 3 0 II 0 2 60 50 240 100 200 3 0 600 1 2 2 80 12 10 CE...

Page 52: ...PC HSM R3013_IM 11 01 18 52 600 AA R6 NiMH ON 12 10 10 10 40 0 1 1 4 1 10 2 14 3 18 4 ON 2 2 3 3 3 B 4 4 1 1 2 2 2 3 3 OFF 2 2...

Page 53: ...PC HSM R3013_IM 11 01 18 53 8 1 2 3 4 5 6 18 14 10 4 7 x2 600 AA R6 NiMH Mignon AA R6 1 1 2 2 3 3 4 4...

Page 54: ...PC HSM R3013_IM 11 01 18 54...

Page 55: ...PC HSM R3013_IM 11 01 18...

Page 56: ...PC HSM R3013_IM 11 01 18...

Page 57: ...PC HSM R3013_IM 11 01 18...

Page 58: ...Stand 12 2017 PC HSM R 3013 Internet www proficare germany de Made in P R C...

Reviews: