background image

14

CONDITIONING GUIDELINES

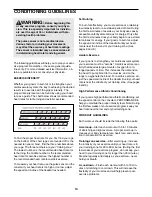
The following guidelines will help you to plan your exer-
cise program. RememberÑthese are general guide-
lines only. For more detailed exercise information, ob-
tain a reputable book or consult your physician. 

EXERCISE INTENSITY

Whether your goal is to burn fat or to strengthen your
cardiovascular system, the key to achieving the desired
results is to exercise with the proper intensity. The
proper intensity level can be found by using your heart
rate as a guide. The chart below shows recommended
heart rates for fat burning and aerobic exercise.

To find the proper heart rate for you, first find your age
on the bottom of the chart (ages are rounded off to the
nearest ten years). Next, find the three numbers above
your age. The three numbers are your Òtraining zone.Ó
The lowest number is the recommended heart rate for
fat burning; the middle number is the recommended
heart rate for aerobic exercise; the highest number is
the recommended heart rate for aerobic exercise.

To measure your heart rate, use the pulse sensor on the
console. If your heart rate is too high or too low, adjust
the speed and incline of the treadmill as needed.

Fat Burning

To burn fat effectively, you must exercise at a relatively
low intensity level for a sustained period of time. During
the first few minutes of exercise, your body uses easily
accessible 

carbohydrate calories

for energy. Only after

the first few minutes does your body begin to use stored

fat calories

for energy. If your goal is to burn fat, adjust

the speed and incline of the treadmill until your heart
rate is near the low end of your training zone. (See
pages 8 and 9.)

Aerobic Exercise

If your goal is to strengthen your cardiovascular system,
your exercise must be Òaerobic.Ó Aerobic exercise is ac-
tivity that requires large amounts of oxygen for pro-
longed periods of time. This increases the demand on
the heart to pump blood to the muscles, and on the
lungs to oxygenate the blood. For aerobic exercise, ad-
just the speed and incline of the treadmill until your heart
rate is near the middle of your training zone. (See pages
8 and 9.)

High Performance Athletic Conditioning

If your goal is high performance athletic conditioning, set
the speed control on the console to PERFORMANCE to
help you maintain the proper intensity level. Note: During
the first few weeks of your exercise program, keep your
heart rate near the low end of your training zone.

WORKOUT GUIDELINES

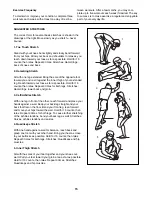
Each workout should include the following three parts:

A warm-up

ÑStart each workout with 5 to 10 minutes

of stretching and light exercise. A proper warm-up in-
creases your body temperature, heart rate, and circula-
tion in preparation for exercise. 

Training zone exercise

ÑAfter warming up, increase

the intensity of your exercise until your heart rate is in
your training zone for 20 to 60 minutes. (During the first
few weeks of your exercise program, do not keep your
heart in your training zone for longer than 20 minutes.)
Breathe regularly and deeply as you exerciseÑnever
hold your breath.

A cool-down

ÑFinish each workout with 5 to 10 min-

utes of stretching to cool down. This will increase the
flexibility of your muscles and will help prevent post-
exercise problems.

WARNING:

Before beginning this

or any exercise program, consult your physi-
cian. This is especially important for individu-
als over the age of 35 or individuals with pre-
existing health problems.

The pulse sensor is not a medical device.
Various factors, including your movement,
may affect the accuracy of heart rate readings.
The sensor is intended only as an exercise aid
in determining heart rate trends in general.

Summary of Contents for 490GS 831.299371

Page 1: ...er in the space above for future reference CAUTION Read all precautions and in structions in this manual before using this equipment Save this manual for future reference SEARS ROEBUCK AND CO HOFFMAN...

Page 2: ...weighing 250 pounds or less 8 Never allow more than one person on the treadmill at a time 9 Wear appropriate exercise clothing when using the treadmill Do not wear loose cloth ing that could become ca...

Page 3: ...make sure that the storage latch is fully closed 20 Inspect and tighten all parts of the treadmill every three months 21 Never drop or insert any object into any opening 22 DANGER Always unplug the po...

Page 4: ...hrough Saturday 7 a m until 7 p m Central Time excluding holidays To help us assist you please note the product model number and serial num ber before calling The model number of the treadmill is 831...

Page 5: ...xtra Pad if one becomes worn or needs to be replaced Handrail Washer 75 2 Handrail Bolt 74 2 Extension Leg Screw 53 2 Screw 3 2 11 1 ASSEMBLY Assembly requires two people Set the treadmill in a cleare...

Page 6: ...3 14 11 5 3 Hold one of the Handrails 1 at an angle as shown and insert the upper end as far as possible into the right Upright 11 Keep the lower end of the Handrail away from the treadmill to avoid s...

Page 7: ...ment grounding conductor and a grounding plug Plug the power cord into a surge suppressor and plug the surge suppressor into an appropriate outlet that is properly installed and grounded in accordance...

Page 8: ...down to the RESET position Note Each time the walking belt is stopped the speed control must be moved to the RESET position before the walking belt can be restarted 2 1 CAUTION Before operating the c...

Page 9: ...ulse if desired To measure your pulse stand on the foot rails and place both thumbs on the pulse sensors as shown The pulse sen sors are pressure acti vated fully press them down Do not press too hard...

Page 10: ...is fully engaged over the catch To protect the floor or carpet from damage place a mat under the treadmill Keep the treadmill out of direct sunlight Do not leave the treadmill in the stor age position...

Page 11: ...ur left thumb press the storage latch and hold it Pivot the treadmill until the frame and foot rail are past the storage latch 2 Hold the treadmill firmly with both hands and lower the treadmill to th...

Page 12: ...reaker located on the treadmill frame near the power cord see 1 c above If the circuit breaker has tripped wait for five minutes and then press the switch back in b Make sure that the power cord is pl...

Page 13: ...g the allen wrench turn the left rear roller adjustment bolt clockwise and the right bolt counterclockwise 1 4 of a turn each Be careful not to over tighten the walking belt Plug in the power cord ins...

Page 14: ...stem your exercise must be aerobic Aerobic exercise is ac tivity that requires large amounts of oxygen for pro longed periods of time This increases the demand on the heart to pump blood to the muscle...

Page 15: ...lat on the floor Bend your front leg lean forward and move your hips toward the wall Hold for 15 counts then relax Repeat 3 times for both legs To cause further stretching of the achilles tendons bend...

Page 16: ...Reed Switch Clip 44 1 Reed Switch 45 1 Magnet 46 1 Console Base Key No Qty Description 47 2 Frame Pivot Spacer 48 4 Platform Screw 49 4 Isolator 50 1 Front Roller Pulley 51 1 Front Roller Adj Bolt 52...

Page 17: ...8 48 39 51 11 23 22 22 58 70 53 36 37 38 40 33 33 33 60 33 33 33 26 73 61 63 64 70 47 53 34 68 67 48 5 62 5 35 84 83 39 83 39 86 40 57 28 62 16 38 38 87 1 13 13 13 13 4 3 3 59 75 55 54 81 80 41 49 73...

Page 18: ...Model No 831 299371 QUESTIONS If you find that you need help assembling or operating the PROFORM 490GS treadmill a part is missing or you need to schedule repair service call our toll free HELPLINE 1...

Reviews: