19
10
HOW TO USE THE ELLIPTICAL CROSSTRAINER
HOW TO ADJUST THE PEDALS AND THE UPRIGHT
The motion of the elliptical crosstrainer is determined
by the positions of the pedals and the upright. Follow
the instructions below to adjust the motion of the ellip-
tical crosstrainer.
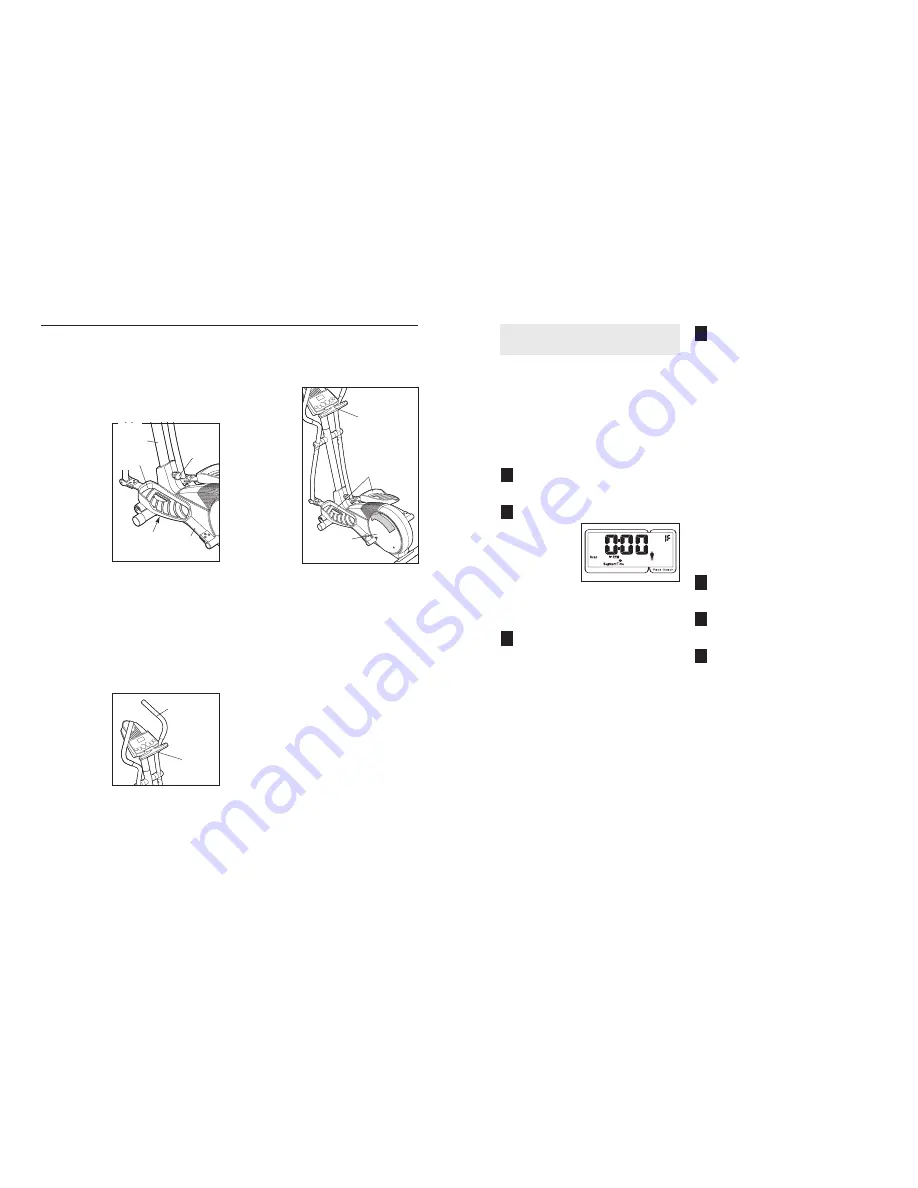
To adjust the
pedals, first
remove the
pedal knob
beneath each
pedal. Slide the
pedals forward
or backward and
reattach each
pedal using one
of the five holes
in the pedal and
one of the three
holes in the
pedal spring.
Make sure that
both pedals are
in the same position.
To adjust the upright, first turn the upright knob counter-
clockwise a few turns to loosen it. Next, pull the knob,
raise or lower the upright to the desired height, and
then release the knob.
Move the upright up and
down slightly until the pin on the knob snaps into
one of the four adjustment holes in the upright.
Make sure that the upright is not resting on top of
the pin.
Then, turn the knob clockwise until it is tight.
HOW TO USE THE HANDLEBARS
The handlebars
are designed to
add upper-body
exercise to your
workouts. As you
exercise, push
and pull the han-
dlebars to work
your arms, shoul-
ders, and back.
To exercise only
your lower body,
hold the handgrip pulse sensor as you exercise.
HOW TO EXERCISE ON THE ELLIPTICAL
CROSSTRAINER
To mount the
elliptical cross-
trainer, hold the
handgrip pulse
sensor and step
onto the pedal
that is in the
lowest position.
Then, step onto
the other pedal.
Push the ped-
als until they
begin to move
with a continu-
ous motion.
Note: The
pedal disks
can turn in
either direc-
tion. It is rec-
ommended
that you move the pedal disks in the direction
shown by the arrow; however, for variety, you may
turn the pedal disks in the opposite direction.
To dismount the elliptical crosstrainer, wait until the
pedals come to a complete stop.
Note: The elliptical
crosstrainer does not have a free wheel; the ped-
als will continue to move until the flywheel stops.
When the pedals are stationary, step off the highest
pedal first. Then, step off the lowest pedal.
Pedals
Pedal Disk
Handgrip
Pulse Sensor
Handlebars
Handgrip
Pulse
Sensor
Pedal
Knob
Upright
Knob
Pedal
Spring
Upright
Pedal
To use iFIT.com CDs or videocassettes, the elliptical
crosstrainer must be connected to your portable CD
player, portable stereo, home stereo, computer with
CD player, or VCR. See HOW TO CONNECT YOUR
CD PLAYER, VCR, OR COMPUTER on page 16.
Note: To purchase iFIT.com CDs and videocas-
settes, visit our Web site at www.iFIT.com.
Follow the steps below to use an iFIT.com CD or
video program.
Turn on the console.
See step 1 on page 13.
Select the iFIT.com mode.
Each time the
console is
turned on, the
manual mode
will be selected.
To select the
iFIT.com mode,
press the
iFIT.com button. The indicator near the button will
light and the letters IF will appear in the upper
right corner of the display.
Insert the iFIT.com CD or videocassette.
If you are using an iFIT.com CD, insert the CD
into your CD player. If you are using an iFIT.com
videocassette, insert the videocassette into your
VCR.
Press the play button on your CD player or
VCR.
A moment after the play button is pressed, your
personal trainer will begin guiding you through
your workout. Simply follow your personal trainer’s
instructions.
The program will function in almost the same way
as a preset program (see step 3 on page 14).
However, an electronic “chirping” sound will alert
you when the resistance setting and/or pace set-
ting is about to change.
Note: If the resistance of the elliptical
crosstrainer and/or the pace setting does not
change when a “chirp” is heard:
• Make sure that the indicator near the iFIT.com
button is lit.
• Adjust the volume of your CD player or VCR.
If the volume is too high or too low, the con-
sole may not detect the program signals.
• Make sure that the audio cable is properly
connected and that it is fully plugged in.
Follow your progress with the feedback modes.
See step 4 on page 13.
Measure your heart rate if desired.
See step 5 on page 13.
When you are finished exercising, the console
will automatically turn off.
See step 6 on page 13.
7
6
5
4
3
2
1
HOW TO USE IFIT.COM CD AND VIDEO
PROGRAMS


